blog backbdrop

Showing posts with label journal. Show all posts

Tuesday, 1 July 2025

Apothecary themed Journal

I have been making an apothecary themed journal using some of these beautiful papers from The Ultimate Apothecary Collection from Opulence by Design Crafts.


This is another huge kit with a great variety of elements for your journaling and scrapbooking and lots of toppers for cards and collaging too.

The Ultimate Apothecary Collection Herbs & Remedies Kit for Cardmakers and Papercrafters is beautiful a digital download kit containing 50 A4 pages in PDF format.
It has a wide selection of toppers, papers, labels, embellishments, etc.

If you like making embellishments for your craft  projects, this kit has plenty for you to fussy cut and create with.


For the base of my journal I used the thick cardboard packaging from a set of pillow cases that I bought.  I cut it down slightly to fit the papers that I had chosen for the covers of my journal and these have been printed out to A5 size on 160 gsm Navigator paper.

I did give my journal base a very light coat of gesso.


I added some cream lace around the edges of my cover and to the spine and fussy cut some flowers and foliage to accompany the topper for the front of the journal from one of the insert sheets.


For the inside of the journal cover, I chose two of the watermark print designs and die cut 
a spine for the centre of the journal using my memory book spine die with some kraft card. 


I've neatened the edges with a thin strip of cream ribbon either side of the spine.


These are a selection of the fabulous papers that will go inside my journal


I thought that I would keep this  journal fairly simple and then just make a few things to go inside.  I've added an embellished cord with some dried rosemary on the end.

Whilst in my garden I picked a few herbs and pressed them to use in my journal as I thought that they would fit the theme quite nicely.


Opposite each journal page to write in there is a decorative one and most have a pocket with a card in them, to decide what it will be used for.


I made this trio of little seed packets to add into my journal which were really easy to make from one of the design papers. 


I just cut two squares out, leaving a small white border around two squares and a larger border at the top to create a flap for your seed packet. 

I then folded the squares in half, glued around the edges and inked. You then get a lovely design on both sides.  The wording was created with a label printer.

I mounted them in my journal using some clear photo corners in my craft stash that I find really handy for these projects.


This is my bookmark page, I  use these for page saves and I made a few bookmark corners  which I find really handy too and they are also very simple to make too.


A handy little embellishment that can be made from your craft kits for reminders or just to embellish.
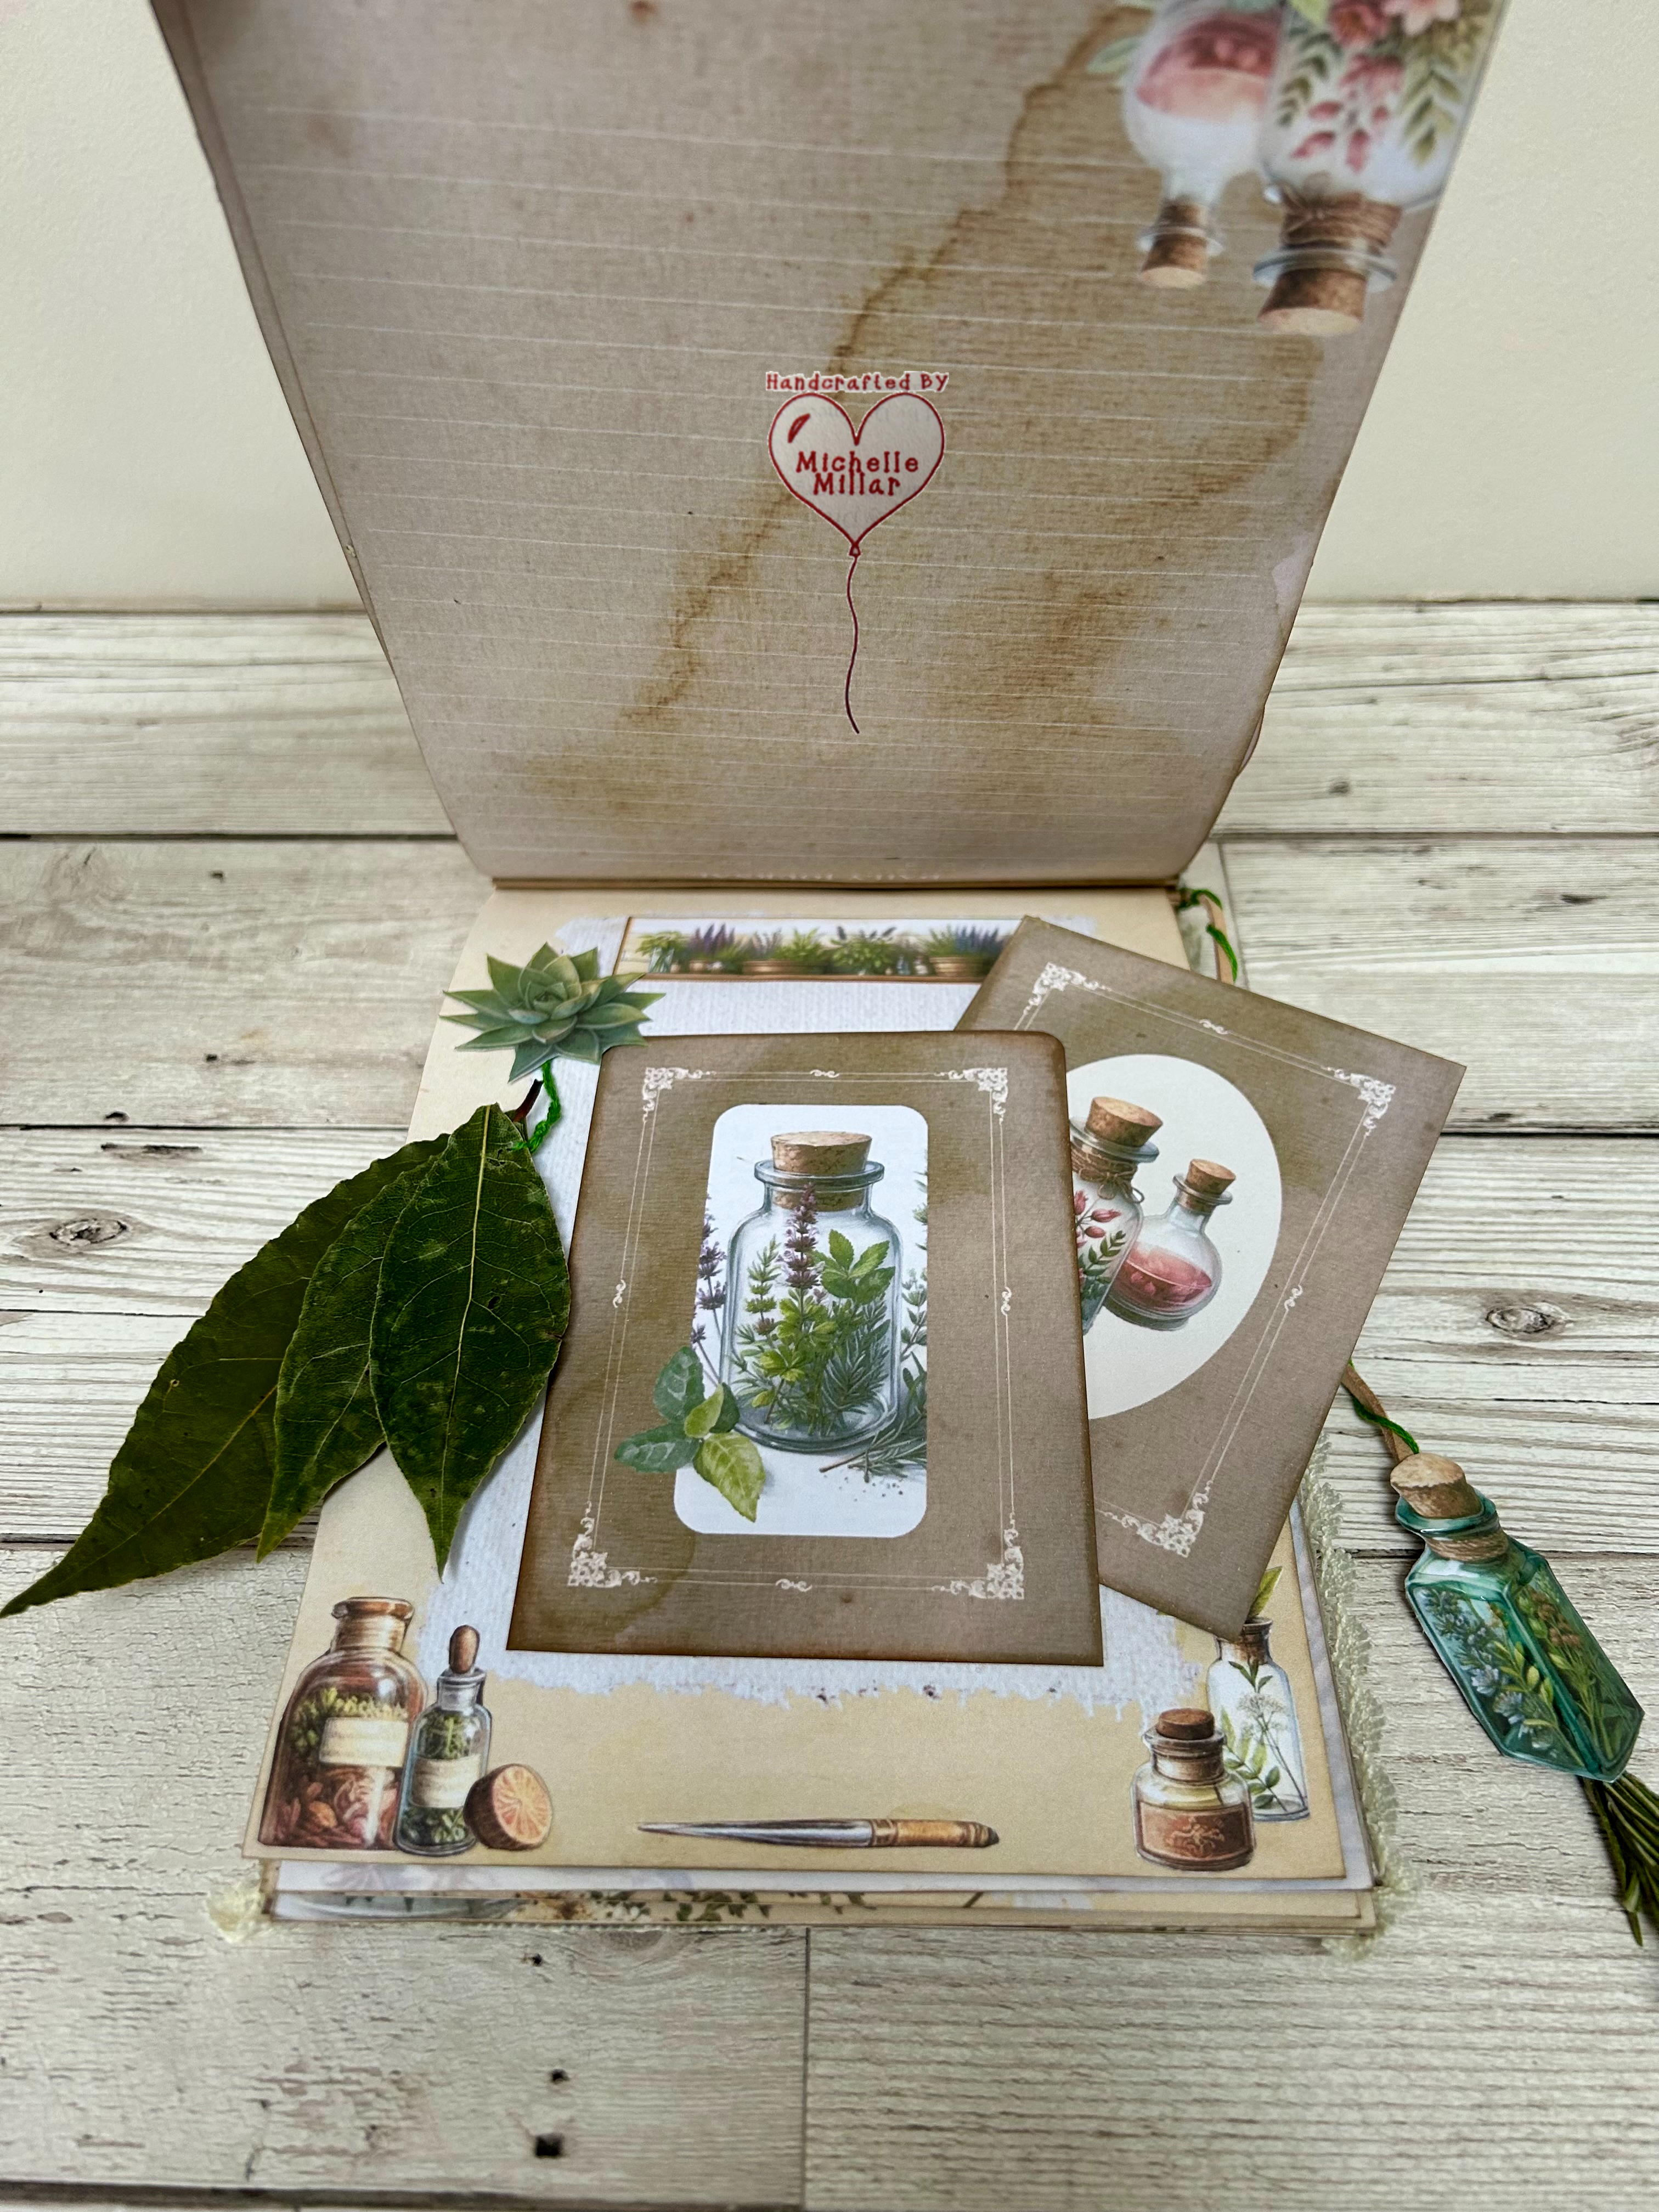

I've added a few pressed bay leaves from my garden


I found a sleep tracker online that I could print off and just add on each month.


My final page. I really like the layered journal page design which is already done  for you to start creating onto.


On the back of toppers I've attached some pressed lemon balm from my garden.


This has been a fun project to put together and  would be great for scrapbooking too. 


Thanks for stopping by today to view my little crafty space and appreciate that there are a lot of pictures on this project.

If you want more inspiration and demos from Opulence by Design, follow the links below. I think Amanda is a very talented designer and creates a wide selection of kits and crafting sheets that can be mixed and matched with your own crafty stash.


My strawberries seems to be flourishing..... not where I planted them but where they self seeded themselves and happily growing up between two paving slabs. Isn't nature amazing sometimes.


Have a great week, whatever you have planned for yourself, its certainly a hot one here.

Happy Crafting


Challenge


Tuesday, 4 March 2025

Dragon Themed Journal

My second post this week, following along the dragon theme is a journal that has been created using The Dragon Within Breathing Courage & Creativity Collage & Mixed Media Mystical Dragons digital download Kit from Opulence by Design Crafts.
It has 40 pages of backing papers (10 x 8 PDF)  - including textured prints, beautiful prints and panels for your projects, toppers and embellishments, mystical affirmations and dragon inspired greetings, quotes and sayings.


I also used the Presscut living hinge multi media from John Next Door to form the base of my journal. John Lockwood has some really handy YouTube videos demonstrating how to put together a journal using these dies and suggestions for inserts too. This is the first time I have used mine and I love the living hinge spine, which I believe can be extended.

I printed out a few of the papers that I intended to use, I do this as I go along. I used the last few sheets of a cream textured paper that I had in my craft stash. It has a suede feel to it so I thought that this would be good to use on the spine with the golden dragon skin paper but reprinted the front page for my journal cover because I preferred the crisper image from the bold 300gsm Navigator white card rather than the suede textured print in the image above.
 
I also printed the wording onto one of the textured papers. some of these I cut around but most of these I just tore out for a more rustic effect.


The two greyboard panels for the my journal measure 6 x 8 inches, with a textured spine and the die cut end pieces on the left will be used as mini pockets for my tags to slide into.

The papers ink up really well to add more dimension to your projects and hide any white edges too.


After putting my journal together with red liner tape, I've added a little more inside for ribbon to tidy up the edges.


I then started to create some tags. I used more of the rice paper loosely over a die cut tag from kraft card  and then created an embellishment for the tag using one of the Celtic symbols, heat embossed it with clear embossing powder and then mounted it on greyboard to create a disc.


For more texture, I used a piece of brown packaging, which has been swiped over with a gold ink pad and I've also added one of the sentiments.
For my second tag I used one of these glorious dragon embellishments and tags, with a sentiment. I have also used one of my go to Sakura stardust sparkle pens in gold to trace along the white outline on the dragon. I leave a white outline when cutting out small detail as it makes fussy cutting easier for me.


These papers are great to cut into for your journaling too. I have printed this sheet out twice and then fussy cut  around the dragons. Any white edges are easily covered with ink and I've always found my dinky inky sparkle inks from the Dreamees have been really handy for this job as they come in a great range of colours and I have had these for years.


I have added a quote to the top of the page  and used my sparkle pens and glossy accents to the dragon eyes.


For this page I've stamped and embossed a dream catcher and added a dragon with a sentiment.


My pages are 6 x 6.5 inches, including the  0.5 inch folded hem to thread my twine through. I've also printed both sides of all my pages using the textured print and for this one I've added a printed dragon vellum background.


For this page I have printed the image four times and decoupaged it, creating a disc for the centre.  The centre dragon disc has been heat embossed with clear embossing powder a few times, to add dimension and then placed back into the centre.  I have also added a custom sentiment.


For my final large page, I've added a pocket to keep the dragon postcards that I made. I've also added glossy accents to their eyes and some shimmer along that scaly neck.  This one also has a custom sentiment.


My smaller pages are about 4 x 4 inches and I've added a little film and fibres to accompany the dragon and sentiment.


Inside I've created another disc which has been heat embossed with clear embossing powder and added a strip of material with pieces of rice paper and another sentiment.


I've created a similar idea on the back too.


For my second small page, I have used one of these beautiful Celtic images and decoupaged it for a bit of dimension. I have also added the leather border from one of the designs and reduced it in size  to fit the project.


Inside my page I've added another custom sentiment and some stamped images which I've cut out and added a little more rice paper in the background.


I've taken part of the image from the alternate colourway print used for the front page of my journal and reduced it to fit on my page, I've also added some mica flakes to the edges of the page and a sentiment.


I used twine to attach my pages, 4 x the length of my longer page (the piece in front for some reason was cut too short).


Once all the pages had been threaded, I tied all the threads together over the spine.


I can always easily add to my journal this way too.


I added a few wooden orient beads from my stash to create a tassel and also some glossy accent to the faux studs on the cover, along with a few metal gemstones too.


I have made a collage of pictures to show how my pages look once all threaded into the journal.


The last page is printed on vellum.


My journal also fits into the dragon box that I made.

Thanks for taking the time to view my post, I appreciate that there's quite a bit to scroll through on this project.  This has been a fun make .


If you want more inspiration and demos from Opulence by Design, follow the links below. Amanda is a very talented designer and has a wide selection of kits and crafting sheets that can be mixed and matched with your own crafty stash.

Have a great day, whatever you have planned for yourself.

Happy Crafting


Challenges:


Decorated Mdf Storage Box

One of the things I really enjoy doing is decorating boxes, especially as they are really handy for keeping all your crafting accessories in...