blog backbdrop

Saturday 24 August 2019

Dreamees - Recipe of Happiness Plaque

Today I thought that I would share a plaque I made as a craft swap with the Dreamees Catchers craft group.


I used the following mix of stamps and dies by The Dreamees:-

  • Stitched alphabet stamps
  • Recipe stamps
  • Something Stitchy stamp set
  • Divine Doily die
  • Pretty Leaves & Flourishes dies
  • Peculiar Leaves & Flourishes dies
  • Square lacy die set


 I also used a selection of backing papers from The Dreamees Pretty Pets & Sensational Flowers CDs. I chose tones of rich peach, a colour, to be honest, I don't use a lot or have seen much on cards recently. It makes a refreshing change to pinks and purples.

I also used:-

  • MDF shaped plaque
  • Burlap lacy ribbon
  • Pearl strings
  • Wired twine
  • bakers twine / white organza ribbon
  • Tim Holtz distress ink in gathered twigs


I covered the mdf plaque with the wood effect backing paper and used my Crafters Companion sanding block to achieve the smooth finish to my shaped plaque.  To soften the edges, I also used Tim Holtz distress Ink in gathered twigs.


I love these stitchy flowers and as you know, Dreamees stamps are a firm favourite of mine, especially their flower stamps which have an undeniable charm about them.  I layered them up a few times to add dimension.


Also adding a little glossy accent to the centre of the stamps to highlight the button detail.


The leaf  flourishes were die cut from craft card and the delicate flourishes (including the butterflies) from peach satin card.  I edged everything with the distress ink.  You can just about see the square lacy die peeking through from under the flowers as I used it as one of the layers under the backing papers.


The recipe stamps are great for projects like this.


I thought the stitchy alphabet stamps would tie in nicely with the stitched flowers and stitched rectangle dies.


I was really happy with how this project turned out, but then I do tend to wax lyrical when it comes to using Dreamees.

Happy Crafting

Monday 12 August 2019

Tattered Lace Designer Vintage DT sample collection

Following the launch of Tattered Lace Vintage Designer collection, I am sharing my DT samples made from some of the dies for the launch on Create and Craft TV .

I used the following dies for my samples: Triangle Wrap Card die set, Foundation Doilies die set, Decoupage Fantasy Flowers die set, Layers of Lace die set, String Doilies die set, Stencil Flourishes die set and the Flexi Frames die set.


For my Anniversary card, I used the Decoupage Fantasy Flowers with the Stencil Flourishes on snow white centura pearl cardstock. A lot of the dies from Tattered lace do come with free charisma downloads but you don't have to use them, they are an optional extra.


I have die cut these flowers using gold mirri card and just used the outline/skeleton part of the flower die. Decoupaged a few for dimension and think they look quite delicate this way. For the front panel on my card I have used one of the dies from the Tattered Lace Harlequin set.


With this card I have used the charisma papers but again, just used the outline/skeleton part of the die, along with the Flexi Frames and the Layers of Lace for my lacy edged card shape.


Such a pretty lacy die with so much detail and it also comes with the outline die for the card edge without the lace.


I use colour core card by Create & Craft which has low chalk content and eliminates that white edge that you can get when you die cut. My base card is a white textured 240gsm colour core cardstock.


The Layers of Lace dies can also be used to create lacy panels as I have done here on my gatefold card, using a combination of cream and blue mint colour core cardstock. I have used the thinner Layers of Lace dies on the card edge with some of the Flexi Frames inside.


One of my favourite colour combinations.


With the Triangle Wrap Card die set, the panels can all be used together to build up your layers of you can use the smaller ones for a smaller card which I have done here. Not everyone wants to make larger card. Here, I have made a tent card with a sentiment tag.


I decided to go with reds and creams this time because I wanted to use this lovely rose embossed card stock by Santoro Gorjus. I have used the two smaller Triangle Wrap Cards dies which perfectly around my cardstock.


 I have made the tag using the Doilies  Foundation die along with a sentiment stamp by Visible Image.


Staying with the same Triangle Wrap Card die set I have made an A5 card using all the layers of the die set but onto white centura pearl paper for a more delicate effect. The backing paper was printed from the Tattered Lace Pastel Haven USB onto the same pearlescent paper.


The layers of lace are so delicate and detailed and I found that they die cut perfectly with my Cut n Boss machine.


I thought the grey colour core card would coordinate perfectly for my Triangle shaped gatefold card.


On this card I only used the Triangle Wrap Card die on one side of my card, adding some Flexi Frames and the Decoupage Fantasy Flowers with their charismas.


I have used pink and pale grey colour core cardstock.


With the String Doilie dies I decided to make a little dress after cutting them from white centura pearl pearlescent paper. I have also used the Foundation Doilies dies for the card shape using a combination of snow white centura pearl cardstock and their pearlescent paper with backing papers printed from the Tattered Lace Pastel Haven USB.


Using the Foundation Doilies dies with the Decoupaged Fantasy Flowers and charismas for this thank you card. Papers also from the Tattered Lace Pastel Haven USB.


These flowers are delicate and pretty. You can choose how much you choose to decoupage them and whether you want to use your own papers with them.


For a more vintage style card, I have used the rest of the Decoupaged Fantasy Flowers from this set with the String Doilies die set.


For the card base I have used the Tattered Lace Oval Torn Edge dies with have a lovely torn stitched edge to them, perfect for a vintage card.


A perfect opportunity to add your lace and pearls.  I have also used snow white centura pearl cardstock which is a good sturdy 300gsm and has a lovely sheen to it. I have just inked the edge of the toppers with Tim Holtz Victorian Velvet distress ink.


Finally, an easel card using the Stencil Flourishes.


These flourishes are so pretty and with mirri card behind they really make your card ping. I have also used the Tattered Lace Foundation Triangle Nesting dies for the centre panels.


The Hunkydory rainbow mirri card really brings out the lovely fresh blue card and I have just finished it off with some little blue roses.

A beautiful collection to work with and one I will certainly be making plenty of use of  in the future.

Happy Crafting.


Tuesday 6 August 2019

Tattered Lace - TemptingTreats DT samples

Following the launch of Tattered LaceTempting Treats collection, I am sharing my DT samples made from some of the dies for the launch on Create and Craft TV  today.

I had the following dies to work with from this collection:- Hot Dog, French Fries, Milkshake & French Fry Box.


These are quite a quirky collection and when I looked at them, party invite came to mind.  I used my Tattered Lace ornate torn edge oval dies as a card base onto a deep red colour core textured card stock from Create & Craft.


Once I figured out how I wanted to incorporate the actual invite within the die (after a few practise runs) I used the outer die to cut the hot dog card shapes onto my pre printed invite that I had made using a sand coloured card.


I matched the back of the hot dog with the same card as the base of the invite so that when folded it would all match as the die is shaped.I also decoupaged the french fry box and added some glossy accent to the ketchup for texture.  The chipboard letters were a free gift with a craft magazine and I've highlighted the letters with a spectrum noir sparkle clear overlay pen.


With a party you need bunting! So I thought some ketchup and mustard filled hot dogs were very apt. They would be great for a BBQ too. These were printed onto glossy cardstock.


I used my glue gun to attach them to the ribbon. I used the matching charisma for the dies which are available to download direct from the Tattered Lace website.


For a fast food theme party or card I used all the Meal Deal dies together with their match charisma papers.


I have decoupaged the french fry box from the fries die and snipped out some fries to add separately to the card. I added these to my embossed backing paper, using a birthday embossing folder which was a gift from a friend. The words are from the French Fried Gift Box die set.


Also using the dies inside with a stamped sentiment.


With the Milkshake die I used the matching charisma papers for it but made it into a spinner card using the spinner element from one of the Tattered Lace collections. The wording also from the French Fries Gift Box. 


I die cut the spinner element out of acetate so that it wouldn't be as obvious when the card was moved round.


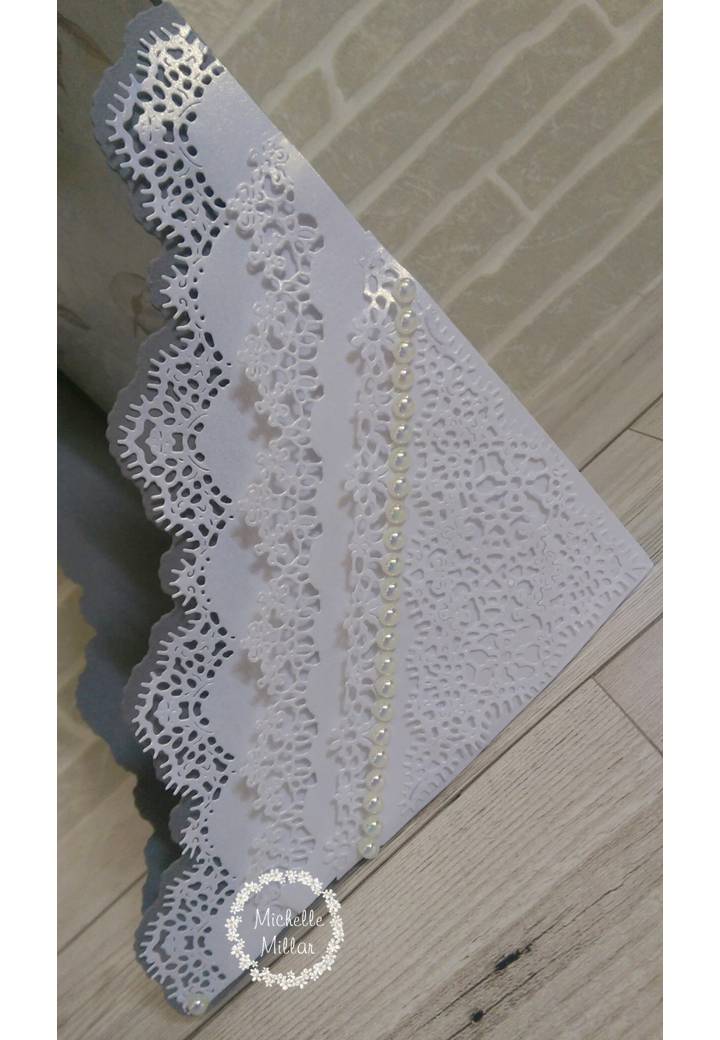
I have also used the Tattered Lace Foundation Oval nested dies for the card base with their Dainty Trellis Oval die set.


The French Fries Gift Box die set makes a sweet little gift box, ideal for sweet treats. I have used the matching charisma papers which have been printed onto glossy cardstock.


Adding some gems, coordinating roses, along with the ribbon and wording, decorative panel, that come with the die set.


Instead of usng the charisma papers on this French Fries Gift Box I have used patterned pearlescent card from Hunkydory, Hobby House Ribbon and decoupage flowers from the Tattered Lace Pressed Rose collection.


Even though it's a french fries box, they can be made and filled with sweets, little soaps or any treats. Ideal little gift boxes for teachers too.


A totally different way to use this gift box. I was originally thinking along the lines of a calendar card and came up with an idea of a card with daily inspirational messages. You could send to a friend for their mantlepiece, dressing table, shelf and in the front of the box would be a sentiment for every day.


I have used backing papers from my Tattered Lace Pastel Haven usb and created a selection of cards with well known inspirational messages on them. Everyone could do with a pick me up now and again on grey days.


I have also used a tattered lace ribbon threader die along the edge and the square dies are from the Tattered Lace Rainy Days Story Book die set.


It doesn't have to be a card for a particular occasion and can be replaced with memories from pictures or children's drawings for example.


Although these dies come with matching charisma papers that you can download for free, you can just use the die and papers from your own stash to create your cards.

This Milkshake card was made as a recipe card, perhaps for a summer children's party. As adults have their cocktail recipes, perhaps young girls would like their own milkshake ones.


#


For my mermaid themed cocktail card, I have used a marbled card made using shaving foam and my Dreamees pearlescent reinkers. For the ice cream sundae pearls, I have used little pearls and some cotton wool for the creamy top.


I have used my Tattered Lace Harlequin die set for the card base and toppers and Create & Craft colour core card in colours to tie in with the fruits in the milkshake mix.


Finally, I thought I would make some quirky little greeting cards for no specific occasion, just because I thought that these dies would lend to that theme.


"I only have fries for you ......"


"Franks very much"


"You're  exStraw  special"

For the card shapes I have used the following Tattered Lace die sets, Essential Pearl Rectangles, Nested Hexagons and Nested Oval Foundation. With added googly eyes for a little bit of character.

Happy Crafting!


WOYWW #777

Happy 'What's on Your desk Wednesday!'  WOYWW This is my first contribution to the blog, that I came across the other day, so I ...