blog backbdrop

Thursday 28 January 2021

Chase your dreams birthday card

 Another birthday card share today and this time it's butterflies for a card that was made for my niece.


An A5 card this time and using the Butterflies in Abundance stamp set by the Dreamees, which I have stamped and heat embossed the largest butterfly in the set with gold Wow superfine embossing powder.  I then used the Dreamees dinky inkies sparkle 2nd gen inks to colours them as well as creating the background for my card.


It's not always easy to capture the shimmer in a picture when you want to, but this time, the light must have been just right.


I used the sentiment from the Dream Big stamp set, which I thought was very apt and also heat embossed it with gold embossing powder.

I also used the Dreamees calligraphy alphabet stamp set for her name at the base of the card using gold ink. It's quite faint in the picture but stands out enough on the card to fit in with all the gold highlights on the card. Its a great alphabet stamp set if you want to create words on projects and your handwriting isn't perfect.


I love these inks, they are really versatile and make great backgrounds too. They add enough sparkle and shimmer to your project without it being overpowering.  Use them to re-colour your white pollen stamens to tie in with your projects and I have even used the re-inkers on my natural sisal too.
happy crafting.


Wednesday 20 January 2021

Dream Catcher

I have got a little collection of birthday makes to share today for one of my friends that I made for her just before Christmas and these are all gothic themed.

This is quite a large mdf dream catcher that I made for my friend from the Dreamees.   I didn't have black gesso so I used black acrylic paint, applied with one of those dome sponges shaped like an egg. Mine happens to be makeup sponges from Primark as they are cheaper than the proper craft ones you can buy, but they are great to apply paint to mdf like this as I find that you don't get brush/streak lines on your mdf when dry.


I found some go-to beads in my stash that have a good mix of black, silver, smokey and clear textured shaped beads for projects like this and threaded some onto some clear twine, using some large studded gems for the front of the feathers.


I decorated the dream catcher with flowers made from Fleurs flower forming foam using the Dreamees Sweet Sunflower dies. I used the crocus patch colourways for the foam and a purple faber castell oil pastel on the edges of the petals to add tone to the flowers before moulding the foam to give them some shape.


I used a mix of black and purple stamens in my flowers and added some foliage from the Fretwork Fronds also by the Dreamees in purple card and adding black feathers that I purchased from Hobbycraft.

I used a silver acrylic paint pen the mdf wording and added some black braiding to hang the dream catcher up.

To go with the dream catcher I also made a frame card using paper and graphics from the Beliza Mortals CD by  Magik Graphics. The flower was made using the Build a Peony flower stamp by the Dreamees, which has been heat embossed onto black vellum using silver Wow embossing powder.


The image on the inside has been decoupaged into the curtained disc on the topper.


To finish with, I added an 8x8 card to match which was printed onto glossy cardstock when I made it, hence the reflection on the card, which always makes taking photos a challenge when you have a light background also. 

Magik Graphics have some amazing gothic, pagan, mystical graphics and more and there is no loss of definition when you print your images and design papers off even on regular printer settings.

I really enjoyed making these and it's to have a change of genre to craft with.

Happy Crafting


Saturday 16 January 2021

Panda Love Drops cookie box

 It started cold snowy out there today and it always looks so pretty as long as you are inside in the warm especially as I am not a lover of the cold weather.

Today I am sharing a cookie box, made with card and decorated using a digi stamp download, to put my homemade shortbread for a gift.


I have used this adorable Panda Love Drops digi stamp set along with the design papers and one of the sentiments from the set for this month's digi stamps from the Imagine that digi stamp monthly progressive challenge.


decided to die cut a pre-coloured digi image into a heart shape and then a decoupaged one on top that I had also fussy cut around which was easier than I had anticipated. I used glossy accent on the hearts, panda eyes and more importantly the umbrella long handle, which made it a lot easier to cut around the curved umbrella handle when dry. I even managed to decoupage it.


For my cookie box, I used quite a simple template to follow from Crafters Companion using the Ultimate Pro box board. I have used this template quite a lot and you can make this box from an A4 piece of card. The instructions for the box can be found on their website and they even have pictures too which is also a bonus. Just click on the link below:- 


I used the umbrella design paper to make the panels for my box, the heart design paper for the 2nd layer heart and tag, saving the worded red design paper for the top tag and the die cut border lace edge on my box.  I also added one of the sentiments from the digi set to my tag.


The dies I used on my project were; a mini tag by Xcut, Xcut heart dies and a border die from the beautiful babysuns by the Dreamees. I also wanted to see if I could utilise as much of this digi set as possible, so I used glossy accent on the hearts..... which, I did have help to cut out and these made wonderful little heart gems!


I did, however, make the shortbread to go in the box, as well as cut out the little confetti hearts I printed onto tissue paper using the heart design paper. I thought I would look nice as a liner for the shortbread to sit in the box. The tissue paper was printed on a draft setting as I didn't need a lot of ink for this.


This is such an adorable digi set and I've really enjoyed this one. The papers are so pretty too. When I first started this challenge, I thought that I might struggle as I'm not a colourist but the good thing with digi images is that they are resizable, which makes them so much more adaptable for your projects and they never run out.

Kris has created some lovely digi designs and I still have my gnomes to use yet, which I am really looking forward to creating with.

Time for a cuppa I think! Enjoy the rest of your day.
Happy Crafting


Wednesday 13 January 2021

Inspirational Junk Journal

Today I'm sharing a project made for a friend last year and this junk journal is the sort of thing I love to put together as it can be filled with all sorts of things.


Shabby chic was the look I was anticipating and as for the content well, there was no plan really just messages in the shape of inspiration of hope, strength and faith in yourself which we all need sometimes and forget from time to time.


I had decided that a small neat book shape in kraft card would be perfect for my junk journal and the Tattered Lace precious nested book die, which is about 13cm x 18cm was just about the right size.


I used and adapted the die to create the spine for my journal from the Tattered Lace Enchanted Tales book collection so that I could secure the pages into my junk journal and for the cover, I liked one of the design papers from Stephanie Weightmans Its a gift collection which I printed onto cream velour paper that I have in my stash. 


I originally discovered this paper when the Dreamees stocked it. I love the fact this paper is printable and the suede texture it gives to your projects. I made the flowers using the Dreamees Loops and Lace flower dies on olive green pearlescent paper, with cotton ribbon inked with Tim Holtz vintage rose distress ink.


When I first discovered this poem, I thought it was beautiful, wise words that definitely needed to be shared and a good starting point. I didn't want to take too much attention away from the words on the page so kept this page fairly simple with a little moss at the base and part of an embossed tree with some acorns at the top. I have typed out and printed the poems in this journal onto patterned paper.

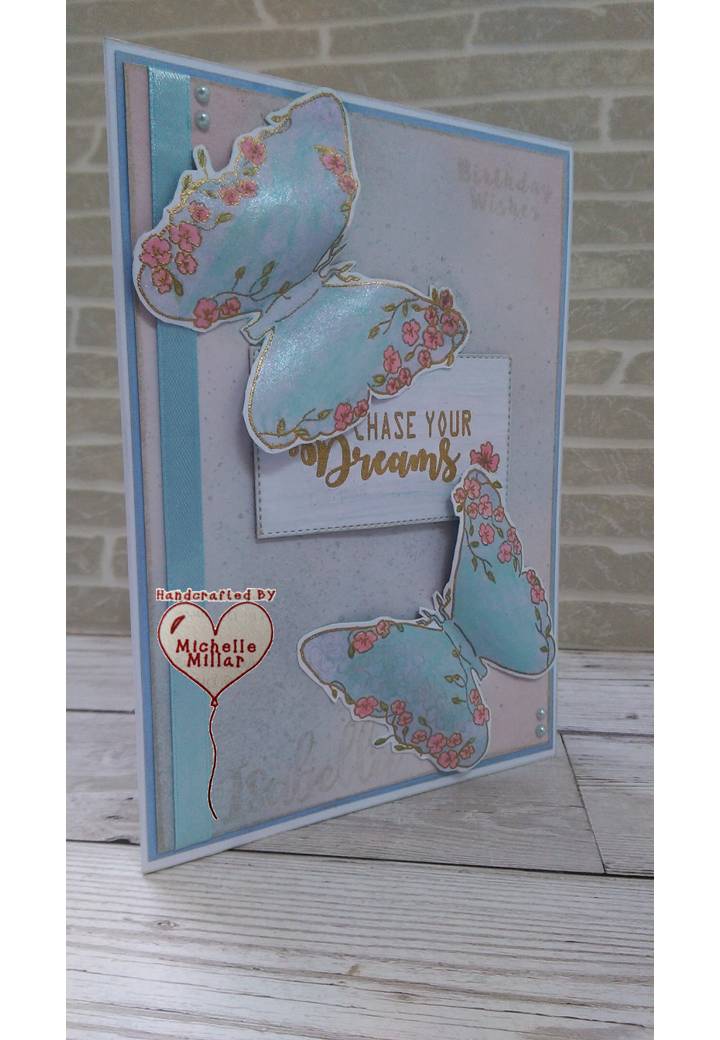
A simple little vellum butterfly was all that was needed to embellish this page, made using the Dreamees Fall & Foliage stamp set, along with some glossy accent on the bubbles. I thought this poem was another great strong powerful hope floats tale.
Life is hard at times and we all stumble and fall and from a young age, you learn to get up, dust off the grit from your knees and carry on, with encouragement.
I always tell my children that no matter how hard life gets, somewhere out there someone has left a light on for you.... you just have to find it.

Using a mix of vintage design paper and the same that I had printed onto rice/sumi paper, I added a little cream webbing, lace and the odd vellum flower topped with another poem.  We all get caught up in life and living and its so easy to lose touch with the little things that you don't always see but were always there.

As I started to put the journal together, I thought that I had better even it up a bit with a few more light-hearted artwork pieces.

So, on the next page I used some of the Love Art rice paper by Stamperia and thinking along the lines of "hope floats," I found these cute heart embellishment along with these inspirational captions and decided to tie them into my page.


I mirrored these with some more Stamperia rice paper for my next paper with some mini vintage envelopes with matching notecards, adding a little vintage postcard to the top of my page.

I love these rice papers, particularly the ones with the face art on them. I do have another design to use for another project.


For my next page, I stencilled and inked my page added some layers, lace and ribbon and made an ATC card using the Puddle Jumps digi image by Vera Lane Studios. 
The card says it all, sometimes a good puddle is all you need. I backed this onto a background made using a little acrylic ink spray and shaving foam. To accompany my ATC card I also used the Just Pray & BowBee digi Images which were coloured in with promarkers.


I love making ATCs, they are something I keep saying I want to get back to making and swapping and even if you don't swap they are just nice to make. A little piece of art work, make one, send one and make someone's day.


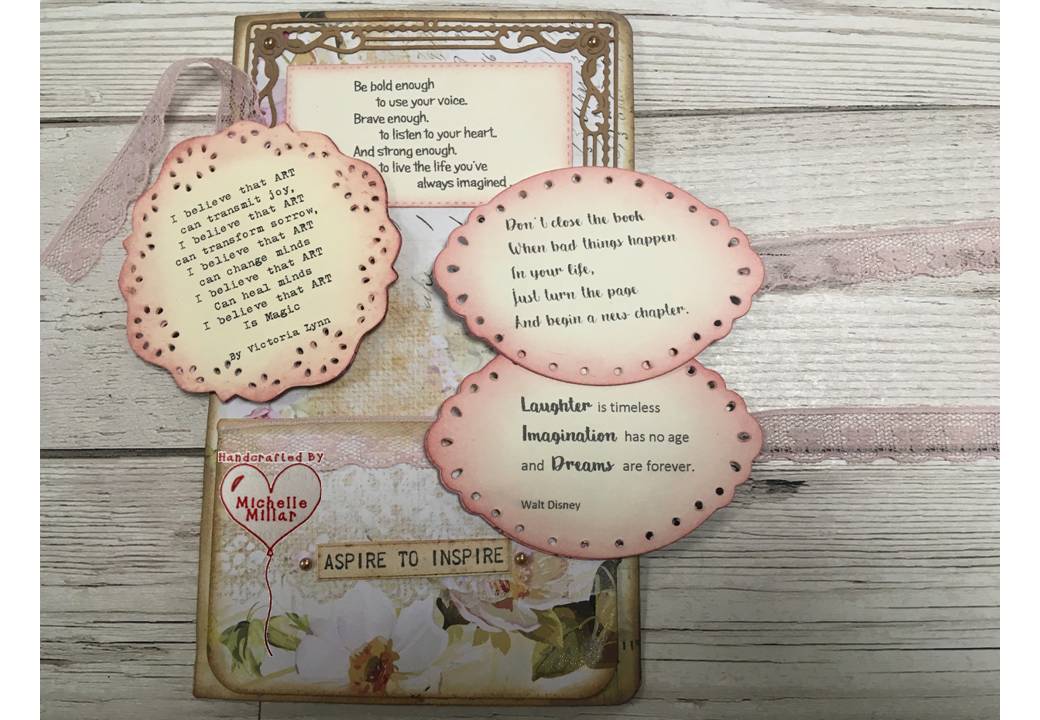
My next page is a tag pocket, and there are some lovely inspirational sayings that I wanted to add to the journal, one being from an artist which I really liked. I used the Dreamees Loops and Lace dies with some pink lace, some more vintage rose distress ink from Tim Holtz.


On the back of that page, I used  one of the lovely design papers that  my crafting colleague Alysha Sheridan designed and I printed this onto cream velour paper and added this pretty ornate frame by Crafter Companion with some "never forget quotes." We all need a little encouragement sometimes, that warm voice in your head that reassures you that it's going to be ok.


And when you lift the flap, a few more words of encouragement and then a little picture just hidden under the flap.

Which says it all really. Through the eyes of a parent, you understand that.  You know they have the ability to fly, to be the person they want to be, to overcome all those obstacles in their way but the hard part can also be believing it too, a process that takes time...


On the inside cover, I made a band out of Kraft card and added some antique lace. I had originally thought of maybe making some postcards and popping them in there but then I thought, what about a survival kit.

Looking on the shelf in my bedroom there is one that my son bought me many many years ago when we were in Jersey. It was something so simple and yet so sweet in an organza bag. I have seen lots of these around and thought that this would finish off my junk journal nicely.


It was fun making this as you can personalise them to suit and I had to remember that all these things needed to fit in the bag too...after I sourced them.


This junk journal was more inspirational wording than junk art-based because it was more personalised with a friend in mind. I do like the random sort of nature of these, where you start with a blank canvas and that creative project just develops.

I have a taste for making these now and it's on my list to make another of a different sort, along with a few more things to make this year, hopefully with all being well and good.
Have a good day, whatever you have planned.
Happy Crafting


Easter Cards

I have a few Easter cards that I'm sharing today and I've been using the Signature Series Digital Florist Everything Anemone Cardmak...