blog backbdrop

Wednesday 25 March 2020

Hat easel card

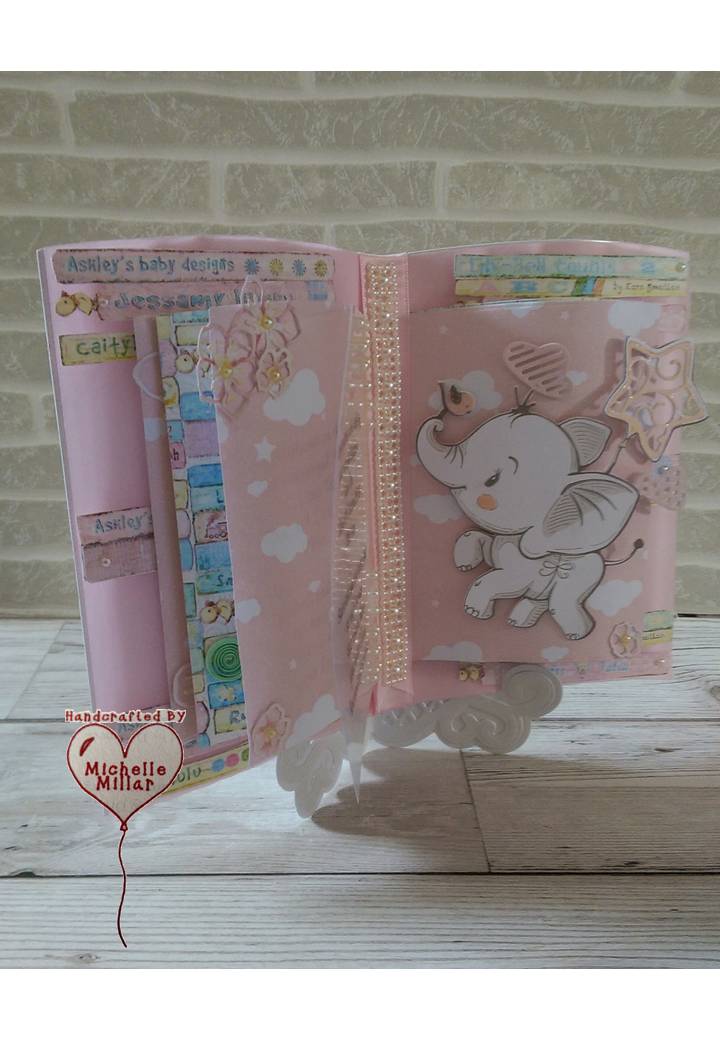
The project that I am sharing today was made for a group swap and the one thing that I knew it had to include was pearls, which is what this crafty friend of mine always uses.


I have never found it difficult to think of something to make with my Dreamees products and it is so easy to mix and match whatever you have throughout their ranges as it all goes together so well.  I think sometimes we can worry too much on what to put together rather than how you want your project to look.

To make the hat for my easel card I used their Templates and More CD.  I have had this cd for many years but cds like this are invaluable and I find that I always find my way back to them, no matter how trends move on.


In the past, I have cut these templates out by hand but as I have a set of nested circle dies, once I printed off the template, I found I got a more precise and clean cut with the dies. I did this with 300gsm white cardstock for the hat template and the pretty peach backing papers also by the Dreamees. The peach kisses paper pad comes in an 8 x 8-inch loose leaf double sided paper pack is one of a lovely colourway collection.

 https://www.dreamees.org.uk/
https://www.dreamees.org.uk/


I made a circle easel card to attach my hat to, using the peach striped backing paper to complement the floral peach kisses papers and to decorate the white hat template.

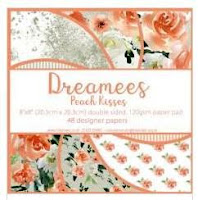
The only hard decision I had to make when buying a paper pad, was which one, as they are all lovely and at £8.99 good value for money.

I chose the peach kisses because peach is one colour that I don't see a lot in cards and being a pink/lilac person its also a colour that I don't often lean towards for no real reason. It was when I purchased a Hobby House collection that had a mix of  pink and peach melba ribbons in my bundle that I thought, this is lush and was disapointed when I used all the peach card from my kit up.
The peach ribbon is from that Hobby House collection but the pearls are Dreamees and I had to make sure that there were plenty for Paula.


For my sprig of flowers on the topper of the easel card I have used a flower stamp that I use a lot,something stitchy with its adorable button centre that has been stamped onto a rich peachy orange Dreamees backing paper.

Decorated with some of their white pollen stamens and a "friends" sentiment from their beautiful baby sun stamp and die set.

I also like to decorate mdf and after seeing a picture on Paula's Facebook celebrating her Anniversary, I thought, what a lovely picture wouldn't it look lovely in a frame...... so after a rummage through my box of mdf (mostly Dreamees mdf) I found a set of mdf hearts that I had forgotten about.  This trio of heart mdf was from a collection called Sensational Flowers (stamps, cd and mdf). 


I printed the picture onto glossy paper and stuck it to the solid heart. I did cover the top heart aperture and the back of the solid hear the peach kisses backing paper.

I used string pearls and hot glue all around the heart to give it a prettier edge and a piece of amber ribbon to hang the heart from.


For the flowers on the heart, I chose the Dreamees pom pom flower stamps and stamped onto one of the peach kisses backing papers using smokey gray VersaFine pigment ink. Again I used some of the Dreamees white pollen stamens for the centres of the flowers. I added a good few layers to plump up my flower, gently curling the tips of the petals for a more rounded shape.


For a bit of structured foliage, I used a small piece of green vellum to stamp my leaves but this time with a stazon ink pad. Stazon is good to use with non-porous materials like vellum, glossy paper, plastic etc. Using a quilling tool (tweezers would work just as well) I curled the edges of the leaves to give them a little more shape before glueing the flowers and leaves down with a hot glue gun.


So there are my two projects. I made a box for the easel hat box to sit in and for the plaque, I had some yellow tissue paper to wrap it in.

One thing I like to do with tissue paper (unfortunately, I didn't think to take a picture of what I did) is get my stamps and decorate it. In this case, I used one of the babysun stamps and the friends sentiment stamp.


I have combined 3 stamp sets, mainly using one paper pad with the exception of a backing paper from another Dreamees cd (Pretty Pets) and I like the way you can mix the older collections with the new so easily.

Why not get involved in a craft swap. They are great fun and a great source of inspiration. You can find lots of craft groups on Facebook and blogs that offer them too.


Happy Crafting
Michelle
x

Monday 16 March 2020

Grandmas Kitchen Tattered Lace samples

Following the launch of the Grandmas Kitchen collection by Tattered Lace I am sharing my samples for the launch on Create & Craft TV.


I had the following dies from the collection to work with which were:- Kitchen Tapestry, Baking Day, Dessert Before Dinner, Rustic Caddy, Nested Mason Jars and the Cookie Cutter die set.

Using a large mdf teapot by the Dreamees I used a selection of backing papers from the Grandmas Kitchen USB to cover the teapot and make the tag (also using the Tattered Lace vintage tag die) and the largest cookie cutter die as a shaped layer. I've also inked the edges with Tim Holtz distress ink in gathered twigs for a more vintage look.  The centre of the teapot features my main topper being the kitchen tapestry of Grandma cooking. I've used a patterned backing paper behind this die also.


I've used the smallest cookie cutter dies for my little cookies using the cardstock from the collection. The colours in the cardstock for the collection tie in really well with the backing papers on the USB and it was really easy to mix in the smallest mason jars and the baking day utensils from the collection into this project.

On most of my projects, I have printed the backing papers onto cream velour paper by the Dreamees from my stash. It just gave my projects a really soft fabric feel to them which I thought was very apt for the collection.


I have to say, I really loved these nested mason jars. You can do so much with them. Here I have used the largest to make a shaker card with iced gems.


I used the two smaller cookie cutter dies and mostly cardstock from the collection but to get the colours more accurate for the iced gems, I used snippets of previous colourway packs of the Tattered Lace smooth card collection which is about 300gsm.


This card does have an acetate panel over the top although it doesn't look that obvious in the picture. 


Using the same die and the recipe cards from the USB I have made a 
recipe book of smoothies


I have used white cardstock to build up the layers, as its only the outline shape I kept mason jar edge. It was then finished off with the matching charisma for the mason jar. The recipe cards were die cut using the large mason jar to ensure the centrepiece would fit perfectly.


A double stepper card using the dessert before dinner die, using papers from the USB and the rustic caddy. I've made the doors open so that I could put some mason jars inside.


The cake stand also has an acetate closh over the cake to give the topper a little more support as it is very delicate sitting at the front of the card.


Using the same dies but a large square card using the Tattered Lace Portifino square lace dies for the card base and printing the table cloth that my cake is sitting on, onto sumi paper.


Again, I have made the rustic caddy door open, so that I could fill it with cookies and a mason jar. I have used the cardstock from the collection with the cookie cutter dies and the doily die from the Tattered Lace Designer Vintage collection.


Another sweet treat card, using the mason jars as cookie jars and the smallest cookie cutter dies for my little biscuits. 


I've used some 3D pearl effects for the icing on my biscuits on the cardstock from the collection. The cookie cutter dies also have been used on the twisted easel card.


A tall dl card made using the rustic caddy and the kitchen tapestry with the cookie cutter die forming a country kitchen tablecloth behind the dies. I have also added the rolling pin from the baking die and added a sentiment onto a tag also on the USB.


As well as backing papers, charismas and recipe cards, there is also a selection of tags to personalise on the USB.


I decided to utilise the recipe cards in a shabby recipe book using the cardstock and backing papers from the collection.

I used the Tattered Lace Enchanted Book die to make the recipe book and sanded the edges to make it look aged. The stitched embossing folder was from my crafty stash.


I used the dessert before dinner die with a recipe I found in a book.


Adding the recipe cards, papers and toppers and making look a little aged.


It was easy to add your own recipe to the cards from the USB using My Craft Studio. 


You could add your favourite recipes or even your grandchildren's favourite cook together ones to keep handy.


For my pink shabby chic card I printed the backing papers onto a white textured cardstock for a more vintage look, especially for the wood panel backing paper. It also feathered really well when I sanded it.I then used some Tim Holtz distress ink in victorian velvet on the edges for a more vintage look.  I have used the medium mason jar for my baking utensils and a little metal cookie cutter in the corner.


I decided it looked better without a sentiment on this card. I don't always add a sentiment to the front of my cards as sometimes they just look nice on a shelf without one. I tend to type a personal verse inside all my cards anyway and just thought this card looked better without one.


Finally a calendar card. Using the kitchen tapestry and rustic caddy dies, with a rolling pin on the side from the baking days dies.


This collection was inspired by vintage recipe books, homemade apple pie, baking with nan, country kitchen shabby chic. Its an adorable collection and I love the backing papers on the USB a huge selection.

As always the matching charismas for these dies and the rest of this collection are available to download for free directly from the Tattered Lace website.

https://www.tatteredlace.co.uk/downloads/artwork/

I hope that you have enjoyed looking through my samples.


Happy Crafting
Michelle


Thursday 5 March 2020

Spring is coming - Hedgehog card

As Spring battles its way through the floods from the endless rain another challenge is about to start on our blog at Let's Craft and Create with a Spring theme for Easter.


Instead of Easter bunnies or eggs, I have decided to share a hedgehog card. I've had many resident hedgehogs over the years and this year has been rather unsettling for our spikey friend.

With the unpredictable temperatures, it means hedgehogs have not been hibernating through the winter as they should do. From around April to March they awake from their slumber and go searching for food.

So, I can not think of a better woodland wonder to dedicate my card to than this little spikey wonder.

I have used:-

  • 6 x 6-inch cream scalloped edge card blank
  • Tattered Lace notebook hedgehog die with matching charisma 
  • Tattered Lace large Hello die
  • Tattered Lace autumnal ivy
  • Tattered Lace mixed foliage dies
  • Hessian
  • patterned backing paper
  • kraft card
  • small piece of raffia & string
  • coffee pearls


I printed the hedgehog charisma onto cream card and then die cut it before shaping the topper for my card. The charisma for the hedgehog and other animals in this collection can be downloaded for free directly from the Tattered Lace website.


This particular die was made to work with the notebook from Tattered Lace but as you can see, I think it works well as a topper on a card. 


I added a little more colour to his back to add a little more depth using one of my ink pads and some glossy accent to his eyes and nose.


A rare daytime sighting of my little thirsty friend on a very hot day last year.

Have a look at what the rest of our design team have been making this month over on our page.  There is a prize for the winning entry and a badge for your blog for the runners up. Also lots of inspiration from the rest of bloggers on our page which is always lovely to see.


Happy Crafting
Michelle


New Baby Card

I thought I would share some new baby cards that I made toward the end of last year using a notebook die set I have and as the theme this month on our blog challenge on Daisy Chains is "dies" I thought that it would be very apt.


The dies I used for my cards were:-

  • Tattered Lace Notebook die
  • Tattered Lace Little Star Elephant die from the Magazine Issue 65
  • Tonic Ornate Easel
 

The magazine also had a lovely selection of papers and I used the pink clouds along with the polka dots for the cards. These also came in blue as well as the charisma papers of Little Star the elephant.  These papers are also available to download for free directly from the Tattered Lace website.
After clicking on the link, scroll down to Issue 65 Little Star Charisma Download.


I had a sheet of scrapbook paper with children's books on it so decided to cut a few out and add them to a pastel pink vellum page that I had created at the back of the card.

Both cards have an acetate top panel where I have printed a personal verse and details of the birth.


In the centre I have added some pink satin ribbon with a strip of pearls by Hobby House, adding single pearls throughout the pages of the card along with small nappy pin paper embellishment and small flowers from some of my flower die collections that had charisma papers with them.


I used a spectrum noir clear overlay sparkle pen on the balloon, cloud and bird on my elephant die just to lift it a little.

This card easel by Tonic is perfect as a card stand, not only is pretty but just the right size and shape (131mm x103 mm) and has been die cut from 300gsm centura pearl snow white card stock.

I haven't made a baby card in a while and then I have two together. These little girls were born within days of each other. I don't tend to make identical cards or projects, I like them to differ albeit a little in some way.

Have a look at what the rest of our design team have been making this month along with the rest of the inspiration provided by the other crafters on our blog challenge every month.


Happy Crafting
Michelle


Easter Cards

I have a few Easter cards that I'm sharing today and I've been using the Signature Series Digital Florist Everything Anemone Cardmak...