blog backbdrop

Monday 30 October 2017

Hobby House

Hobby House make some beautiful card collections which are very well put together, colour coordinated with a selection of beautiful embellishments and ribbon to match. Again another family run craft business that produce good quality products that are inspirational and good value.

I especially love their embellishments which are quite unique and everything in their kits go together so well.  Debbie Simpson regularly demonstrates new collections on Create & Craft bringing lots of inspirational demos and great value for money kits from Hobby House.

These cards were made using the Cosy Christmas Kit.

I made this card into a shaker card using some acetate and glitter flakes by Debbi Moore. The pearl strings and all the embellishments you see are from the kit.

Using all the elements from the kit.


I made this card into an Easel card, adding some stickles clear glitter, also on the card above.

The toppers have lovely crisp images. I've just added some glossy accent and stickles clear glitter
 to them.


Another shaker card using all the elements from the kit and a little acetate and glitter flakes.
The charms are lovely and have some left over.


There is a good amount of ribbon in this kit and it goes far with some left over.

On this card I have added a cream scalloped card and embellished with Dreamees poinsettia flowers which have been heat embossed onto pearlescent paper, glittered some artificial flower stems and made a flower ring. The backing card and rest of the embellishments and sentiment are from the Hobby House.


I have done the same here and added a Dreamees doily die using Hobby House cardstock and papers, along with the embellishments and sentiment.

I still have card and lots of embellishments left over, which are so pretty. A lovely kit to make up.


The kit comes with a sample of cards you can make with this kit and this is what I made.


Happy Crafting


Sunday 29 October 2017

Visible Image

Another craft duo who produce some truly inspirational stamps & stencils are Mark & Helen Alexander, who are Visible Image. Their designs are unique and very different. Their arty images and inspiring quotes make fabulous toppers and backgrounds for cards, journal pages and mixed media pieces. Great quality and lovely to work with. They have an amazing design team who constantly bring buckets of inspiration for their products. I love these stamps.

https://visibleimage.co.uk/
https://visibleimage.co.uk/blog/

Here are a few cards I have made with their stamps. First with the Create With Your Soul  sentiment stamp.
I used an ink technique called bokeh to create the bubble effect on an inked background. Then stamped with the Visible Image Create With Your Soul sentiment stamp when the background was dry.  The butterflies are a Dreamees stamp. 


Here on an mdf plaque I used a stencil and Tim Holtz ink to create my backing paper onto stamping card. Then heat embossed the Visible Image Create with your Soul sentiment stamp using copper Wow embossing powder. Finishing off with gathered lace around the edge.


My first mixed media mini canvas using the same stamp, some tissue paper for texture, texture paste, mica powder and random bits and pieces from my craft draw.


On this card I have used the Visible Image  Dragonfly stamp. I Stamped onto white card using a versaMark clear embossing pad and the dusted it with metallic mica powders. I did the same with the topper for the card.


I


 used the same technique for this card but a variation on colour, adding the Live in the Moment sentiment stamp. These stamps are thick and deeply etched to pick up every detail and get a perfect image.


 I do love this stamp, its so unique, from the Visible Image, Where your Dreams Take You stamp set.
I was inspired by a demo by Mark Alexandra where he used droplets of distress ink and let them run down the card creating a dripped effect. So, I decided to try and re-create this myself. 

 I heat embossed onto watercolour card with black embossing powder and used Tim Holtz distress inks to ink around the edges of the card. When trying this technique I let each dripped colour dry first to avoid them merging into a muddy puddle.

I also used some pebeo masking solution over the whites of the eye to avoid getting any colour on there.  It provides a rubbery cover wherever you paint it. When you have finished colouring your card, the solution just rubs off. On the name bunting I used coordinating ink.


I made this card using the Capture The Moment camera stamp by Visible Image.
I used a printed backing paper and stamped the film reel using an Inkylicious stamp. Then stamped various images using Stazon ink onto the acetate. Stazon is a solvent based ink and ideal for stamping onto non porous surfaces.  After stamping the topper, I decoupaged the zoom lense and gave it an acetate lense to give the image a little dimension.


 For this free standing plaque, I used the Visible Image  Laugh Louder sentiment stamp which has been heat embossed with silver metallic superfine Wow embossing powder. I have also used the same embossing powder to heat emboss the butterfly stamps onto pink vellum using The Dreamees  Fall & Foliage stamp set.


Using a Dreamees mdf plaque, I made this inspirational plaque made using the Visible Image  Keep Going Stamp which has been heat embossed onto Dreamees backing paper. Flowers were made using Dreamees Pretty Petals stamp set.


Using the same Visible Image Keep Going sentiment stamp which has been heat embossed onto embossing glitter. The flowers were made using The Dreamees Creative Chrysanthemums stamp set and the backing papers are also from the Dreamees cd.


This bookmark was made for a group swap using the Visible Image Face it Stamp and the Perfectly
Flawed sentiment stamp. The eyelids have also been glittered. I inked the watercolour card using the
same set of Tim Holtz Distress Ink Minis. I love tis stamp set too, one of my favourites.

I hope you have enjoyed my makes


Happy Crafting


Thursday 26 October 2017

Dreamees Cards

You've seen a lot my mdf makes , so in  this section I will be sharing some of my card makes
 with you.


 Starting with the Flower Shower stamps set. I heat embossed the main image onto a piece of centura pearl cardstock and then re-stamped the flower heads to decoupage onto the card.


With the larger flower stamps, I constructed some fuchsias to hang in the aperture I made for the inside of the card.


As you can see I made two cards like this in different colours. They looked quite effective.


A get well card made with the Dreamees Delightful Dahila stamp set, backing papers from Fantastic Fairies CD and the mason jar from the Sweet as Honey CD. Everything Dreamees goes together.


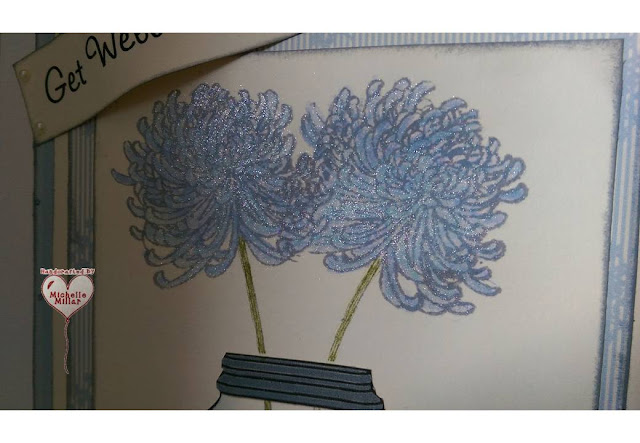
  I don't do colouring so used some Tim Holtz distress ink and a blender pen to colour the flowers and the spectrum noir clear sparkle pen over the top to give it a little shimmer.


Using the same stamp this sympathy card made using the was stamped and heat embossed onto vellum with bright white Wow superfine embossing powder and layered up onto mirri board.


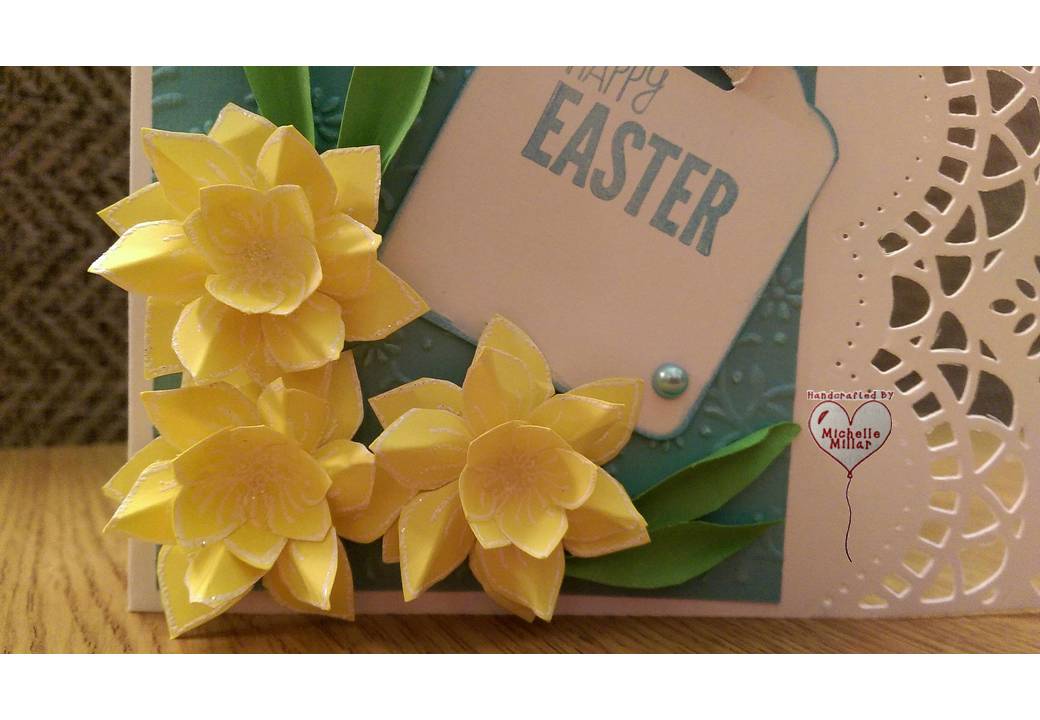
A few Easter Cards I made from this stamp set.  I used the small flower stamps to make these sweet daffodils as demonstrated by Carol Bignall.  I also used the Beatrice Diesire die from Crafters Companion for the lace card edge.

The flowers have been heat embossed with seafoam white opaque Wow embossing powder


 I used the Dreamees Friendship Dish sentiment stamp and the Ditsy Stitch flowers stamps which have been heat embossed with gold superfine metallic gold Wow embossing powder. This sentiment stamps so crisp with ink or embossed.
I made this card using one of the Dreamees CDs and used pearlescent paper to print the flowers and a some gilding flakes on the butterfly.


I pleated the centre of the card as I wanted a concertina fold so I could have the grass popping up in the centre, surrounded by butterflies.  The leaves were stamped using the Dreamees Fall & Foliage stamp set.


This Autumnal card was made using the Fall & Foliage stamp set and the Twig Wreath stamp set. You can just see the wreath under the leaves. This was an earlier stamp set.


This card was made using the flowers from the Sweet as Honey cd Whimsical Wonders paper pack.
The flowers have been painted with a spectrum noir sparkle clear overlay pen to add a shimmer.
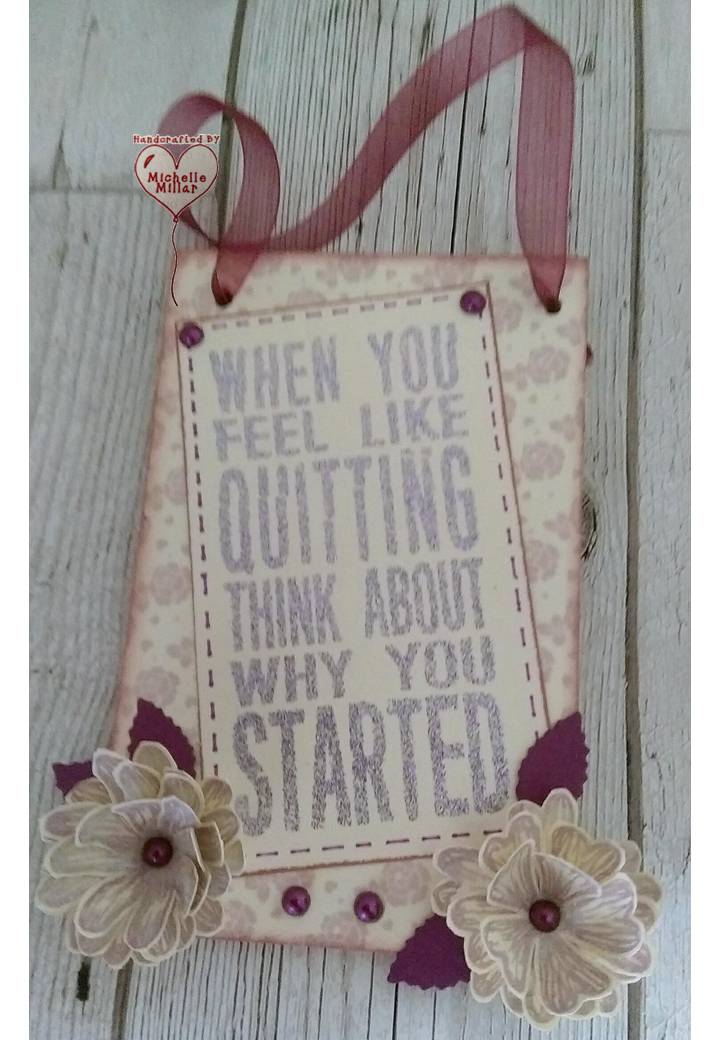
The rectangular pearl dies by Tattered Lace. I love the sentiment on this card.


For my Jar of Hearts card I used the Mason Jar stamp set on this card and then made an aperture of the jar as I wanted to make it into a shaker card. I used the pink papers from the whimsical wonders paper kid and some create & craft satin board in soft pink. I also used the Tattered Lace rectangular pearl dies.


For this letter card I used the Dreamees Florals for All collection, card template from the CD and papers from the kit. The Charming Cascade flower stamps were embossed onto vellum using Dreamees embossing glitters
These Dreamees embossing glitters come in pastels, brights or neutrals and tie in so well with these vellum flowers.


I used The Dreamees Pretty Pearls flower stamp which was heat embossed onto pearlescent paper to make the layered flowers. The swirls are from the same stamp set which were heat embossed onto acetate. Finished off with a Tattered Lace Pearl Die.


 Made using Dreamees Creative Chrysanthemums stamp set on orange card and the Friendship Stamp from their recipe collection and bumble bees from the Sweet as Honey stamp set.  I have used a brick stencil on the base card and park of a script stamp by Indigoblu.


Flower Shower Stamp set and  Delightful Dahlia 


http://www.dreamees.org.uk/ 

I hope you've liked my selection of cards I have previously made.

Happy Crafting


Gothic Fairy Arch

I've finished my Gothic fairy arch and have a few pictures to share with you and I'm also going to add it to one of the monthly chal...