blog backbdrop

Sunday 5 November 2023

Fab Fashionista Birthday

I can now share a birthday card that I made last month for a family birthday using 
more papers from the Bright Lights Fabulous Fashionista Mini Cardmaking Kit by Opulence by Design Crafts.


For this card, I used a white 8 x 8-inch card blank and the Bright Lights Fabulous Fashionista Mini Cardmaking Kit by Opulence by Design Crafts The PDF - 5-page digital download includes 2 beautiful toppers, 6 sentiments and 4 fabulous designer backing papers that could be printed onto cardstock and used as card blanks. 

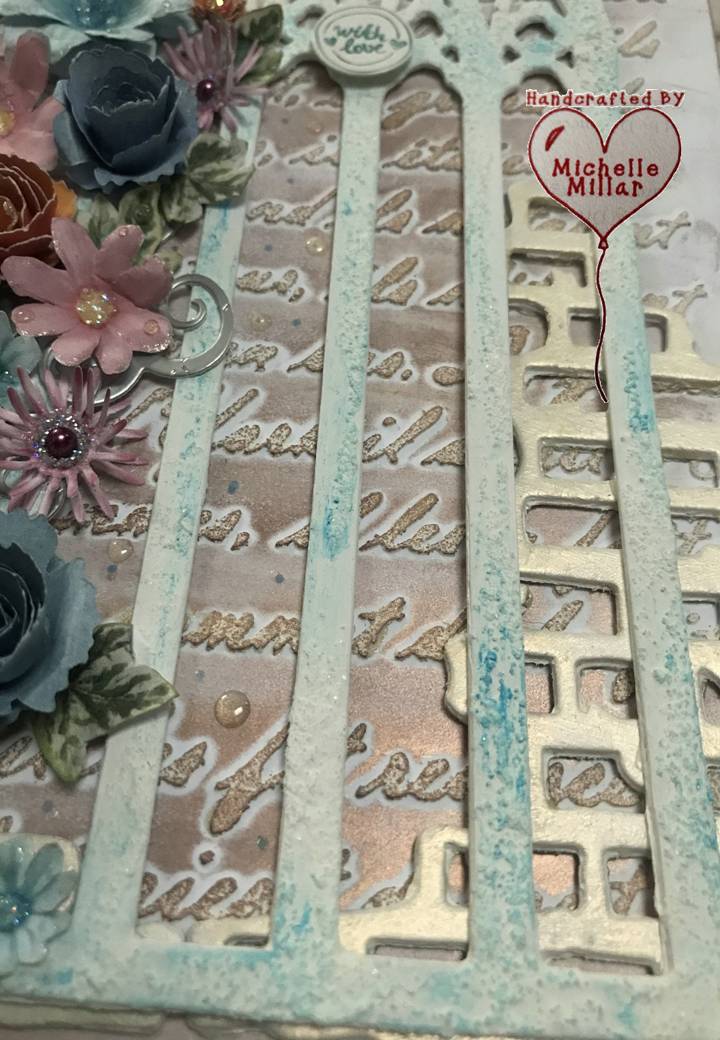
On one of my layers, I printed the beautiful floral design paper onto a textured satin paper that I had in my stash, it was a shame to cover most of it up, as it now had a luxurious feel to it. This is just one of the advantages of being able to choose what you print off from your download files using the mediums of your choice.


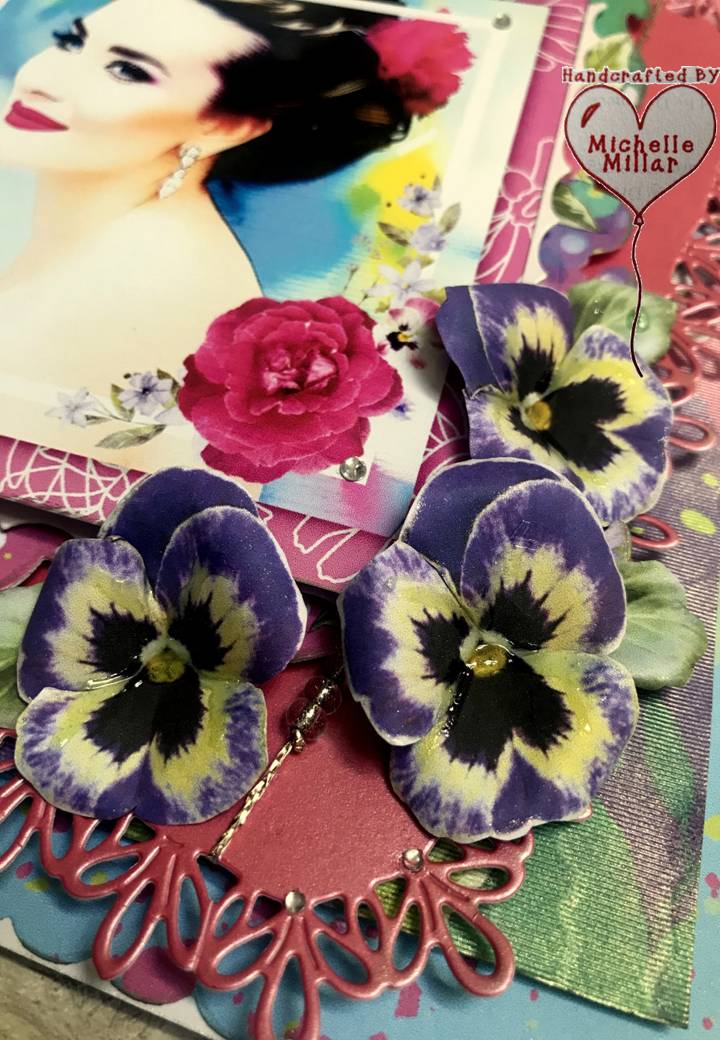
I also made some flowers using a mix of purple & lemon Pansies with the pink & lilac Violas by Opulence by Design Crafts. and not forgetting the Pansy Leaf which is a great foliage to pop in with any flower arrangement that you are using.


These flowers can resized to fit all your projects, which is something I also like to do rather than having to find something to fill a space in a project.

I've added a little glossy accents to the centre of the flowers as they really didn't need anything else for this project.


Sometimes for occasion cards, I carry the backing paper through onto the back and for this card I have also made a matching box.


I do think this is such a beautiful cardmaking kit and I love this topper. From my own cardstock, I have added pink pearlescent and white glossy card.

These papers are just perfect to add a touch of glitter to using your Stickles glitter glue or or glitter shimmer pens.

If you would like to check out Amanda's YouTube Channel for cardmaking, flower making and inspirational craft videos  you can find her gallery here:  


I have already spotted my next kit that I am looking forward to using!

Have a great week,  whatever you have planned for yourself.

Happy crafting


Challenges:-
Lets Craft and Create - Fav Colour Combo -  I tend to lean more towards pinks & purples                                                                                  in my card making 
Triple B - Blooms
Double Trouble - Something/Anything/Everything #51
Crafters Cafe - Flowers   (Top 3 for November)
CD Sunday Plus - AG (Top 3 for November)
Crafty Catz - Show some flowers


Thursday 5 October 2023

Halloween Tags

Sharing some bookmarks that I have just finished making and I love the new range of red rubber Halloween stamps from IndigoBlu this year. I have used Spooky Girl.


I still use bookmarks a lot and they are always really handy to gift too, especially with your craft swaps. I also just enjoy making them.


The first one I made was stamped with black Versafine Clair ink and then heat embossed with clear embossing powder.  I used Craft Artist's Fusion Ink in Hunters Gold for the background.

It's really difficult to see the flecks of gold mica in the misty grey/green background. I used the Berry Fusion ink on the pumpkins for a shimmery glow. These inks are beautiful to use. 
 For a touch more texture, I have added glossy accent to her eyes and  I added a little Cosmic Shimmer Glitter Kiss in Midnight Sparkle to the background.


My second tag was just stamped in black versafine Clair ink and then coloured in the image like the first tag. I used a sparkle dye based ink in ocean blue to add a  dusky shimmer to the background.  I also made use of some Tattered Lace Halloween die cuts in my stash to embellish my tags.


My third tag was stamped in sepia versafine ink. I bought some wool from a charity shop last year and thought that it would come in handy for projects like this. 

I think this is such a cool stamp and one that you can adapt in many ways for your crafting and not just for Halloween and have been looking forward to using this one.

Another week is nearly coming to an end already and the days are starting to get shorter too!
Have a good rest of the week!

Happy crafting


Challenges
As you like it - Halloween - I love this new 'Spooky Girl' stamp and have been looking forward to crafting with it.
Park Hopping - My Happy Place  - Halloween    (Spotlight project for October)

Monday 25 September 2023

Fashionista Birthday card

A birthday card to share today and I do love the vibrancy of this card kit along with its beautiful toppers.


I used a white 7 x 7 inch card blank and part of the Bright Lights Fabulous Fashionista Mini Cardmaking Kit by Opulence by Design Crafts.  The PDF - 5 page digital download includes 2 beautiful toppers, 6 sentiments and 4 fabulous designer backing papers that could also be printed onto cardstock and used as card blanks. 

I printed my topper onto glossy photo paper (170gsm, Wilko brand) and I added some pale blue mirror board between the layers.

Of course, I had to add flowers and I used a mix of purple & lemon Pansies with the pink & lilac Violas by Opulence by Design Crafts. Not forgetting the Pansy Leaf which I think is a great foliage to pop in with any flower arrangement that you are using.


I've added glossy accents to the centre of the flowers and a little diamond Stickles glitter glue to embellish.

This card does actually fit into its envelope. Normally when I add flowers to my cards, I need to make an envelope, especially if it has to be posted and that's where I find the 12 x 12 plain cardstock pads from The Range come in really handy.

I have only used part of this brilliant kit to make my card but will be sharing another card next month that I have made using the rest of the kit, as I have made it for a special birthday, I need to hold onto it until then.

if you would like to check out Amanda's YouTube Channel for cardmaking, flower making and craft videos and tutorials you can find her gallery here:  


My flower box is getting a little full now, I think I need another one! I must admit, it is one of my favourite crafty things to do.


Have a great week,  whatever you have planned for yourself.

Happy crafting


Challenges:-

Sunday 10 September 2023

A Frosted Christmas cards

I have a few Christmas cards to share with you that I have been making from the gorgeous Frosted Christmas collection by Opulence by Design.


This Digital Florist Frosted Christmas cardmaking Kit comes as a 15 page PDF digital download featuring a selection of toppers, tags, sentiments, flowers, inserts and outserts for your cards (if your printer allows you to print onto card) and of course backing papers.

I used the  Tattered Lace Trifold die as a card base for my card and added the rose leaves foliage along with some extra fillers.


A smaller 6x6 inch Christmas card using the blue colourways and layering up the papers. 
In the centre of the flowers.

I have used Crystal Stickles glitter glue (which brings out the colour of the centres of the flowers). Once dry, I added droplets of glossy accents on top to give the appearance of little glittered crystals.


Finally a 7x7 inch Christmas card. I have used a poinsettia embossing folder with one of the plain backing papers. 

These Christmas roses are so pretty and they are flowers that can be used in your cardmaking all year round. 

I have only used a fraction of this kit so far, if you would like to check out Amanda's YouTube Channel for cardmaking, flower making and craft videos and tutorials you can find her gallery here:  https://www.youtube.com/c/opulencebydesign

I do love those kits, especially the flowers and the shading of the papers is fabulous, which means you will never run out.

I like to sit and cut out my flowers first whilst watching TV and when I am not making anything specific I may make a batch and put them in my flower box, it's always handy to have some ready.

Have a great evening,  whatever you have planned for yourself, it's certainly been a warm few days.

Happy crafting


Challenges:

Lets Craft & Create - ATG  (Won Top 3)
Daisy Chains - Dots & Stripes
Allsorts - ATG
Little Red Wagon - Square/ rectangle
CD Sunday - ATG 
Crafty Catz - ATG / Twist Ready for Christmas


Wednesday 16 August 2023

Shabby Chic Trinket Box

I have finally got around to decorating an mdf jewellery box a friend gave me some years ago. It has been sitting in a box waiting for some inspiration and when I saw this new Dimensional Dahlia collection by Opulence by  Design, it gave me the idea to use some of these beautiful papers as rice papers to decorate it.


The Collection I am using to upcycle my mdf box is the Digital Florist Dimensional Dahlias Cardmaking Kit by Opulence by Design. This is a 20 page downloadable PDF kit, with a mix of design papers, tags, toppers, sentiments and flowers.

My Epson Ecotank is great and economical for digital printing but a bit more sensitive when it comes to tissue paper/rice paper.

Nevertheless, it is happy to take printable sumi paper, which is what I had in my craft stash to print on. I attached the Sumi paper with a tape pen to a piece of A4 copier paper to feed it through my printer rather than using a removable adhesive spray, leaving a small border of copier paper adhesive free for my printer to pull it through.


The Sumi paper has a textured thread running through it which is lovely for background papers and has a great woven feel to it too. 


In order to make sure the colours did not bleed, I just left them to dry out for a few days. I would also recommend using a good quality decoupage glue. I used Mod Podge as that was what I had at the time but I would use another medium next time out of preference.


I painted all the areas that needed painting first, using a Sparkle Reinker pearlescent dye based ink in Kiwi by The Dreamees. Once Dry, I gave it a coating of Matte Mod Podge to seal it.  For a more shabby look, I lightly sanded all the edges of the box.


I then started to add my sumi/rice paper to the edges of my box, being careful not to add too much Mod Podge to start off with as once dry, I would go over the whole box to completely seal it.


Along the lid of the box, I've added metallic green microbeads, they just mixed in really well with this project.


On the lid of the box, I chose this design because I think these flowers are so beautiful and have added the single blooms to sit on top as embellishments, alongside the crystal berries but I needed to give my flowers some more texture to protect them.


I still printed on 120gsm Navigator paper) I first embossed the leaves with clear embossing powder, happy with how that looked, I added some iridescent embossing glitter to the veins of the petals and then covered the flowers with a layer of Mod Podge to give them a light vinyl feel to them that I could still mould them in my hand with a flower tool.


For the bottom of the compartments inside the box, I cut up some of the patterned paper. This box is a lot bigger than I had originally thought and think it will come in very handy now that I have given it a facelift.


The final thing to do was to go over it with wax, which is what I normally like to do, and for this project I used, Prima Art Alchemy Antique Brilliance wax in Lucky Clover and Prima Art Alchemy Opal Magic wax in Vintage Silk. In some of the pictures, you can just catch the shimmer from the Vintage Silk wax.

I like making my craft stash stretch further like any other crafter and having more options to use my craft stuff. It's also really handy to be able to just print off what you need sometimes.

I have really enjoyed working with this kit, especially using these beautiful papers as rice papers for the first time, which I will definitely be trying again.  

If you are interested in the link to Opulence by Design's Website, you can follow the link below including the YouTube channel where you will find lots of really inspirational card craft and some brilliant flower making tutorials that I have certainly made use of.


Have a great week whatever you have planned.

Happy crafting


Challenges:


Wednesday 2 August 2023

Floral Gothic Arch Birthday Card

I'm really excited to be a Guest Designer this month over on the Paper Funday Challenges where the challenge is an Anything Goes with an Optional Twist of The Great Outdoors.


For my daughter's birthday card this year, I thought I would go with something a little different. I started with an A5 card base using a piece of A4 Centura Pearl 300gsm snow white card stock by Crafters Companion.

I used a white acrylic mousse through a Pretty Script stencil by Pretty Gets Gritty and as this dries quite quickly I was then able to highlight the text and later fill in the background with a touch of Art Alchemy metallique rose gold wax.


Before I could add the gothic arch, it needed to be die cut a few times from white card and stuck together to form a substrate to add more mediums onto.  The Pretty Gothic Window die set by Pretty Gets Gritty also comes with a smaller window and a set of brick wall dies that are really handy for your projects. 

I painted my gothic arch first with white gesso and then added sand texture paste to give it a more aged look. I also rubbed in a little patina blue Art Alchemy antiquing matte wax to highlight the sand texture and to add some highlight to the arch.


I added a few of my bricks die cuts in white Centura Pearl card stock, I thought they looked like a rustic broken wall and I then started to add my flowers up the aged gothic arch. These are a mix of pink and blue dahlias from collections by Opulence by Design along with the Variegated ivy leaves.
I also made the rolled roses and added the smaller die cut flowers to add more volume.


I didn't think a birthday sentiment looked right on the front and quite often I don't add one if I don't think that there is a place for one, so I added a little 'with love' in the centre which fitted in nicely and I put a personalised sentiment inside to finish the card off.
The little droplets in the background of the card are glossy accent, I've also used it as dew drops on the petals of my flowers too.


Have a look a some of the great inspiration over on Paper Funday this month and why not enter the challenge too!

What have you been making? or have you just been enjoying spending time outdoors.
Have a great day whatever you have planned for yourself.

Happy crafting


Challenges:-
Beautiful Blossoms - Flowers 
Love to Scrap -ATG ( Top Pick)
Mix It Up - ATG
Allsorts - Anything but Square 


Tuesday 18 July 2023

Converted cookie Gift Box

I have a converted cookie gift box to share today.  Like many crafters, I tend to collect and keep 'things' that I think might come in handy one day and this particular cookie box from a pizza place enters my house regularly when my son is home from Uni.


This is the type of project that I really enjoy doing; making something out of nothing.


This is how my gift box started its life. I have saved a few of these that are clean inside, deconstructed and put away as they are a good size for a dimensional shaped cards, mdf or more cookies!!

I went through my Tattered Lace dies to see what delicate lace dies I had to fit on this box as I was sure that I had one for my flowers to sit on and I found the Nested Quatrefoil die set from the Winter Solstice collection that was the perfect size for this box.

I die cut the lacy detail from the lighter colour block paper from the Digital Florist Pansy Leaf Former Sheet by Opulence by Design and the solid shape from that beautiful salmon pink colour paper in the Digital Florist Ranunculus Flower Former Sheet.


I printed my flowers as usual onto 120 gsm colour document Navigator paper, which I like to use as it works well for me and then layered them up. They look quite different to the ones I made on the pearlescent paper.  I inked the edges with a violet rose sparkle dinky inky by The Dreamees and added some springtime Flowersoft to the centres of my flowers.


It was then just a case of building up the layers on top of my box. I edged my die cut toppers with my stardust gelly roll pen. I have a few of these as I go through them. It adds enough of a shimmer to your projects without too much glitter and without the mess of glitter.

I then added sisal, pollen head stamens, frosted berries and the variegated ivy leaves also by Opulence by design.  I like the different sizes on this sheet as they work so well to just poke into little corners of your project.  I think these Ranunculus flowers work really well on gift boxes.


A few 4mm mint pearls to finish off and my little cookie box has a new lease of life. I just have to decide what I am going to put in this one now.

If you are after some crafting inspiration why not pop over to YouTube and follow Opulence by Design. There are also some wonderful flower-making tutorials

Have a great week whatever you have planned for yourself

Happy crafting


Challenges:

Gothic Fairy Arch

I've finished my Gothic fairy arch and have a few pictures to share with you and I'm also going to add it to one of the monthly chal...