blog backbdrop

Saturday 28 April 2018

Fairy Door

One of the mdf projects I love to make is a fairy door. This project will be my third one (not counting my fairy and gnome memory books). This fairy door was made with Dreamees products.


The mdf fairy has been shimmered with a spectrum noir sparkle clear overlay pen


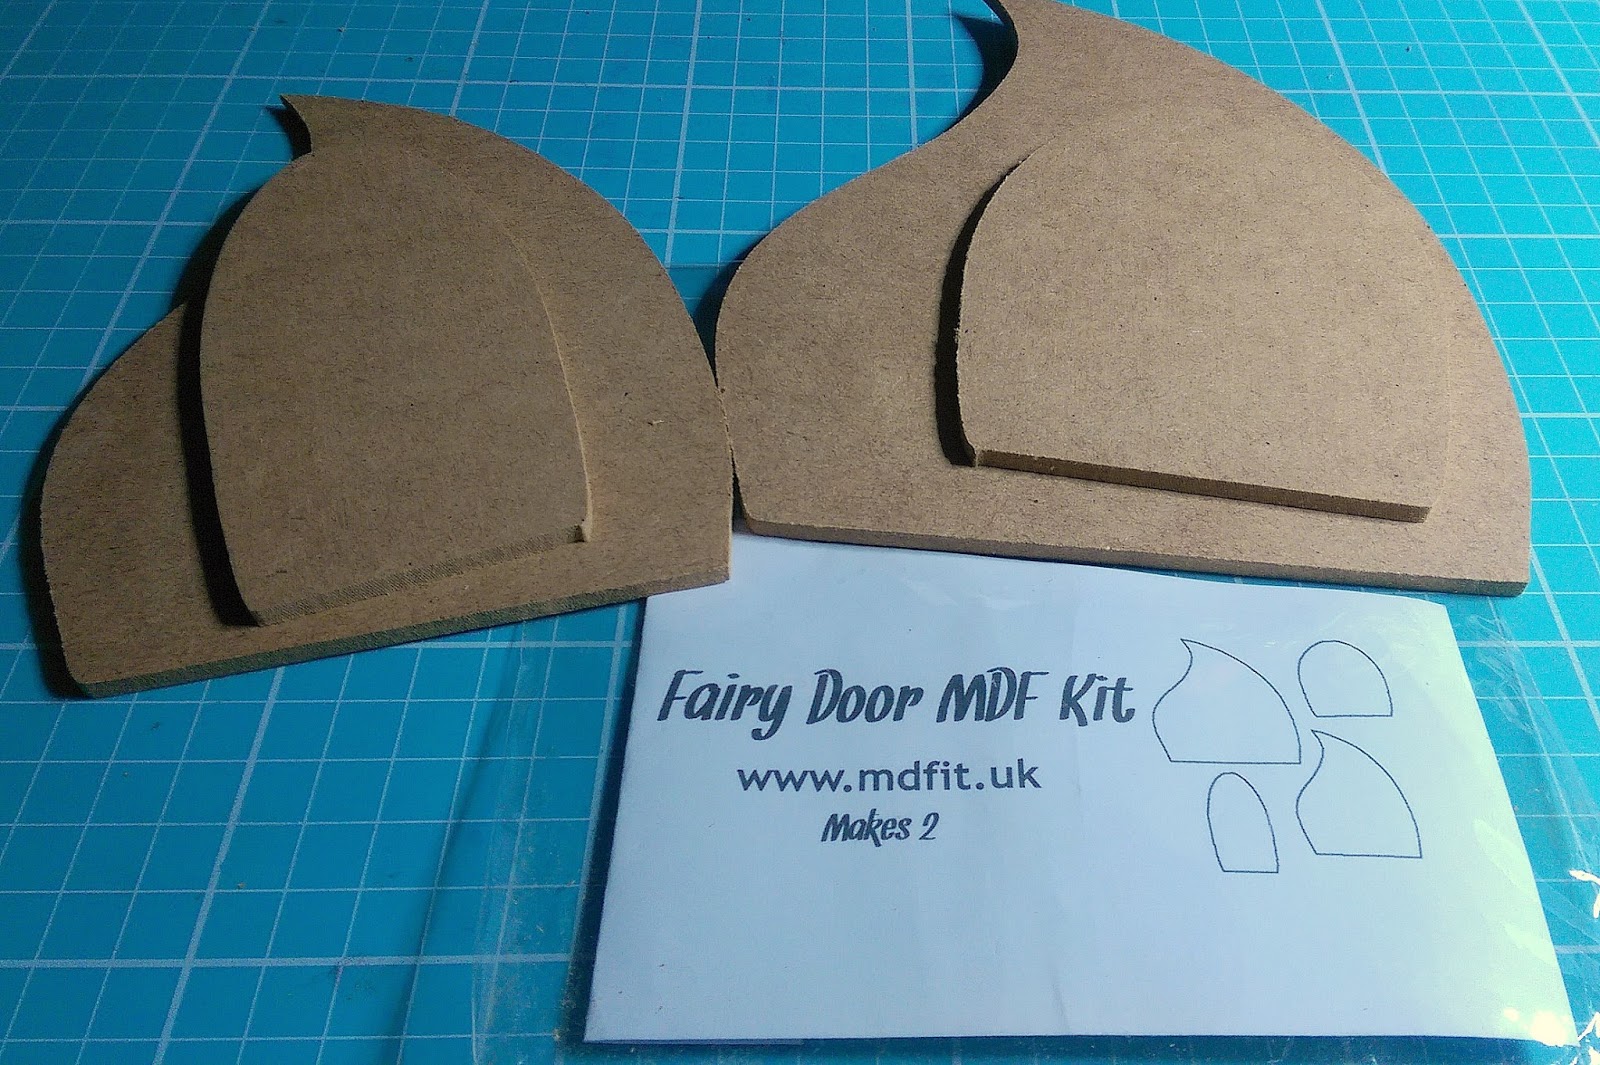
This set of Dreamees fairy doors were purchased at one of their workshops I went on and they came as a pack of two. I have made up the larger door.  The mdf is available direct from the Dreamees.  The very clever Jimmy Murray (MDFit) cuts all their mdf and if there is a specific piece you are looking for, he will make one for you.


This Textures cd by the Dreamees is a really good cd to have in your collection. There is a good selection of papers as well as texture ones and I think this specific wood paper is so realistic.
For the wooden panels on the fairy door, I used a piece of thick cardboard (from a box) and covered it with the wood panel papers along with the mdf pieces.  For the base, I used an mdf Dreamees shape from my stash, which was just long enough for the door to stand on.  I covered this with the pebble paper, which actually looks like crushed pebbles close up.


One thing I also like to do is edge the mdf pieces with a coordinating ink to soften the edges.  I used Tim Holtz distress ink in gathered twigs on all the pieces.


I stuck the pieces together using cosmic shimmer pva glue as its a good strong bonding glue.  I left the stand until the door was fully decorated.


The mdf fairy I sourced online (ebay to be exact).  They came in a pack of 10 (most of them I used in my garden as hanging mobiles from my eucalyptus tree).  I inked the edges of the fairy with some Tim Holtz vintage photo distress ink and then gave it a shimmer with a spectrum noir sparkle clear overlay pen.  This pen (comes in a pack of 3, widely available from Crafters Companion) is invaluable and I use it all the time. I would definitely recommend you invest in a set.  They also come in a fabulous range of colours.


I wanted roses climbing up one side of the door so cut 10 circles out of red card measuring 1 . 5 inches. I could have used one of my dies to do this but it was quicker to draw around the lid of a little pot that was handy and just cut them out.  I then cut spirals into the circles.  You don't have to own a quilling tool to twist the paper into a coil but it helps if your flowers are small as its less fiddly.  I just happened to have one which was a free gift from a craft magazine.  I used a little cosmic shimmer pva based glue to stick the base of them (to stop them unravelling too much)

.  


You can also see the pebble paper better in this picture.


Using some twine/wired raffia ( I purchased this big role from a floristry wholesaler.  It should last a while).  I wrapped it around a thin paintbrush to coil it before bending it to stick onto the fairy door.  I have used my glue gun to do this in the past but this time I just happened to use my cosmic shimmer pva based glue in tiny blobs.  It does dry clear but you just have to hold it in place a little longer to make sure it sticks well before moving onto the next section.

This wired raffia is perfect to make the door knocker also,  I then glued my twinkling fairy to the door.  Then I added my roses where I wanted them, along with some leaves punched from green cardstock just to all a little foliage.


Now I glued the base to the door and left it overnight just to make sure it formed a good bond.
The next day I added the finishing touches, which were a toadstool, ladybird, some little pieces of bark (I was given), a little acorn (I had picked up and kept) and a handmade by metal charm.  I also shimmered the stepping stones and acorn with my pen, for that early morning dew look.


Hope that you have enjoyed my fairy door walk through. Soon this fairy door will be off to its neww home.

Happy Crafting

Wednesday 25 April 2018

Mini Journal

I am doing a guest DT over on A Inky Mess  this month and have made my first mini journal for the mixed media ATG challenge,  which is sponsored by Gecko Galz this month.   Gecko Galz is offering a $25 spending spree as a prize for the winner on their online shop etsy.

My mini journal measures 3 inches x 2.5 inches.


I started with:-

  • a piece of black shoe box (this had a lovely vinyl feel to it) measuring 3 inches x 2.5 inches
  • some textured brown paper packaging
  • black acrylic paint
  • clear gesso


After I scored a spine on my mini journal cover I gave it a coat of gesso, adding the brown paper packaging and adding another layer of gesso before leaving it alone to dry overnight. (I did give it a little blast with a heat gun to start it off and then decided it would be best not to fiddle and let it dry properly).


Once dry I gave it a coat of acrylic paint and left it to dry overnight.  I will point out that I started this in the evening knowing it needed time to dry and did the same when I used the acrylic (less temptation to fiddle with it). The brown paper gave it a lovely texture.


Once dry, this was where the experimenting started. I used some old gold metallic gold gilding wax by Creative Expressions. The gilding wax really highlighted all the ridges in my journal cover and transformed it.  I really loved the look it gave it.


I decided on the following embellishment to decorate the cover:-
  • Royalty foiled layered stickers by Sticko
  • Vintage nostalgic epoxy stickers by Bottle Cap inc.
  • Metallic Mesh ribbon by Ribbonbox
  • Glittered hearts - made using a glue gun and a pink glitter glue stick


I teamed these with some tiny red gems for the crown and some red metal nailhead stickers


I used a mix of a cosmic shimmer strong pva based blue and pinflair glue gel to stick these down.


On the back, I used a pair of metallic copper feather stickers and made some pink glitter gems using the glue gun and the pink glitter glue stick.


Now onto the journal pages which were made up of a cream music sheet from an old music book purchased from a charity shop (the pages are lovely and thick) and a sturdy piece of cream card.

The sheets measure 2.5 inches x 4.5 inches and are folded down the centre. I chose a sheet that fortunately had some images on the back that would tie in nicely with my journal.


I used my Tim Holtz distress oxides from the brights collection to add colour to the sheets and the mini label and flower dinky dies from  Docrafts (Xcut).  I made two corner pockets and a larger pocket for the mini tags.


I used a mix of stamps some cute kitten stamps given to me and paw prints with a sentiment from the Dreamees clever cats along with a fishbone punch purchased in a charity shop.

On the tags, I used some little Inkadinkado stamps, a little glossy accent and a glitter pen I also used a Crafters Companion edging die on the pocket.  I have used my pearlescent dinky inkies to colour the girl and on the page to give a different finish to the distress oxides that I have used which give a chalky finish when dry.
I wanted to make use of these adorable stickers made for me by the very crafty Pauline Newton whom I swap ATCs with, in a craft group. I added some pearl drops, lace and a few die cuts to finish the pages.

I have used sequins, stickers, dies, gems and ribbon flowers on these pages.


For this page I have used the music paper which was already cream but as the paper is quite thick, it takes the ink very well, I have also used the Inkylicious stamp Hope with a balloon and Sheena Douglass's Music & Dance stamps.  Although it's not clear from the photo the girl has been coloured with The Dreamees pearlescent inks.

I have filled the pocket with tiny Dreamees flowers heat embossed onto red pearlescent paper from their stylish shoes stamp set. Also, a die cut fairy, butterfly, foliage and red pearl drops.I have used a few of the music stamps of Sheena Douglass Music & Dance collection

On these pages I have used dinky vintage car and plane stamps by CArt-Us and a nature stamp (trees) by Artemio. A little background stamping using Visible image Mesh-ellaneous and Crafty Individuals distressed diamonds background stamp. Ive used Tim Holtz distress oxides brights collection to colour the cards and finished off with a little glossy accent and gold pearl drops.

For these pages I have used an  Inkylicious photo negative stamp, and old London issued stamp and Debbi Moores metal magic onto a nature red rubber stamp set.


Metal Magic is used with a clear versamark inkpad and when heated, enables you to create your own metal embellishments using your stamps or by pressing shapes into the heated granules to make an impression before it sets hard. I have used gold but check out the link for alternative colours.


Once all the pages were done I stitched them together 


I then added a mini spine of black card to hold it all neatly together using pinflair glue gel and left it to stick over night.


Once stuck firmly ( I love pinflair glue gel gives a very firm, rubbery, clear adhesion that is also flexible) I stuck the book to the spine of the journal using more of the same glue, leaving it to dry.


I really enjoyed making this mini journal and because its dinky you can you lots of little stamps and embellishments that you have in your stash.  Just take it a page at a time.  I hope you've enjoyed my tutorial.


Don't forget to enter the challenge with a chance to win some crafty goodies from Gecko Galz and have a look at their shop on etsy. The monthly challenge runs from 25th of every month.


Happy Crafting

Also entered into Crafters Castle -  ATG Mixed Media challenge


Easter Cards

I have a few Easter cards that I'm sharing today and I've been using the Signature Series Digital Florist Everything Anemone Cardmak...