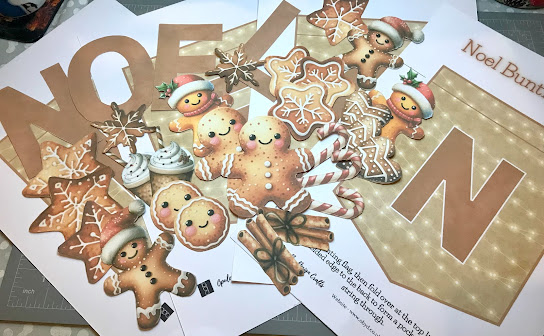
I created my bunting using the Christmas NOEL bunting Kit - PDF Digital Download from Opulence by Design Crafts.
On my desk is the 10 page digital download kit that I printed onto 180gsm smooth card from my craft stash. I intend to use the rest of these wonderful embellishments for tags. These are beautiful for card making too as there is an A4 design sheet in the kit that can be used for your backing paper.
I have missed a few of the weekly WOYWW group link ups (what's on your work Wednesday) over on Sarah's Craft Shed, so I've got some catching up to do and I am very late with my post today.
WOYWW is a weekly blog hop where we all have a look at look at what everyone has been up to. Follow the link above for more information.
I'm so happy that Amanda has designed some festive bunting as this downloadable kit can be used for so much more. If you are a Patreon member subscribing to Opulence by Design Crafts you have probably already noticed that this kit is part of your free club members gift.
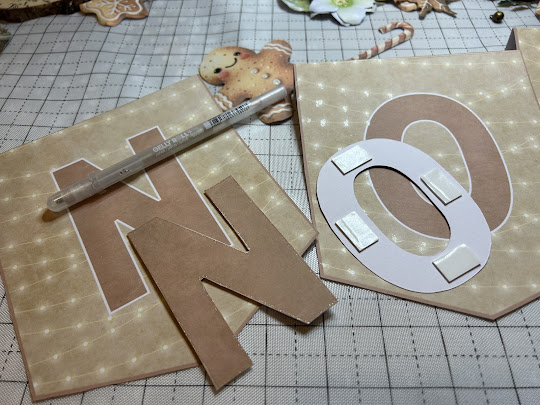
I highlighted all the little fairy lights designed in the background for the flags with a Spectrum Noir clear overlay sparkle pen for a little shimmer and then edged the flags with the pen too.
Next, I have added the additional lettering to layer up and added some foam pads to the back for a little dimension. I also edged the letters with my trusty stardust Sakura gelly roll pen to add some twinkle and highlight.
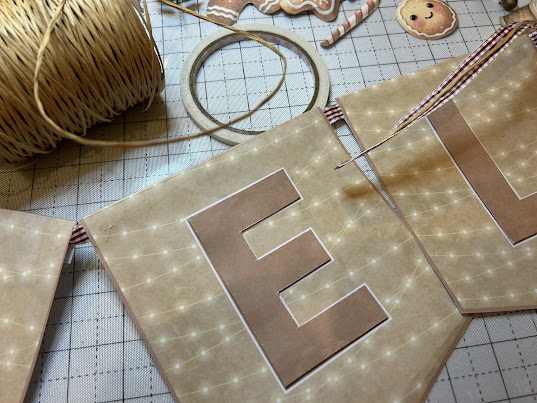
Then, I added my ribbon. The bunting flag has a top line to create a small hem, when folded back you just need to add glue/double sided tape to create a small pocket to thread your string chosen ribbon through it.
For the area where I will be displaying this I like to add natural bindwire which I attached to my ribbon using a glue gun. It does take a little more time but it's a great way to keep your projects in shape especially when you have doors that keep opening and causing your bunting to flap about......those little things.
I really enjoyed making this and it was an easy project to put together. I added glossy accents to these adorable gingerbread cookies and for their smiles and around the piped edges I used a Sakura clear glaze gelly roll pen for the fine detail. On my travels I have often found the best deals on these pens have been in the little craft/art shops for these pens as sometimes online, the postage can be the same price for just one pen.
I also added some of these white and green helleborus from Opulence by Design Crafts along with their rose leaves. One of my many favourite flowers and this one is an easy one to cut out too, very forgiving if you struggle with cutting out and so beautiful. I just added a few drops of glossy accents and let them set in the centre like tiny little clear globes and it really highlights all that detail of the design.
I have used foam pads and my hot glue gun to stick everything down. The sprigs of die cut holly are from John Next Doors christmas collection Helens Holly die set.
For the centre of my bunting I have gone a little cookie crazy. I've glazed the heart shaped cookies with my Sakura clear gel pen but for the star shaped cookies I have added some Stickles glitter glue in stardust. I have gently moulded the cookies with my fingers and added a little ink around the edges of the gingerbread and cookies for that just cooked look too. I also added some little vintage bells with hot glue.
I tucked a gingerbread latte embellishment at both ends of the bunting with a tasty cookie in front, very apt for this time of year, especially as it seems to have got very cold all of a sudden.
I have lots of lovely embellishments leftover from my kit to make some great festive tags too.
If you are interested in more inspiration and demos from Opulence by Design, you can follow her on Youtube
Cutie Pie - Special occasions - Prepping for Christmas!
Pammies Pinkies - ATG - Honorary Mention


