blog backbdrop

Showing posts with label WOYWW. Show all posts

Wednesday, 8 January 2025

Cute Paws Birthday Cards - WOYWW

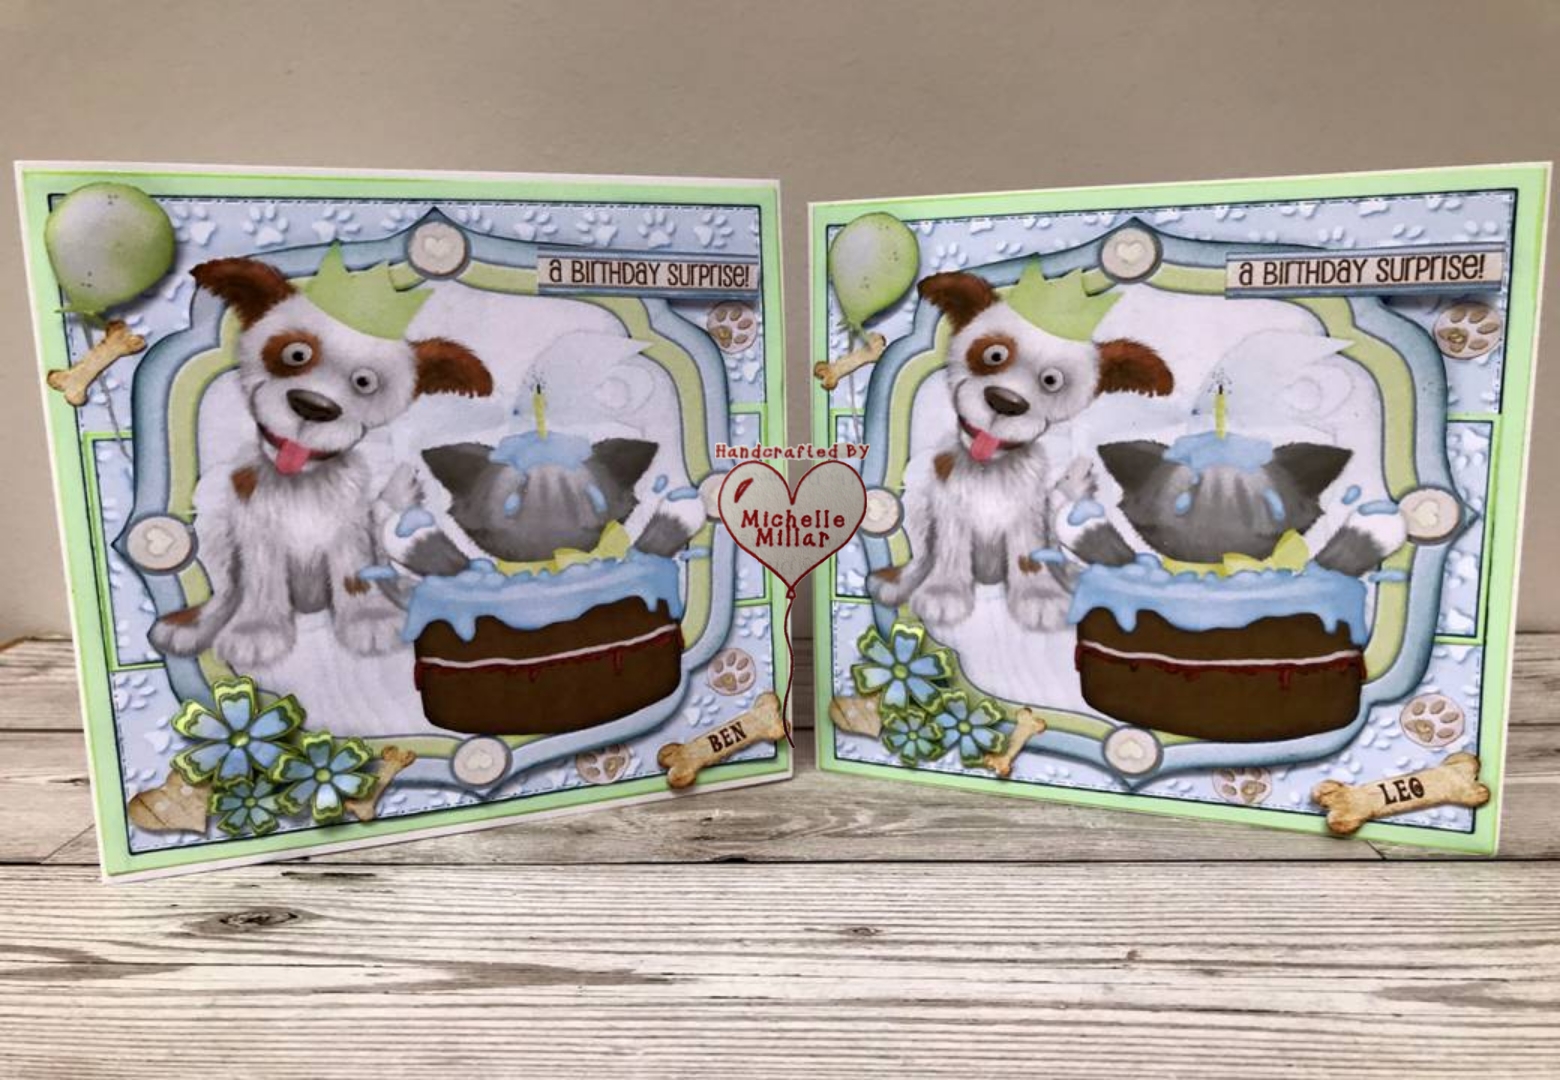
Today I am sharing a pair of birthday cards made earlier in the year for twins.


I'm also joining up with the weekly WOYWW group link up (what's on your work Wednesday) over on Sarah's Craft Shed, so I've got some catching up to do as usual. 

WOYWW is a weekly blog hop where we all have a look at look at what everyone has been up to. Follow the link above for more information.


So on my desk, I have downloaded and cut out one of files that I had called Cute Paws from Debbi Moore Designs  This particular download was from one of Debbi's weekly Treasure Hunts which she has run on her Facebook lives for the past few years to inspire crafters to craft and share.

Every week you can download a free project using the code from the Treasure hunt on the Facebook Live and collect some beautiful projects to craft with.

I have used this one a few times and sometimes when I need a card,  I don't need to look to very far but my collection of varied downloads which I can mix and match to suit what I need, which is how I like to craft these days.


I have used 6 inch white card bases, Sakura sparkle pens and glossy accents to highlight and add texture.

I edited the bones with the boys names and then mounted them on foam pads. I like the fact that I can resize the elements that I choose to use and only print off what I need.


I thought these images would look great inside the cards too.


This 6 inch birthday card was made more recently using the same design.


and another cute pup inside the card too.

During the summer, we came home to find this little robin bobbing abound on the lawn in our back garden, so he was named 'Bob!' 


Choosing to have a snooze on the lawn perhaps wasn't the safest place with so many cats around that would find him a tasty treat, let alone the sparrow hawk who frequently visits but we certainly enjoy to see the robins pass through our garden.

Have a great day,  whatever you have planned for yourself.


Happy Crafting


Wednesday, 11 December 2024

Birthday Card - Bright Lights Isabella Cardmaking Kit - WOYWW

I'm sharing another birthday card made for a friend and  I have used the travel the world through paper Bright Lights - The Isabella Collection mini download kit from Opulence by Design Crafts.


This digital download kit has two beautiful toppers, a selection of sentiments and 4 vibrant backing sheets to craft with.


I'm late today joining up with the weekly WOYWW group link up  (what's on your work Wednesday) over on Sarah's Craft Shed, so I've got some catching up to do as usual. 

WOYWW is a weekly blog hop where we all have a look at look at what everyone has been up to. Follow the link above for more information.

This is a view of how my desk started. I normally think about what I want to print off first and what paper I am going to use. I've been looking into textured papers and card to print onto as not only does this work out cheaper long term but it means that I have what I want onhand instead of having to search for it for a project. 

I printed the topper on 160gsm smooth paper and also mounted the topper onto a piece of die cut cardstock. These beautiful papers were printed onto some of Debbi Moore's double sided pearlescent paper. This paper is quite sturdy and off white in colour, also lovely to print onto. 


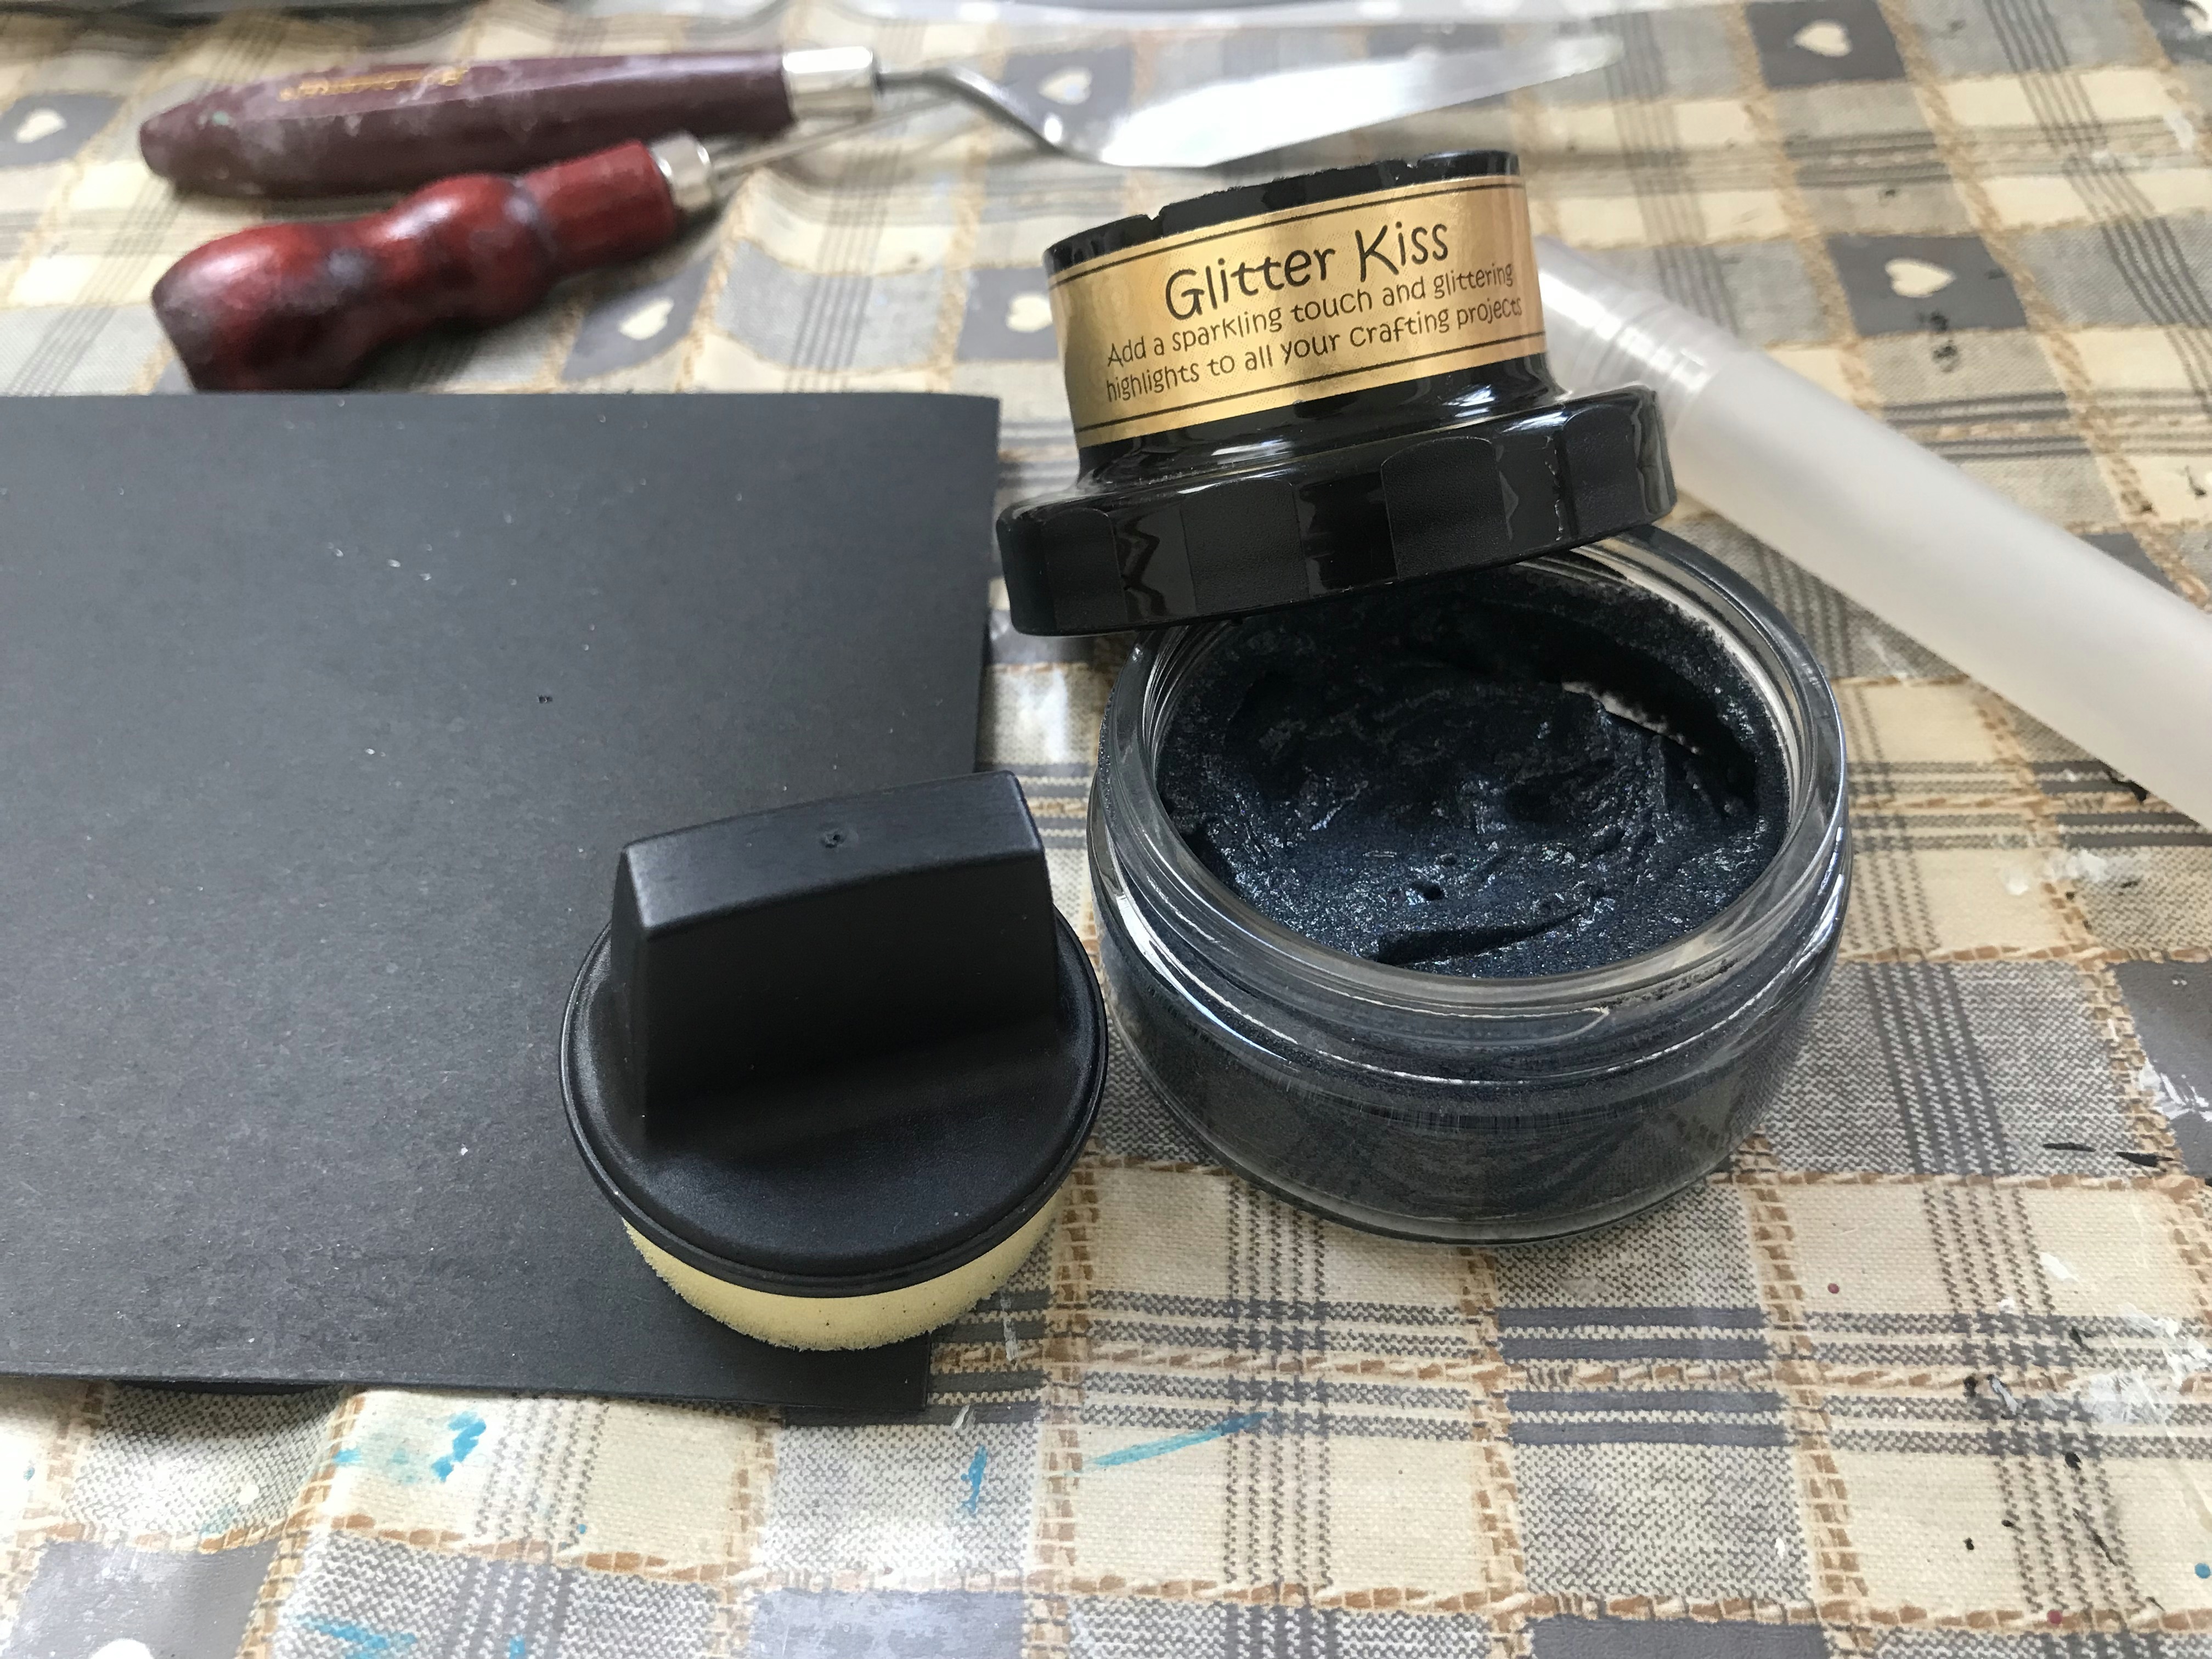
To make my glitter topper I swiped Cosmic Shimmer's Glitter Kiss in Midnight Sparkle across a piece of black cardstock. 

This craft product was another of my lucky finds in a charity shop. It was 50p and when I opened it I could see that it had gone hard but as I knew it was a water based product, I hoped that it could be rejuvenated. It was certainly worth taking a chance on for 50p and I was glad that I did!


This product dried quite quickly leaving a lovely sparkle, although I did speed it up with my heat gun.


As well as a growing collection of Stickles glitter glue for my flowers, I do love my  Sakura Stardust pens too. I use these a lot to highlight the edges of my projects.


My friend loves her flowers, so I wanted to fit a few on and had a look through my box of flowers to see what I could use to compliment the topper and these lush papers.


I picked out the Orange Nasturtium, the pink dahlias from the Happy Birthday Cardmaking kit, The Blue Marguerite Daisy Flower, and the golden leaves from the Steampunk Florals Collection. I didn't use the feathers in the end.

I added a touch of lemon Flower Soft to the centre of the Marguerite daisies and a mix of Stickles glitter glue/glossy accent to the centres of the other blooms.


I added a bright envelope with some more of the paper that I had leftover to coordinate with the card.

If you want more inspiration and demos from Opulence by Design, follow the links below. Amanda is a very talented designer and has a wide selection of kits and crafting sheets that can be mixed and matched with your own crafty stash.


Have a great day, whatever you have planned for yourself.

Happy Crafting


Challenges:-

Wednesday, 20 November 2024

Christmas Bunting WOYWW 27

I'm sharing my Christmas NOEL bunting that I have just finished making and is now ready to replace my seasonal Autumnal one for December.


On my desk is the 10 page digital download kit that I printed onto 180gsm smooth card from my craft stash. I intend to use the rest of these wonderful embellishments for tags. These are beautiful for card making too as there is an A4 design sheet in the kit  that can be used for your backing paper.

I have missed a few of the weekly WOYWW group link ups  (what's on your work Wednesday) over on Sarah's Craft Shed, so I've got some catching up to do and I am very late with my post today.
WOYWW is a weekly blog hop where we all have a look at look at what everyone has been up to. Follow the link above for more information.


I'm so happy that Amanda has designed some festive bunting as this downloadable kit can be used for so much more.  If you are a Patreon member subscribing to Opulence by Design Crafts you have probably already noticed that this kit is part of your free club members gift.

I highlighted all the little fairy lights designed in the background for the flags with a Spectrum Noir clear overlay sparkle pen for a little shimmer and then edged the flags with the pen too.


Next, I have added the additional lettering to layer up and added some foam pads to the back for a little dimension. I also edged the letters with my trusty stardust Sakura gelly roll pen to add some twinkle and highlight.


Then, I added my ribbon. The bunting flag has a top line to create a small hem, when folded back you just need to add glue/double sided tape to create a small pocket to thread your string chosen ribbon through it.

For the area where I will be displaying this I like to add natural bindwire which I attached to my ribbon using a glue gun. It does take a little more time but it's a great way to keep your projects in shape especially when you have doors that keep opening and causing your bunting to flap about......those little things.


I really enjoyed making this and it was an easy project to put together. I added glossy accents to these adorable gingerbread cookies and for their smiles and around the piped edges I used a Sakura clear glaze gelly roll pen for the fine detail. On my travels I have often found the best deals on these pens have been in the little craft/art shops for these pens as sometimes online, the postage can be the same price for just one pen.

I also added some of these white and green helleborus from Opulence by Design Crafts along with their rose leaves.  One of my many favourite flowers and this one is an easy one to cut out too, very forgiving if you struggle with cutting out and so beautiful. I just added a few drops of glossy accents and let them set in the centre like tiny little clear globes and it really highlights all that detail of the design.

I have used foam pads and my hot glue gun to stick everything down. The sprigs of die cut holly are from John Next Doors christmas collection Helens Holly die set.


For the centre of my bunting I have gone a little cookie crazy. I've glazed the heart shaped cookies with my Sakura clear gel pen but for the star shaped cookies I have added some Stickles glitter glue in stardust. I have gently moulded the cookies with my fingers and added a little ink around the edges of the gingerbread and cookies for that just cooked look too. I also added some little vintage bells with hot glue.


I tucked a gingerbread latte embellishment at both ends of the bunting with a tasty cookie in front, very apt for this time of year, especially as it seems to have got very cold all of a sudden.

I have lots of lovely embellishments leftover from my kit to make some great festive tags too.

If you are interested in more inspiration and demos from Opulence by Design, you can follow her on Youtube

Have an enjoyable evening, whatever you have planned for yourself.

Happy Crafting


Challenges
Cutie Pie - Special occasions - Prepping for Christmas!
Pammies Pinkies - ATG  - Honorary Mention


Wednesday, 2 October 2024

Pink Orchid Get Well Card WOYWW

 I'm Sharing a 6 x 6 inch get well card today that I made using the Cymbidium Pink Orchid Arrangement Topper Sheet from Opulence by Design Crafts.


I'm linking to the weekly blog hop for 'What's on my workdesk Wednesday' (WOYWW), where we all see what everyone has been doing. If you'd like to know more about it, please visit Sarahscraftshed.co.uk. This week marks their 800th week.


On my desk is everything that I collected to make my card. As I do not have a craft room and I find it too heavy to keep moving my die-cut machines around, I find it easier to cut what I need upstairs and then bring what I have done in a folder down to where I am crafting.

I used John Next Door's Celtic Frame Maker die set  (5 3/4 Frame Maker). John's products can be purchased directly from The Art of Craft.  He designs some gorgeous collections at a very good price range.

I also used the free digital download paper from Opulence by Design Crafts Watercolour Wonders Lemon & Strawberry Cheesecake Wash as I thought it would go perfectly with these beautiful orchids on the topper sheet.

The green colour block paper has also come from one of the collections along with the pastel pink layer, I used for the base of the frame. (this was from the Ice Queen Poppy Collection)

and a few twiggy stems from one of my Tattered Lace collections that have been die-cut in pink cardstock.


I thought these Orchids were just beautiful when I saw them and the delicate Celtic frame dies would be the perfect die set to arrange my card around.


To create my floral embellishments, I used the orchids from the same topper sheet as they were exactly what I needed, along with some foliage. I also used yellow Stickles glitter glue in the middle of my blooms with a Sakura clear glaze pen.
There was a selection of sentiments on the base of the Topper Sheet to coordinate with your project or keep for another one.


The ivy leaves are a very handy foliage to add to your project and I find it quite easy to fussy cut Amanda's flora and foliage. There are quite a few free downloads on her website too and the papers certainly come in handy when you can add them to a project like this.

If you are interested in more inspiration and demos from Opulence by Design, you can follow her on Youtube

I have also managed to finish off my Autumnal wreath.  These are all the lovely banners and embellishments that I printed off.


Shabby Art Boutique have some fabulous downloadable printable crafts that you can subscribe to and then download for free. They are ideal for your journals, scrapbooking etc..
Quite productive for me! I think I need to lie down now ha ha!
Have a great day,  whatever you have planned for yourself.

Happy Crafting


Challenges:
A Perfect Time to Craft - AG   -  2nd Prize Winner


Wednesday, 25 September 2024

Tink The Bear Birthday Card WOYWW 799

Sharing a birthday card that I have made for my friend's daughters birthday using the Tink The Bear Cardmaking digital download kit by Opulence by Design Crafts.


I have gone back to using 6x6 inch card blanks for quite a few of my cards as I find it is also a good size for my stamping projects too.


I'm linking up to the weekly blog hop for 'What's on my workdesk Wednesday' (WOYWW), where we all see what everyone has been doing. If you'd like to know more about it, then please visit Sarahscraftshed.co.uk

I have selected what I am going to use on my card, although I did change my mind on the embellishments once I started to put the card together. This is such a pretty card making kit and great value for money too. There are a good selection of toppers too as well as plenty of flowers in this 10 page download kit.


For this card I did reduced the size of my blooms and I think they are so pretty. This flower with its little leaf was really easy to cut out, and I didn't need to add any extra foliage, its those little extras that make a difference.


Between the layers I added a little Angelina fusible fibre in raspberry sparkle, just for texture as the colours went so well with the kit. I have had this for years and you can still purchase it from Clevercut along with fusible film.

I changed my embellishments to cream glitter card and added stickles glitter glue to the centre of my blooms.

I also decoupaged the flowers on the topper and added one of the sentiments onto my topper using My Craft Studio.


I thought I'd end this post with a pic of the squirrel chilling in the garden on our bench eating his nuts on a sunny afternoon ( taken last month).

Have a great day,  whatever you have planned for yourself.

Happy Crafting


Challenges

613 Avenue Create - AG -    Top Rocker

Wednesday, 18 September 2024

Krishna Birthday Card WOYWW 798

Sharing a birthday card commissioned for a friend and I based my card around their  chosen image.


I'm linking up to the weekly blog hop for 'What's on my workdesk Wednesday' ( WOYWW), where we all see what everyone has been doing. If you'd like to know more about it, then please visit Sarahscraftshed.co.uk

So on my desk, I collected a mix of what I thought I might use for this project. I die cut a lacy frame from a Tattered Lace die set in gold mirri board, and used one of the papers from a retired digi collection by Debbi Moore Designs - Jewel of India, which I also die cut using another die from the Fine Filament Portofino collection.


I thought the satin blue textured card would bring out the blue tones in the image and I 
also cut out some of the embellishments from the CD that I was hoping to use too.


I also found some orchid die cuts in my crafty stash that I thought would go well with my card and lift the colours too. I added a few of the jewel embellishments in between the foliage and a little 'ohm' symbol in the corner.  Finally, I added small gold pearls around the edge of the card.


As this was a special birthday card, I wanted the envelope to look as special too so I used a patterned cardstock and the paper embellishments to decorate along with my shimmer pen and glossy accents.


I also added an insert on the inside of my card, using one of the patterned papers as a watermark so that a message could be written on it.

I'm really glad the recipient enjoyed her card. This is one I really enjoyed making.
Have a great day,  whatever you have planned for yourself.

Happy Crafting


Challenges:


Boutique Birthday Card

I made a card for my daughter's birthday earlier this year, which was inspired by samples from this kit. When you make cards for family ...