blog backbdrop

Showing posts with label birthday card. Show all posts

Saturday, 22 August 2026

Hollywood Glamour Birthday Card

I made these birthday cards a few months ago, ahead of time, as I knew I wouldn't be crafting for a while.


For my card base, I used a 7 x 7" card base to create this shaped card and layered these beautiful papers onto gold mirri card.


These fantasy flowers are beautiful and ideal for foiling too; there are samples of them online. I used my Sakura Twilight Gelly Roll pen around the edges of my blooms ( I use this pen all the time) and added gems in the centres. These flowers have their own faux gem centres that can be blinged up with a little glitter glue.


The Topper was printed onto glossy cardstock.  I used just one piece of my chosen backing paper for the card (careful trimming a little off the card base and maximising the paper left for the panels meant I used all the paper and didn't need to print more off). 

The backing paper was printed on 140 gsm Pure Print Paper from Craft Master.
I bought a pack when it was on offer from Highlight Crafts, and wanted to see whether it was as good as everyone told me it was. I must admit, I was impressed with the quality and choosing a detailed design paper was a good way to test that.


I have also used an iridescent glitter pen to add some shimmer to areas of my paper (this was a Crafters Companion one that still works) and added some foliage - a few rose leaves and fern leaves.  This is my favourite of both cards and designs.


The topper was printed on glossy cardstock, and this time I used a sheet of Pink Frogs white Pearlescent paper to print the backing paper for my card.  This paper is really sturdy and is fantastic quality. It leaves a gentle shimmer on your paper and was a bargain at £4 when I bought it!

Experimenting with different mediums to print on can really extend how you use your digital downloads; sometimes it's trial and error to see what works for you, and I have found packs of unopened printable glossy card in charity shops, which are always handy to have in your stash.


I added gems and a little shimmer to my flowers along with the fussy cut single rose leaves. Again, I've edged these blooms with a Sakura Twilight gelly roll pen. 

There are quite a few of these beautiful flowers in this range now to complement your projects; the tiny flowers were die cut from pearlescent card.


I made a dimensional envelope for both cards, and as they were hand delivered, there was no worry about them getting squished in the post.

Thanks for stopping by today to view my little crafty space. 

Opulence by Design Crafts has a fantastic variety of digital download kits for your crafty needs, including a mini blog for inspiration. They also have a variety of crafting booklets for those who can not print their crafty designs. I use a lot of their designs because I really enjoy crafting with them.

Have a great weekend, whatever you have planned for yourself.

Happy Crafting


Challenges
Creative Creases - fun folds
Creative Fingers - AG


Sunday, 26 July 2026

Rebel Girl Birthday Card

 I'm sharing a birthday card that I made a few months ago using a mix of these fantastic digi images by Polkadoodles.


Polkadoodles has a fantastic selection of stamps and digi stamps, and their MDF collection is also very inspiring for your crafty projects. 

One really useful tool I purchased from them was a magnetic die wand for picking up your fine metal dies; it certainly saves splitting your nails.

It's worth checking out their YouTube tutorials, which are always really handy when you are looking for crafty tips and inspiration.


I do love this collection of cute girls called Rebel Girls, which can be downloaded individually, and there is also a 'rebel messages with attitude pack'  that is brilliant to add to your cards and projects. They also have some great quirky quips, just perfect for teenage cards and are easy to resize too. 

For my card, I have just gone with the birthday quote. 

As you know, my colouring skills have never been that great, so I try to get away with the minimum. I've added glossy accents to her boots and sunglasses.

I have also used the Funky Flower Friend stamp along with the matching Colour & Create Stencil.  This is a brilliant little set. Not only do I love this duo flower design (there are a few of these online), but the neat little stencil fits perfectly over the flowers for you to ink through with your chosen inks, and in my case, I used distress oxides. There is even a small background stencil included.

I stamped and cut out the tiny daisy like flowers, which are so cute and make great fillers in your card projects. They have just had some glossy accent added to the centres to add some texture.

I created a background for my card using distress oxide inks and one of Durty Gurty's stencils.


I added a little shimmer to the flowers with a glimmer pen and glossy accents to the centre of the large flower to accentuate the pollen.


Just a few crystal gems to finish my card off.  In my craft journal, I've added a few of these Rebel Girls to the dividers too.

I've been quite organised so far this year, getting some cards made ahead of time and finishing a few projects, as I won't be able to craft for some time, and that goes for gardening too!

Although with this heatwave, I can't see much of that going on anyway. So much devastation has been caused globally with the rising temperatures as it is.

Thanks for stopping by today to view my little crafty space.
Have a great rest of your weekend, whatever you have planned for yourself.

Thursday, 12 February 2026

Birthday card

 I'm sharing a birthday card that I made for a friend's birthday.


Any leftover handmade flowers from my projects go into my flower box below and sometimes I will just sit and make flowers whilst watching TV. This also saves time and makes it easier for me to plan projects when I have some flowers made up.


I would be interested to hear how other crafters file their digital downloads for crafting.
With a paper kit, you can see what each one is, but with a digital download, especially in PDF format, it is just a file with a name that doesn't take up space in your craft room.

I enjoy all the benefits of crafting with digital downloads, but I also want to know what is in each kit without having to open each file to search for a particular paper or topper that I may want to use, especially as I have so many files from various designers.

So, what works for me, as I am a visual person, is that I have a craft journal with a snapshot of each kit. At least that way, I have a pretty good idea where a particular paper topper is without searching my hard drive

Sometimes you forget some of the beautiful designs you collect along the way and just haven't had time to create with.

It may sound like a laborious task, but I have been doing this for quite a while, and each time I get a download kit,  I just add it on.  You can just see part of a page above.

I have also done this with just my flower dies. I cut them out when I buy them and place them on an A5 page, which goes in one of my craft journals. It also encourages me to make more use of what is in my craft stash.

This particular kit I am using today is one of those I have been meaning to use from Opulence by Design Crafts. It was a member's gift for Patreon users and is the Perfect Panels Set Petal Perfection Kit, which was released toward the end of 2024, and it was designed as a card sketch kit.

It's such a pretty kit, and I have only used a few of these papers, which would also look beautiful printed onto rice paper for other projects.


These roses were left over from a previous project, and I used the digital florist - All eyes are on me rose, along with these little flowers from the Steampunk Florals collections - I've added gold Stickles glitter glue to the centres of these blooms.


I thought these flowers would work well with this beautiful kit and die cut the largest panels for my topper. The rest of the panels I have saved for another project.

I used my clear glitter shimmer pen to highlight areas of the backing paper, and also used my Sakura twilight gelly roll pen to edge the layers of my card.  I normally do this as it leaves a fine iridescent shimmered edge on the layers and is also great for highlighting.

I've also made a boxed envelope for my card, which will be hand delivered.


Thanks for stopping by today to view my little crafty space.

Opulence by Design Crafts has a fantastic variety of digital download kits for your crafty needs, as well as a mini blog for inspiration, too. They also have a variety of crafting booklets for those who can not print their crafty designs.

Have a great week, whatever you have planned for yourself.

Happy Crafting


Challenges


Thursday, 31 July 2025

Birthday card Clematis

 A  birthday card with some blooms to share today that I had made for my sister-in law.


For my card I have used the Chalky Wonders Clematis PDF digital download kit  by Opulence by Design crafts.


There are a lovely selection of flowers and leaves in this beautiful kit and I decided to print one of my layers on a piece of satin paper.

It is worth having a play with your printer settings and mediums that you print on to see the different results that you get.

Saying that, I have an Epson Ecotank and hadn't intended to change the printer settings when it came to printing the flower sheet, but when I looked a little closer at these printed flowers,  I actually liked the darker hue to the blooms and decided to go with it for my project even though this is not the original colour on the design.


I've edged my blooms with a little purple ink to add some tone and green for my leaves. They have been gently shaped to look more natural.

I've also added  some 1cm pink organza ribbon and blue string pearls. The flowers have just had a touch of shimmer from a clear overlay sparkle pen (I think it was one of Crafters Companions brush pens).

Checkout a few of the links below for Opulence by Design Crafts for some great inspiration on their designs and tutorials too. They have a varied selection of kits and crafting sheets and a freebie section that you might what to download too.  Beautiful designs that makes crafting easier.


I do love a clematis. I have three in my garden now, pale pink, cerise and this vibrant purple one around my arch.


I love to seeing the bees going from flower to flower and was fortunate to catch the broad-bordered bee hawk moth  flying around my garden early one evening, they are really quite striking.

Areas for nature to thrive in are becoming smaller unfortunately.
Have a great rest of the week, whatever you have planned for yourself.

Happy Crafting

Saturday, 28 June 2025

Birthday card - Pom Pom Posy

I'm sharing another birthday card in between projects and this one has been made for a friend.


I chose this particular topper from the Spring Pom Pom Posies - Olivia digital download cardmaking topper sheet by Opulence by Design Crafts because it reminded me of my friend when she was a little girl. Time flies and now she has a family of her own.


I also decided to use two of the papers from the Inspired by Giverny Gladiolas dancing in the moonlight digital download cardmaking kit as not only in my opinion does this gorgeous kit have a varied selection of soft textured designs but a lot of these papers would mix perfectly with your toppers to add dimension to your cards and projects.

Sometimes it can be difficult to find the right shade of paper/cardstock for a project  and then it when you do find it, it goes out of stock.


To decorate, I added  some little artificial flowers along with a few variegated ivy leaves from Opulence by Design Crafts. I used coloured paper and a small little flower punch to create the little flowers.

Checkout a few of the links below for Opulence by Design Crafts for some great inspiration on their designs and tutorials too. They have a varied selection of kits and crafting sheets and a freebie section that you might what to download too.  Beautiful designs that makes crafting easier.


I've also been busy in my garden. Sorting my little wildlife pond was a big job  as it hasn't been done in a very long time and I'm glad its all done now. I even discovered a family of frogs under my reeds which was a bonus.


One of the smallest frogs on on some barley straw.
I must have put back about 100 ramshorn snails which keep the water clear, considering I started with 13, they have been thriving.

Have a great day, whatever you have planned for yourself.

Wednesday, 8 January 2025

Cute Paws Birthday Cards - WOYWW

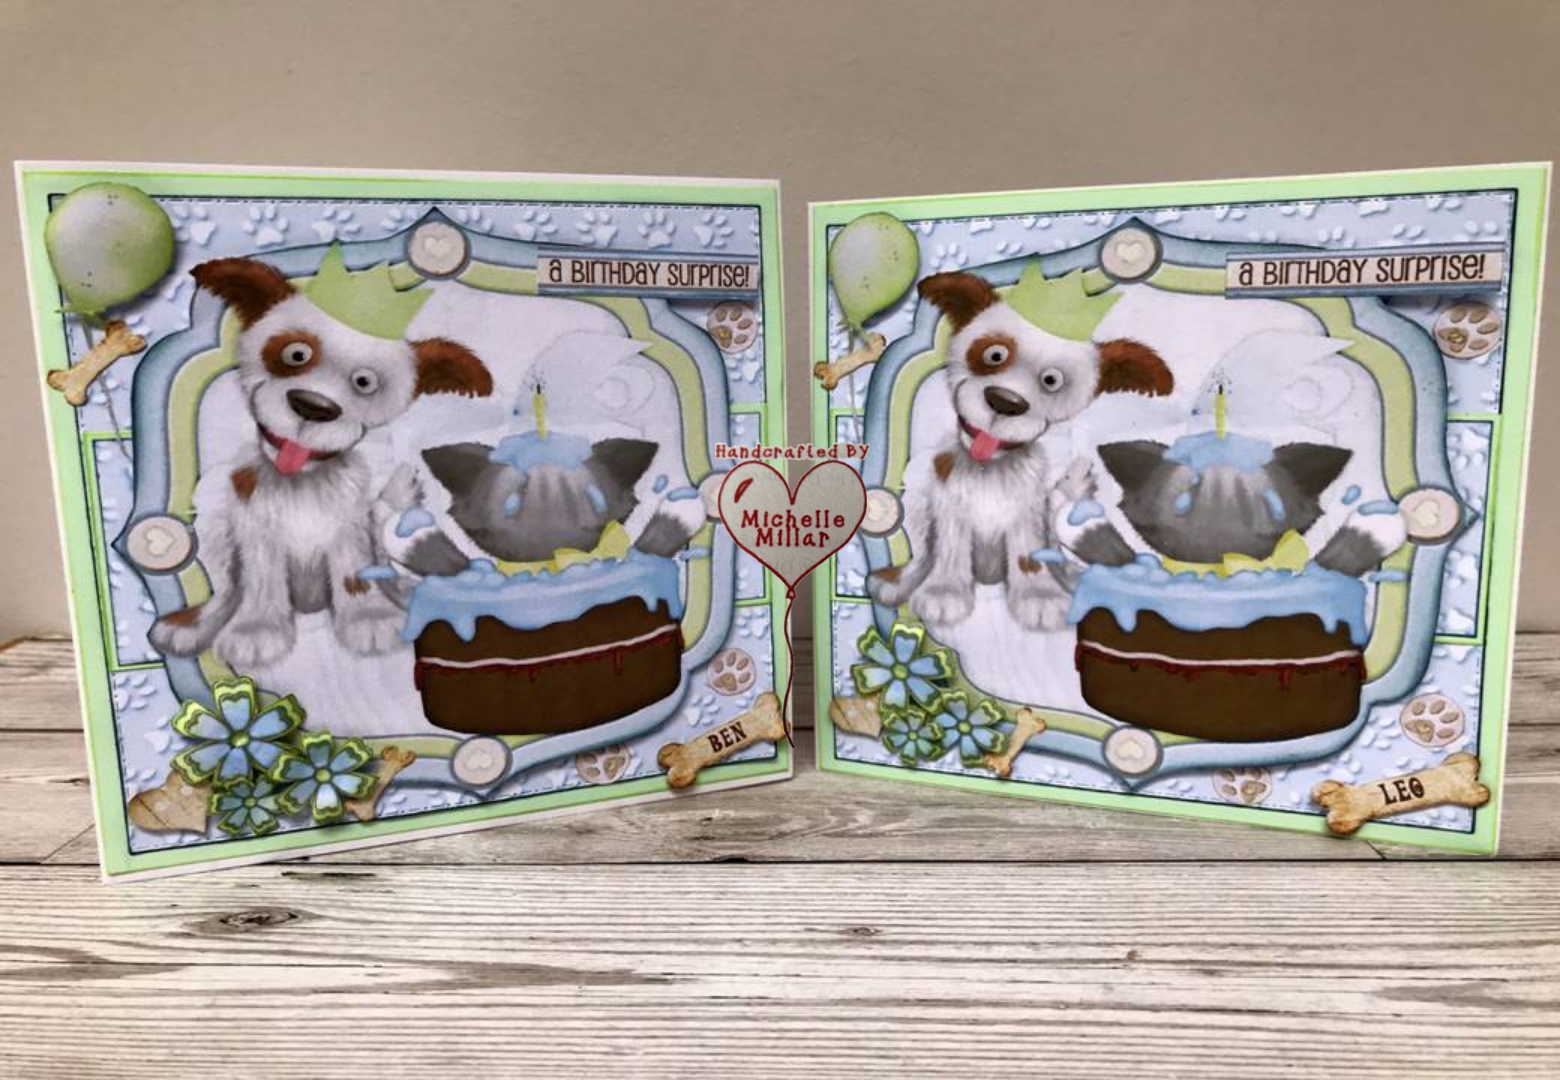
Today I am sharing a pair of birthday cards made earlier in the year for twins.


I'm also joining up with the weekly WOYWW group link up (what's on your work Wednesday) over on Sarah's Craft Shed, so I've got some catching up to do as usual. 

WOYWW is a weekly blog hop where we all have a look at look at what everyone has been up to. Follow the link above for more information.


So on my desk, I have downloaded and cut out one of files that I had called Cute Paws from Debbi Moore Designs  This particular download was from one of Debbi's weekly Treasure Hunts which she has run on her Facebook lives for the past few years to inspire crafters to craft and share.

Every week you can download a free project using the code from the Treasure hunt on the Facebook Live and collect some beautiful projects to craft with.

I have used this one a few times and sometimes when I need a card,  I don't need to look to very far but my collection of varied downloads which I can mix and match to suit what I need, which is how I like to craft these days.


I have used 6 inch white card bases, Sakura sparkle pens and glossy accents to highlight and add texture.

I edited the bones with the boys names and then mounted them on foam pads. I like the fact that I can resize the elements that I choose to use and only print off what I need.


I thought these images would look great inside the cards too.


This 6 inch birthday card was made more recently using the same design.


and another cute pup inside the card too.

During the summer, we came home to find this little robin bobbing abound on the lawn in our back garden, so he was named 'Bob!' 


Choosing to have a snooze on the lawn perhaps wasn't the safest place with so many cats around that would find him a tasty treat, let alone the sparrow hawk who frequently visits but we certainly enjoy to see the robins pass through our garden.

Have a great day,  whatever you have planned for yourself.


Happy Crafting


Wednesday, 11 December 2024

Birthday Card - Bright Lights Isabella Cardmaking Kit - WOYWW

I'm sharing another birthday card made for a friend and  I have used the travel the world through paper Bright Lights - The Isabella Collection mini download kit from Opulence by Design Crafts.


This digital download kit has two beautiful toppers, a selection of sentiments and 4 vibrant backing sheets to craft with.


I'm late today joining up with the weekly WOYWW group link up  (what's on your work Wednesday) over on Sarah's Craft Shed, so I've got some catching up to do as usual. 

WOYWW is a weekly blog hop where we all have a look at look at what everyone has been up to. Follow the link above for more information.

This is a view of how my desk started. I normally think about what I want to print off first and what paper I am going to use. I've been looking into textured papers and card to print onto as not only does this work out cheaper long term but it means that I have what I want onhand instead of having to search for it for a project. 

I printed the topper on 160gsm smooth paper and also mounted the topper onto a piece of die cut cardstock. These beautiful papers were printed onto some of Debbi Moore's double sided pearlescent paper. This paper is quite sturdy and off white in colour, also lovely to print onto. 


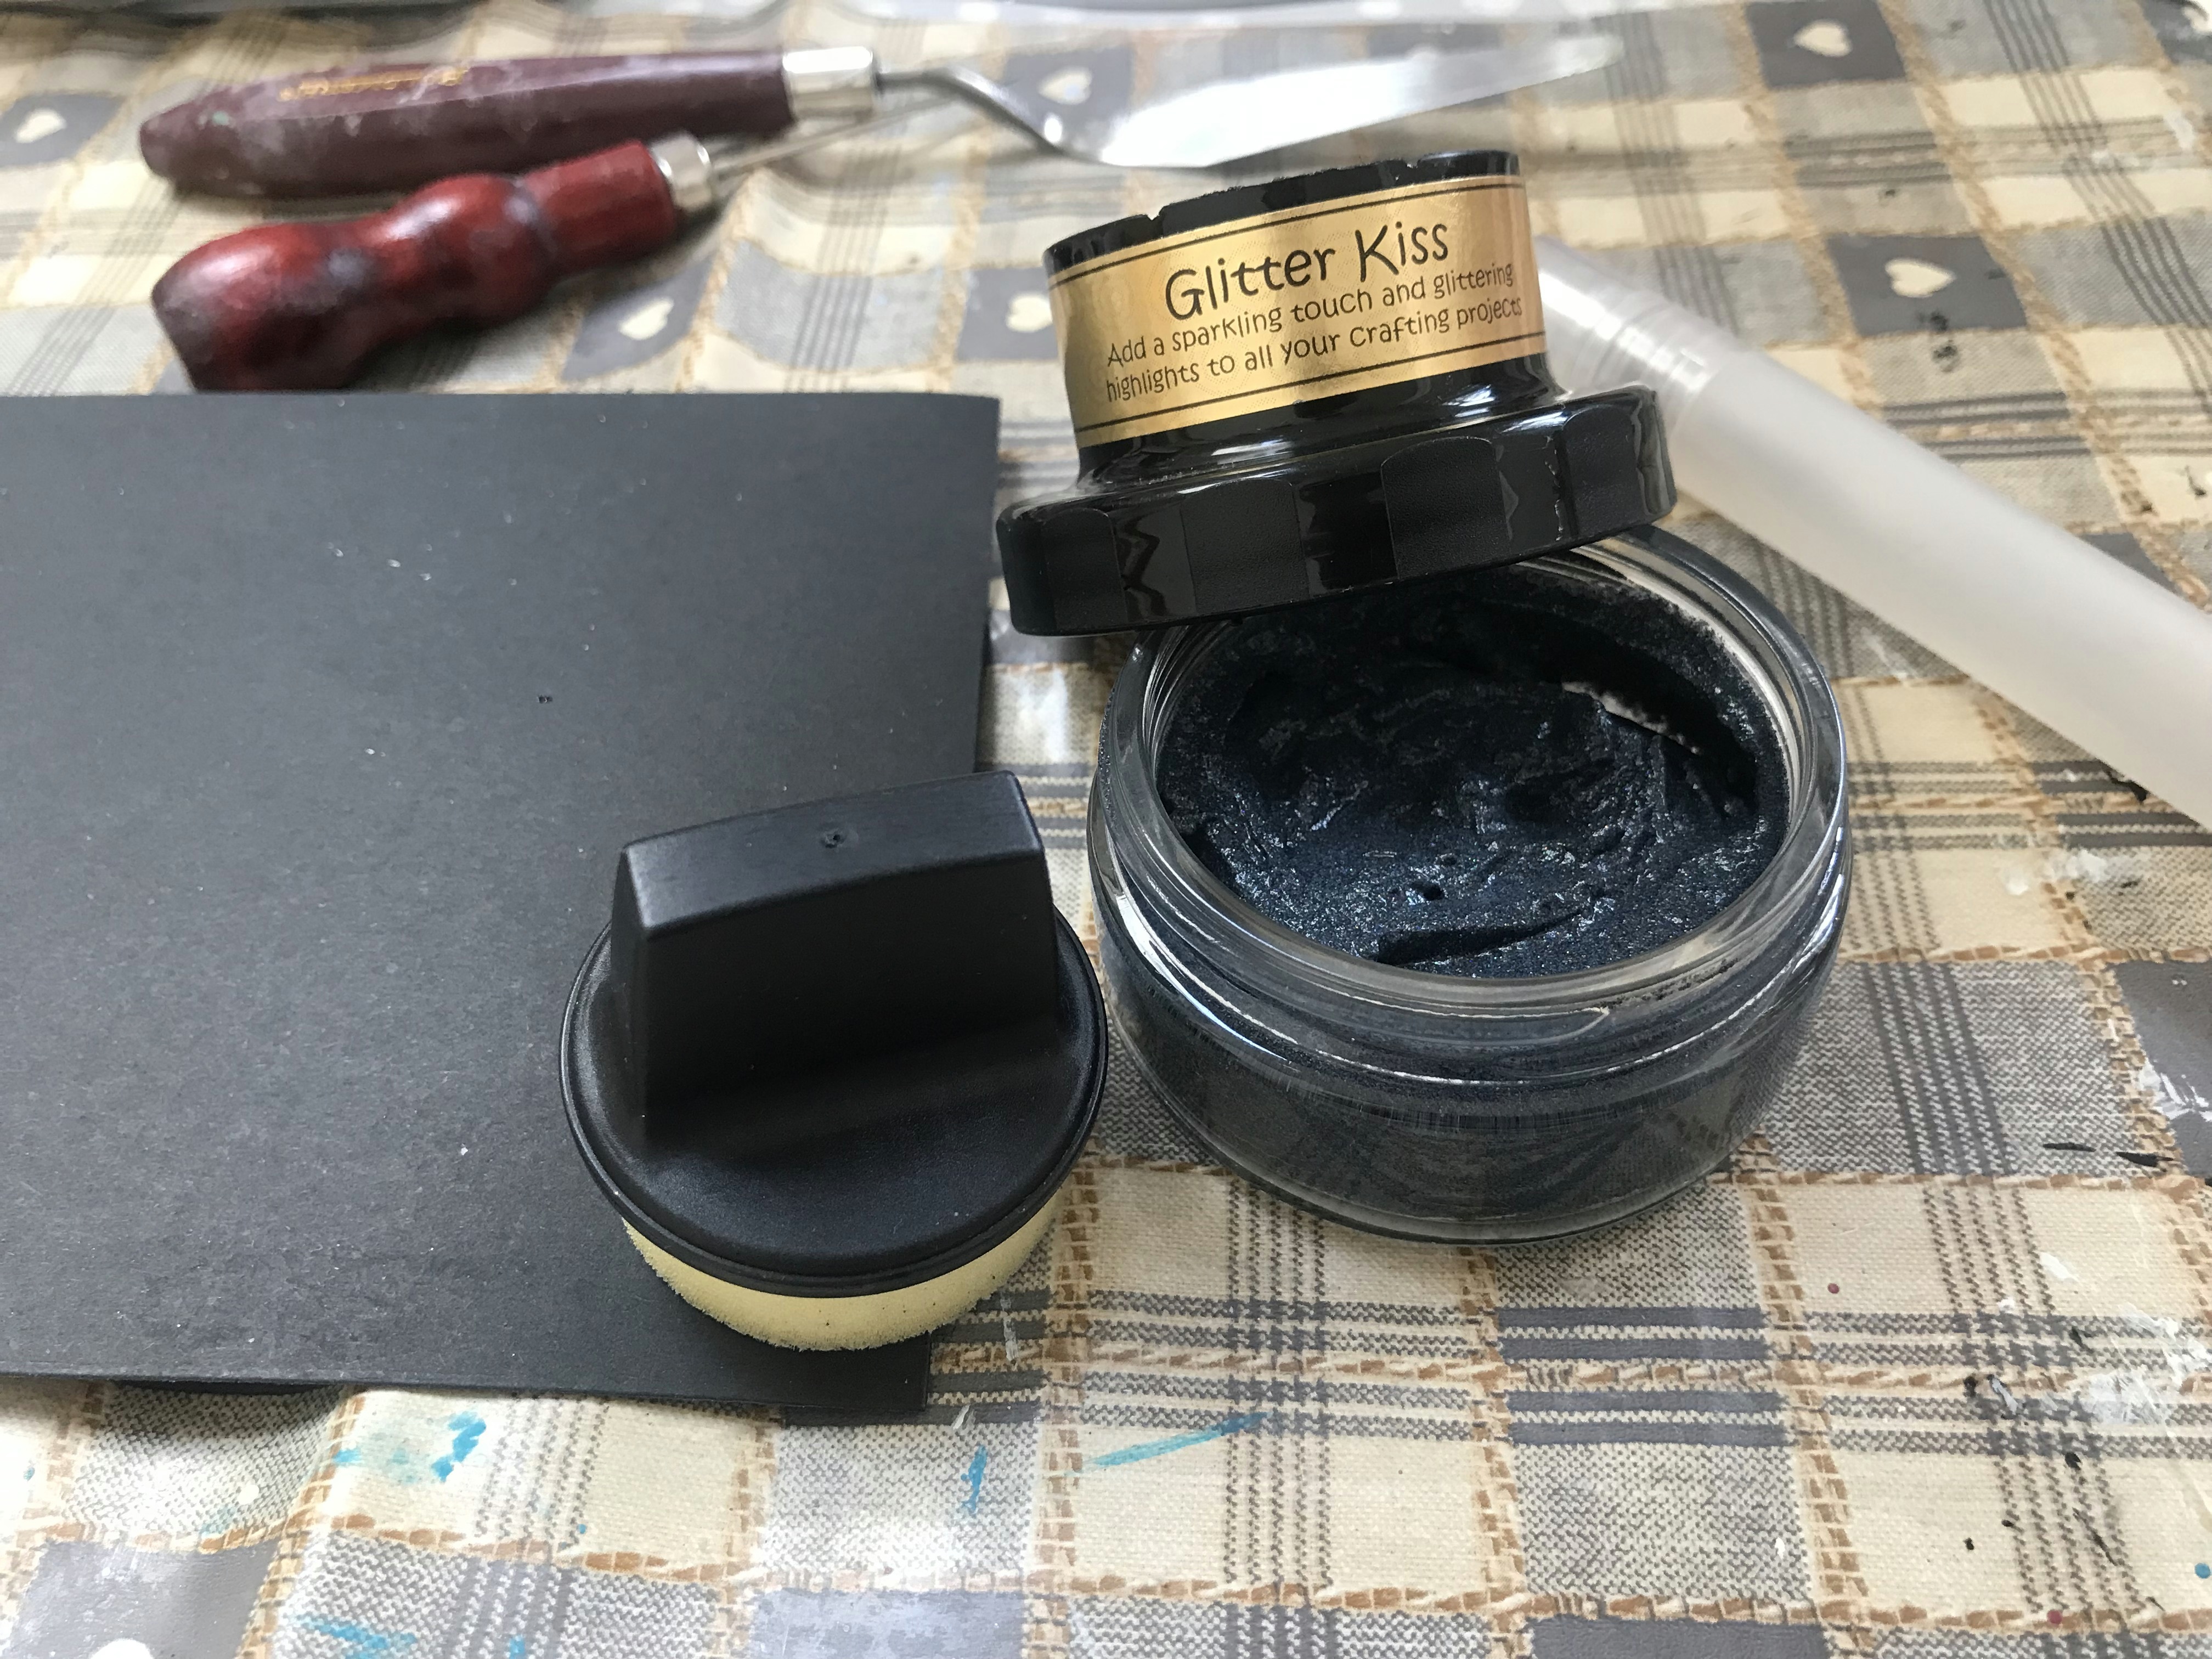
To make my glitter topper I swiped Cosmic Shimmer's Glitter Kiss in Midnight Sparkle across a piece of black cardstock. 

This craft product was another of my lucky finds in a charity shop. It was 50p and when I opened it I could see that it had gone hard but as I knew it was a water based product, I hoped that it could be rejuvenated. It was certainly worth taking a chance on for 50p and I was glad that I did!


This product dried quite quickly leaving a lovely sparkle, although I did speed it up with my heat gun.


As well as a growing collection of Stickles glitter glue for my flowers, I do love my  Sakura Stardust pens too. I use these a lot to highlight the edges of my projects.


My friend loves her flowers, so I wanted to fit a few on and had a look through my box of flowers to see what I could use to compliment the topper and these lush papers.


I picked out the Orange Nasturtium, the pink dahlias from the Happy Birthday Cardmaking kit, The Blue Marguerite Daisy Flower, and the golden leaves from the Steampunk Florals Collection. I didn't use the feathers in the end.

I added a touch of lemon Flower Soft to the centre of the Marguerite daisies and a mix of Stickles glitter glue/glossy accent to the centres of the other blooms.


I added a bright envelope with some more of the paper that I had leftover to coordinate with the card.

If you want more inspiration and demos from Opulence by Design, follow the links below. Amanda is a very talented designer and has a wide selection of kits and crafting sheets that can be mixed and matched with your own crafty stash.


Have a great day, whatever you have planned for yourself.

Happy Crafting


Challenges:-

Hollywood Glamour Birthday Card

I made these birthday cards a few months ago, ahead of time, as I knew I wouldn't be crafting for a while. For my card base, I used a 7 ...