blog backbdrop

Showing posts with label Portmanteau. Show all posts

Thursday, 26 December 2024

A trunk for a frog

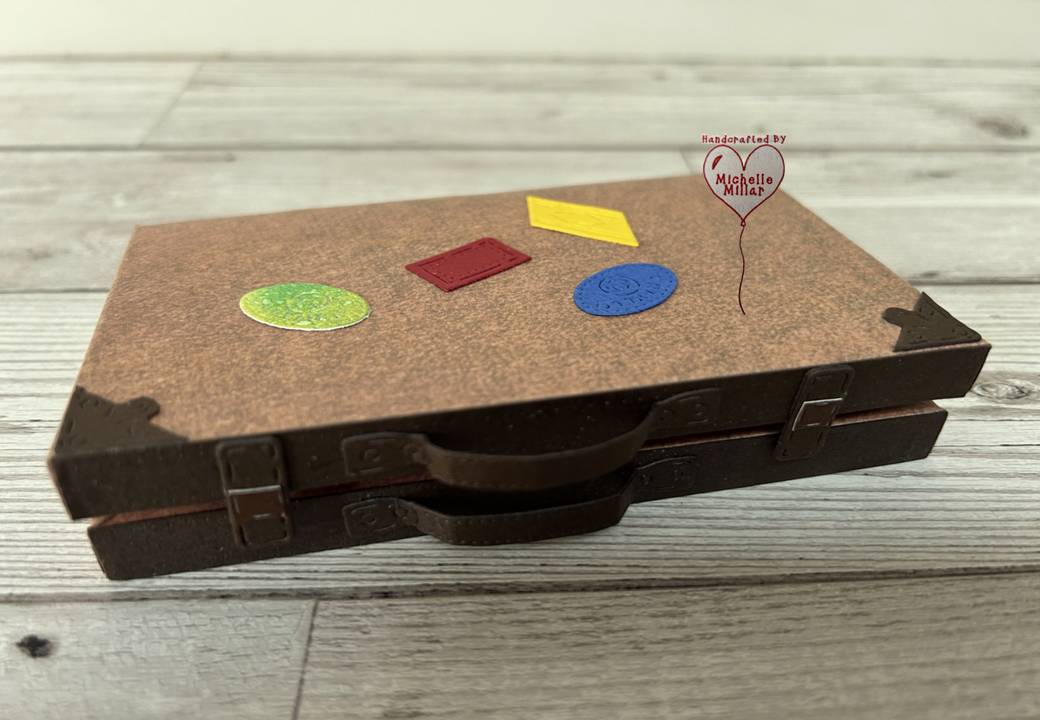
I decided get one of those little projects sorted on my "intended to do list" and this is one of them - a trunk for a frog!


I discovered Des the frog in a wonderful little shop  - Nervous Wreck Designs on the Isle of Wight  whilst on holiday. Later in the year, I found out that Creative_._me (on Instagram) was also making cute little jumpers too for the frogs that she had been making for the frogs she made for the shop, so I decided that Des could do with a trunk to store them in.

If you are interested, pop over to Instagram and check out Sarah & Jaynes accounts - a small business selling handmade crafts made on the Island.


I remembered that I had a small case die from one of my retired Tattered Lace die sets -There's no place like home. I also used two of the downloadable background papers, which at the time were made available as a free download. 

I do love this die, it's one of those designs that you hold onto because it is handy for those random little projects.

For the card base I printed both sides onto the faux leather look design paper using my new card that I had bought with my Amazon voucher before Christmas. After some good recommendations I decided to give the Navigator Bold 200gsm card a try (150 sheets in a Ream in a royal blue wrapper). Lovely silky card and it went through my Epson ET2650 Ecotank printer - guided without any issues. 

I always print on standard settings and never on best quality but that is just my personal preference, as I just find that best quality always floods too much ink and doesn't give me a crisp image and I get dark soaked backing papers too. Unfortunately, this also happened with my all-in-one HP printer too.


I did get a bit carried away die cutting the label tags too but they just looked so cute!

I also recommend John Next Doors silicone crafting mat too, not only is it nice and long, heat resistant but you can press your cardstock down to keep it in place on your mat. 

Those red liner tape peel offs that migrate all over my house when I use them - stay on my mat until I throw them away and I spend less time looking on the floor for stuff that seems to stay put now!


I used red liner tape to make up the trunk but foolishly forgot to put the inserts for the trunk in first before making it up.  You can see on one side, but it didn't notice much, especially when I added the centre panel into the case.

The buckles were die cut from chocolate card and I added two strips across the top the trunk for a better finish.

Two jumpers and a scarf fit into the trunk quite comfortably. I love diorama, so I enjoy making little projects like this.


And to keep my trunk closed, I just added a few small black velcro dots that I cut in half.


Des looks all set for an adventure now I think!
I made him a froggy Clock seat a few months ago ....who knows what will come next in the new year!

Enjoy the rest of the festive season and wishing you all a healthy and Happy New Year.

Happy Crafting


Challenges-
Daring Cardmakers - Happy - Diorama crafting projects are right at the top of that list when it comes to crafting. I enjoy not just making them but looking at them too!

Wednesday, 25 September 2019

Tattered Lace Portmanteau Collection DT samples

Following the launch of Tattered Lace Portmanteau collection, I am sharing my DT samples made from some of the dies for the launch on Create and Craft TV .

I had the following dies to work with:- There's no place like home, Centre of Attention, Fields & Foliage, 3D Decoupage English Ivy, 3D Decoupage Buddleia, Bell Iar.


This is by far my favourite die of those I had to work with, in the collection. I love a bit of diorama.


I used kraft card for the base and papers from one of the Santoro Gorjuss paper pad collections.  This die set also comes with the luggage labels and wording. 


You can use up your textured papers to achieve the leather look straps.


I used most of the label for the inside fo the case and then started to add the contents which comprised of 2 origami paper shirts, a miniature atlas(free dollhouse download) glasses embellishments, miniature handwritten letter embellishment and a book which I made using a download from Pinterest.

I also made a feminine version incorporating the centre of attention die.


Instead of backing paper I used some sample wallpaper from my stash, that I have been looking for a use for ages. I also added the spine die on this portrait version using snow white centura pearlescent card.


I have used the centre of attention die with the lacy panel on the inside along with some embellishments to fill the case.


Not everyone wants to use the charisma papers which you can download direct from the Tattered Lace website, along with papers (where available) but they can be downloaded using the link below.

https://www.tatteredlace.co.uk/

For this particular die I have used papers and card from my stash to achieve the looks I wanted and them paper pieced them, which is really easy on this die.


I think this combo would also make a really good birthday card, especially if you are looking for something a little different.


I have used the There's no place like home die with the fields & foliage die for a scenic open bookcase using snow white centura pearl card, Hunkydory mirri card (from their darks collection) and olive green pearls from The Dreamees. I have used the matching charisma paper for the fields & foliage die.


I could just about fit the decoupaged fields of foliage inside one of the panels with some green backing paper from Tim Holtz coordinations cardstock.

A stack of cases using Tattered Lace papers printed from their wallet collection  which have been printed onto white cardstock. 


Also with the there's no place like home die set is a small wallet die which I have used as a clutch bag.


I have used some of the luggage labels as tickets and another printable fold up map.


These cases have been stuck onto a sturdy circular base.


Following on from the fields & foliage die, I decided to play around with a different card shape, using the Tattered Lace Harlequin dies.


Using kraft card, colour core card and bronze Dreamee pearls.


I have also used the decoupage branch from this die on the front of the card with the doves.


I have also used the 3D decoupage English ivy with the fields & foliage for a larger card, adding a few layers.


Using the centre of attention die again and papers from Stephanie Weightmans Designer collection with some dies from the Tattered Lace Vintage Designer collection for a shabby chic card.


This die comes with 2 outline dies (unity dies) which enables you to use them together or on the edge of the card to achieve the shape on your card.


I thought the papers worked really well with this die and added a touch of lace behind the dress to complete the look and the frill from the dress as a shawl.


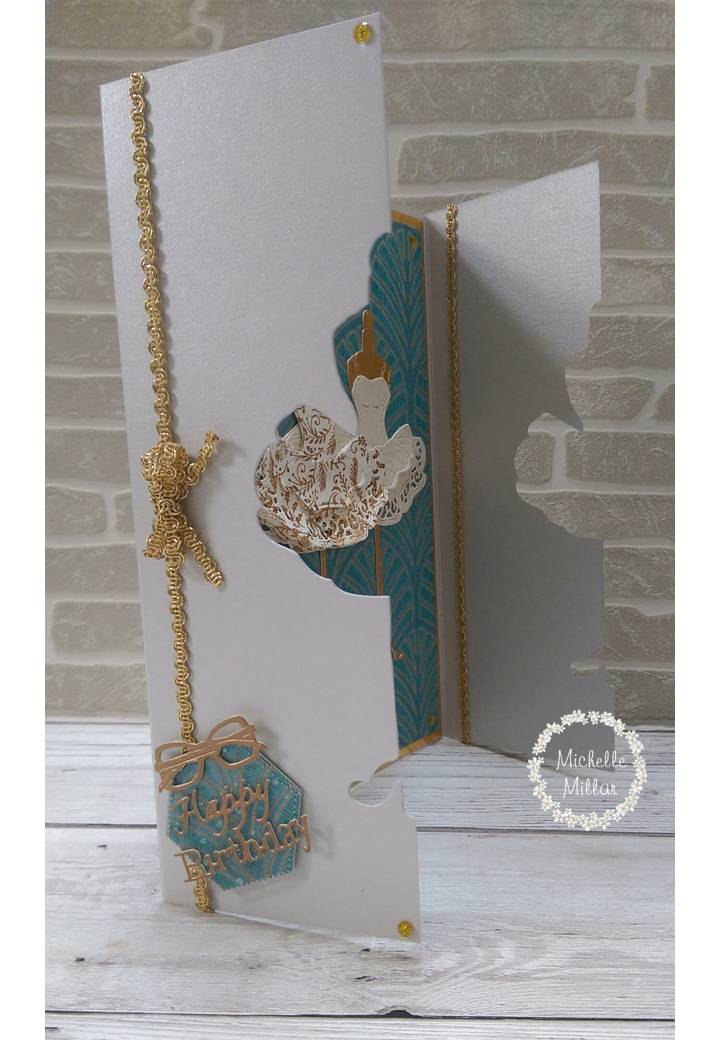
A trio of mannequins using some luxury wallpaper as backing paper and some pearlescent papers for the dresses. I have also used a blue/grey double sided pearlescent card for my base card.


Using the unity die to cut the shape from the gatefold card.


I also used some of the accessories dies from the Tattered Lace celebrations pop ups collection and some gold rope ribbon.


Just to show how the unity die works when used with the gatefold card.


Now onto the bell jar. I had an idea of trailing flowers from glass case and this is what I came up with.  There are 3 parts to this die, the flowers, the background and the outline of the bell jar.


I used the charisma papers with the die and just decoupaged them, chopping the rest up for my flurry of flowers.


This card actually worked out a lot better than I had anticipated.  Sometimes I have these ideas and them have to fathom out how to make them work. I used a little hot glue to join both pieces together.


Then mounted it onto a circle easel, adding some more flowers to the base. I used colour core card from Create & Craft for the base card and layers.


For a neat thank you card I used the ribbon dies from the Tattered Lace Violet Haze collection, with the corners from the There's no place like home die and some glossy accent on the base of the bell jar.


I also added some Tattered Lace glittered acetate I had left and only 2 levels of decoupage so that I could add the from to the jar.


Its a sweet die and ideal for smaller cards or toppers.


It also works perfectly with the Tattered lace Tri fold card die.


For this A5 leaving card I have used the lace panel from the Tattered Lace vintage designers collection with the expression of lace diamond frame and the 3D decoupage buddleia dies.


I used the matching charismas with the buddleia dies.


I used the 3D decoupage buddleia with the 3D decoupage English ivy dies for this get well card.


I also used part of the Tattered Lace Tall stepper card for the card base.


Finally another idea I had.  Often seeing how ivy climbs across walls and fences, I decided to create my own card base using a brick stencil, Tim Holts distress ink in gathered twigs and some kraft card.


I used the 3D decoupaged English ivy with the 3D decoupage buddleia for a more rustic looking card.


I hope you've enjoyed my selection of cards
Happy Crafting!


Decorated Mdf Storage Box

One of the things I really enjoy doing is decorating boxes, especially as they are really handy for keeping all your crafting accessories in...