blog backbdrop

Showing posts with label Something Stitchy. Show all posts

Saturday, 5 September 2020

Birthday card for a friend

Today I am sharing a birthday card made for a good friend of mine and linking it with our blog challenge on Let's Craft and Create's  friendship theme this month.


For my card I have used:-


  • Tattered Lace Designer Vintage  - Foundation Doilies dies
  • Tattered Lace Heart die
  • Cream 240gsm card
  • Katy Hudson - Sweet Nothings Collection
  • Dreamees Something Stitchy flower stamp set
  • Dreamees pretty pets backing paper from CD
  • Piece of A5 orange card
  • Peach ribbon
  • metallic peach pearl gems

My card base measures 15.2cm in diameter, which is the largest doily die of this set, with the second largest layered over the top.
I have then used one of the smaller doily dies with some of the sweet nothing cardstock before the die cut heart in plain orange card (as an accent)and sweet nothings cardstock again.


Using the charisma pad, I die cut the "perfect pair" squirrels and the "sweet nothings" blue tits out. These are really pretty images . Katy Hudson is an illustrator based in Bristol who became obsessed with drawing animals and telling stories. The idea stuck, which led her to studying for a degree in illustration and creating some wonderful illustrations. These are just a few that she created for a papercraft collection on Create & Craft TV.


I printed out some backing paper from my Dreamees Pretty Pets CD to stamp my flowers onto as I knew it had the perfect paper I wanted for the flowers. I printed the flowers onto cream paper. I used two sizes of the something stitchy  flowers stamps and layered up my flowers to get plenty of dimension.


Have a look at the inspiration from the rest of the design team and what our crafters have been making for our blog challenge this month. There is a prize for the winning entry and a badge for your blog for the top 3 runners up.


.Happy Crafting
Michelle
x

Wednesday, 5 August 2020

Craft Journal

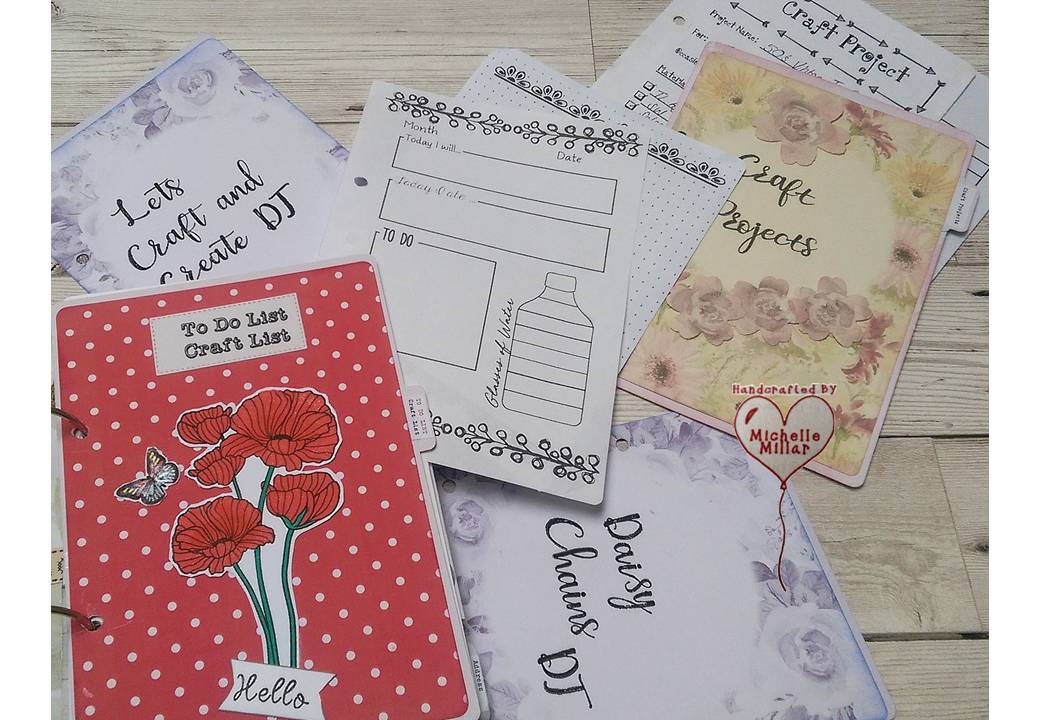
I finally got around to doing one of the things I had been meaning to do for ages and that was to start my Craft Journal. Today I am sharing the front page that has been finished with lots of layers.


I am also going to be using this project for our blog challenge this month on Let's Craft and Create where our theme is to use lots of layers.

My son bought me this journal kit for my birthday by The Dreamees, which comprised of 1 x set of A5 mdf covers, 1 x set A6 mdf covers, jump rings, journal stamp set, journal CD, set of fine writer pens.

Using one of the A5 mdf covers is used the following:-


  • Dreamees Craft Magazine Issue 1 - I used some of the free papers that come with the magazine along with the free mdf shapes that came with the magazine(if you order direct from the Dreamees website).
  • Dreamees Forget Me Not stamp set
  • a strip of Hobby House gold flower pearl string
  • a strip of rich plum satin ribbon
  • small mdf heart
  • Dreamees doily die
  • Dreamees swirl die
  • Backing paper from CD
  • chipboard letters
  • Gold superfine Wow embossing powder
  • Versafine embossing ink
  • Dreamees dinky inkies sparkle 2nd gen in treasure.
  • Dreamees olive green pearls
  • small piece cream webbing
  • Tim Holtz distress ink victorian velvet


I stamped and heat embossed the Forget Me Not flowers onto some of the backing paper from the magazine. the gold embossing really highlighted the veins on the petals and leaves. I also used the flower stamp on the small mdf heart to get the same effect.


I used the mdf hearts from my shape kit that came with the magazine, covering the solid heart with backing paper


I used the treasure dinky inky on my chipboard lettering and to highlight the edges of the mdf heart and Tim Holtz distress ink in victorian velvet around the edges of my mdf journal.

I then went on to finish the other side with backing papers from the journal cd
which also had some lovely sentiments.


I have stamped the Something Stitchy flower stamps onto patterned paper and added a little glossy accent to the little button centres to make them pop, also to the button stamp. It just needed a piece of ribbon to bring the layers all together.


That is only the cover....

Inside I keep all my ink swatches. I made some simple charts to keep my colour swatches from the different ranges as an easy refer back to and printed off a colour chart for the Distress Inks, downloadable online.


A section for my Dreamees Stamps, CD & die collection catalogue, Tattered Lace die list. 

DT Blog Challenge Info, Craft Projects and some of the all essential journal pages that came with the CD Rom; such as a To do list, Address List and Birthday list. 


I've used the backing papers from the CD with the sentiments on some of my pages and for the larger titles, I have used the Dreamees Calligraphy stamp set. This alphabet stamp set is priceless in my opinion.


Have a look at the inspiration from the rest of the design team and what our crafters have been making for our blog challenge this month. There is a prize for the winning entry and a badge for your blog for the top 3 runners up.

If you don't have a blog, you can enter via Facebook just by adding the link from our actual blog challenge page to your entry on your Facebook page. Follow my link below to the challenge.


Happy Crafting
Michelle
x


Tuesday, 5 May 2020

Vintage lace card

Today's card share is a vintage lace card made with a lovely vintage postcard that one of my friends gave me. She gave me a few and said "I'd be interested to see what you do with them" So, I thought to start with I would make her a card, to let her know I was thinking of her across the miles in these uncertain times over the past few months.


I am also using my card for our theme this month on Let's Craft and Create's blog challenge. We would like you to use ribbon, lace, twine, all or some in your project this month. 

for my card I used:-

  • 5.5 inch textured deckled cream card base
  • A5 burnt orange patterned paper from stash (Tattered Lace)
  • A wide strip of cream vintage lace from haberdashery remnant shop
  • A strip of antique gold satin ribbon from stash
  • Paper doily from stash
  • Vintage postcard
  • Polka dot backing paper from a Dreamees CD printed on cream paper
  • Dreamees Something Stitchy flower stamps
  • Dreamees butterfly dies from the pretty/peculiar leaves & flourishes dies
  • Pearls


I love my Dreamee flower stamps and use them all the time
when making flowers like this for my cards. I stamped my flowers using cocoa memento ink and layered them up. I think the gsm of the card for these was about 120. You can add a pearl in the centre like I have or a drop of glossy accent to highlight the button centres. With the butterflies, I die cut them from the same backing paper as the flowers.


I added a little sparkle to the centre of the flowers with a spectrum noir clear overlay pen.


Have a look at the inspiration from the rest of the design team and what our crafters have been making for our blog challenge this month. There is a prize for the winning entry and a badge for your blog for the top 3 runners up.


Stay safe
Happy Crafting
Michelle
x


Wednesday, 25 March 2020

Hat easel card

The project that I am sharing today was made for a group swap and the one thing that I knew it had to include was pearls, which is what this crafty friend of mine always uses.


I have never found it difficult to think of something to make with my Dreamees products and it is so easy to mix and match whatever you have throughout their ranges as it all goes together so well.  I think sometimes we can worry too much on what to put together rather than how you want your project to look.

To make the hat for my easel card I used their Templates and More CD.  I have had this cd for many years but cds like this are invaluable and I find that I always find my way back to them, no matter how trends move on.


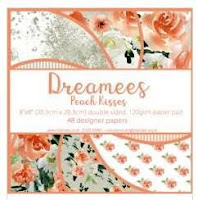
In the past, I have cut these templates out by hand but as I have a set of nested circle dies, once I printed off the template, I found I got a more precise and clean cut with the dies. I did this with 300gsm white cardstock for the hat template and the pretty peach backing papers also by the Dreamees. The peach kisses paper pad comes in an 8 x 8-inch loose leaf double sided paper pack is one of a lovely colourway collection.

 https://www.dreamees.org.uk/
https://www.dreamees.org.uk/


I made a circle easel card to attach my hat to, using the peach striped backing paper to complement the floral peach kisses papers and to decorate the white hat template.

The only hard decision I had to make when buying a paper pad, was which one, as they are all lovely and at £8.99 good value for money.

I chose the peach kisses because peach is one colour that I don't see a lot in cards and being a pink/lilac person its also a colour that I don't often lean towards for no real reason. It was when I purchased a Hobby House collection that had a mix of  pink and peach melba ribbons in my bundle that I thought, this is lush and was disapointed when I used all the peach card from my kit up.
The peach ribbon is from that Hobby House collection but the pearls are Dreamees and I had to make sure that there were plenty for Paula.


For my sprig of flowers on the topper of the easel card I have used a flower stamp that I use a lot,something stitchy with its adorable button centre that has been stamped onto a rich peachy orange Dreamees backing paper.

Decorated with some of their white pollen stamens and a "friends" sentiment from their beautiful baby sun stamp and die set.

I also like to decorate mdf and after seeing a picture on Paula's Facebook celebrating her Anniversary, I thought, what a lovely picture wouldn't it look lovely in a frame...... so after a rummage through my box of mdf (mostly Dreamees mdf) I found a set of mdf hearts that I had forgotten about.  This trio of heart mdf was from a collection called Sensational Flowers (stamps, cd and mdf). 


I printed the picture onto glossy paper and stuck it to the solid heart. I did cover the top heart aperture and the back of the solid hear the peach kisses backing paper.

I used string pearls and hot glue all around the heart to give it a prettier edge and a piece of amber ribbon to hang the heart from.


For the flowers on the heart, I chose the Dreamees pom pom flower stamps and stamped onto one of the peach kisses backing papers using smokey gray VersaFine pigment ink. Again I used some of the Dreamees white pollen stamens for the centres of the flowers. I added a good few layers to plump up my flower, gently curling the tips of the petals for a more rounded shape.


For a bit of structured foliage, I used a small piece of green vellum to stamp my leaves but this time with a stazon ink pad. Stazon is good to use with non-porous materials like vellum, glossy paper, plastic etc. Using a quilling tool (tweezers would work just as well) I curled the edges of the leaves to give them a little more shape before glueing the flowers and leaves down with a hot glue gun.


So there are my two projects. I made a box for the easel hat box to sit in and for the plaque, I had some yellow tissue paper to wrap it in.

One thing I like to do with tissue paper (unfortunately, I didn't think to take a picture of what I did) is get my stamps and decorate it. In this case, I used one of the babysun stamps and the friends sentiment stamp.


I have combined 3 stamp sets, mainly using one paper pad with the exception of a backing paper from another Dreamees cd (Pretty Pets) and I like the way you can mix the older collections with the new so easily.

Why not get involved in a craft swap. They are great fun and a great source of inspiration. You can find lots of craft groups on Facebook and blogs that offer them too.


Happy Crafting
Michelle
x

Saturday, 7 September 2019

Birthday card for a Friend

I thought I would share one of the birthday cards I made recently for a friend


For my card I used:-


  • Dreamees Something Stitchy flower stamps set
  • Dreamees Something Stitchy backing papers 
  • Dreamees Pretty Pets cd for blue gingham backing paper
  • Dreamees Divine Doily die
  • Duo Dies Nested circles
  • Sentiment stamp from Dreamees Designer Blooms 
  • Dreamees Friendship Recipe stamp
  • Tonic card stand die
  • Tattered Lace String Doily dies
  • Dreamees mint pearls
  • a piece of blue lace
  • Tattered lace bumble bee die cut
  • Tattered lace maidenhair fern die cut
I used snow white centura pearl for the card base and layered the doily dies onto the cardstock
I love this something stitchy flower stamps set with its button centres which I stamped onto the gingham backing paper. I also used a little glossy accent on the centre of the flowers.


The sentiment on the front of the card was heat embossed with silver superfine Wow embossing powder onto the same pearlescent card and the recipe sentiment stamped inside using black versafine ink.  The rest of the elements were added to complete my card.


As this is mostly a Dreamees card, you can find most of the items that I have used on their website.

To accompany my card, I also made a box using 12 x 12 card from one of  The Works design paper pads.


Entered in the following blog challenges:-

Mix it Up ATG option twist 3D
Papercraft Challenges  Handmade stamped flowers


Happy Crafting


Saturday, 24 August 2019

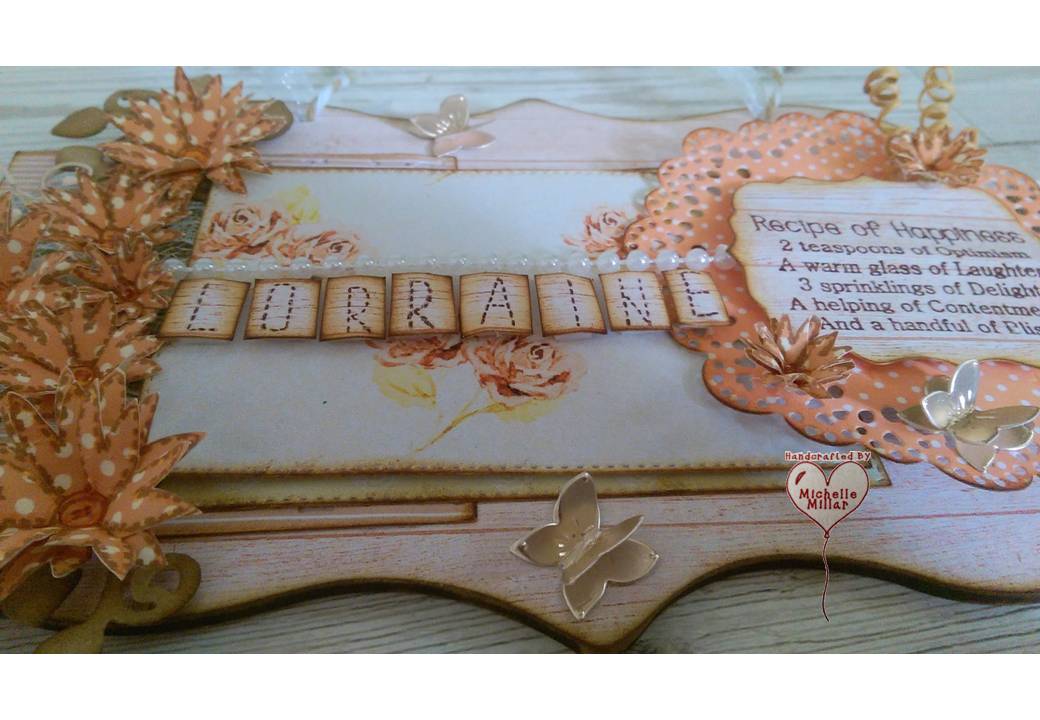
Dreamees - Recipe of Happiness Plaque

Today I thought that I would share a plaque I made as a craft swap with the Dreamees Catchers craft group.


I used the following mix of stamps and dies by The Dreamees:-

  • Stitched alphabet stamps
  • Recipe stamps
  • Something Stitchy stamp set
  • Divine Doily die
  • Pretty Leaves & Flourishes dies
  • Peculiar Leaves & Flourishes dies
  • Square lacy die set


 I also used a selection of backing papers from The Dreamees Pretty Pets & Sensational Flowers CDs. I chose tones of rich peach, a colour, to be honest, I don't use a lot or have seen much on cards recently. It makes a refreshing change to pinks and purples.

I also used:-

  • MDF shaped plaque
  • Burlap lacy ribbon
  • Pearl strings
  • Wired twine
  • bakers twine / white organza ribbon
  • Tim Holtz distress ink in gathered twigs


I covered the mdf plaque with the wood effect backing paper and used my Crafters Companion sanding block to achieve the smooth finish to my shaped plaque.  To soften the edges, I also used Tim Holtz distress Ink in gathered twigs.


I love these stitchy flowers and as you know, Dreamees stamps are a firm favourite of mine, especially their flower stamps which have an undeniable charm about them.  I layered them up a few times to add dimension.


Also adding a little glossy accent to the centre of the stamps to highlight the button detail.


The leaf  flourishes were die cut from craft card and the delicate flourishes (including the butterflies) from peach satin card.  I edged everything with the distress ink.  You can just about see the square lacy die peeking through from under the flowers as I used it as one of the layers under the backing papers.


The recipe stamps are great for projects like this.


I thought the stitchy alphabet stamps would tie in nicely with the stitched flowers and stitched rectangle dies.


I was really happy with how this project turned out, but then I do tend to wax lyrical when it comes to using Dreamees.

Happy Crafting

Boutique Birthday Card

I made a card for my daughter's birthday earlier this year, which was inspired by samples from this kit. When you make cards for family ...