blog backbdrop

Showing posts with label Precious Nested Book. Show all posts

Wednesday, 13 January 2021

Inspirational Junk Journal

Today I'm sharing a project made for a friend last year and this junk journal is the sort of thing I love to put together as it can be filled with all sorts of things.


Shabby chic was the look I was anticipating and as for the content well, there was no plan really just messages in the shape of inspiration of hope, strength and faith in yourself which we all need sometimes and forget from time to time.


I had decided that a small neat book shape in kraft card would be perfect for my junk journal and the Tattered Lace precious nested book die, which is about 13cm x 18cm was just about the right size.


I used and adapted the die to create the spine for my journal from the Tattered Lace Enchanted Tales book collection so that I could secure the pages into my junk journal and for the cover, I liked one of the design papers from Stephanie Weightmans Its a gift collection which I printed onto cream velour paper that I have in my stash. 


I originally discovered this paper when the Dreamees stocked it. I love the fact this paper is printable and the suede texture it gives to your projects. I made the flowers using the Dreamees Loops and Lace flower dies on olive green pearlescent paper, with cotton ribbon inked with Tim Holtz vintage rose distress ink.


When I first discovered this poem, I thought it was beautiful, wise words that definitely needed to be shared and a good starting point. I didn't want to take too much attention away from the words on the page so kept this page fairly simple with a little moss at the base and part of an embossed tree with some acorns at the top. I have typed out and printed the poems in this journal onto patterned paper.

A simple little vellum butterfly was all that was needed to embellish this page, made using the Dreamees Fall & Foliage stamp set, along with some glossy accent on the bubbles. I thought this poem was another great strong powerful hope floats tale.
Life is hard at times and we all stumble and fall and from a young age, you learn to get up, dust off the grit from your knees and carry on, with encouragement.
I always tell my children that no matter how hard life gets, somewhere out there someone has left a light on for you.... you just have to find it.

Using a mix of vintage design paper and the same that I had printed onto rice/sumi paper, I added a little cream webbing, lace and the odd vellum flower topped with another poem.  We all get caught up in life and living and its so easy to lose touch with the little things that you don't always see but were always there.

As I started to put the journal together, I thought that I had better even it up a bit with a few more light-hearted artwork pieces.

So, on the next page I used some of the Love Art rice paper by Stamperia and thinking along the lines of "hope floats," I found these cute heart embellishment along with these inspirational captions and decided to tie them into my page.


I mirrored these with some more Stamperia rice paper for my next paper with some mini vintage envelopes with matching notecards, adding a little vintage postcard to the top of my page.

I love these rice papers, particularly the ones with the face art on them. I do have another design to use for another project.


For my next page, I stencilled and inked my page added some layers, lace and ribbon and made an ATC card using the Puddle Jumps digi image by Vera Lane Studios. 
The card says it all, sometimes a good puddle is all you need. I backed this onto a background made using a little acrylic ink spray and shaving foam. To accompany my ATC card I also used the Just Pray & BowBee digi Images which were coloured in with promarkers.


I love making ATCs, they are something I keep saying I want to get back to making and swapping and even if you don't swap they are just nice to make. A little piece of art work, make one, send one and make someone's day.
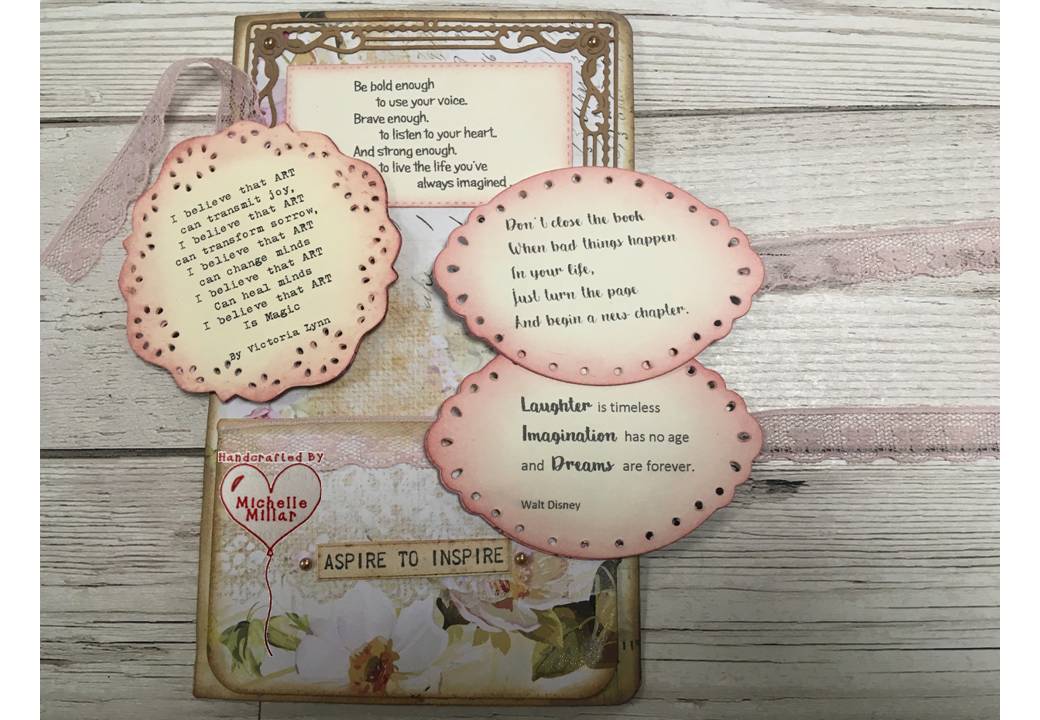

My next page is a tag pocket, and there are some lovely inspirational sayings that I wanted to add to the journal, one being from an artist which I really liked. I used the Dreamees Loops and Lace dies with some pink lace, some more vintage rose distress ink from Tim Holtz.


On the back of that page, I used  one of the lovely design papers that  my crafting colleague Alysha Sheridan designed and I printed this onto cream velour paper and added this pretty ornate frame by Crafter Companion with some "never forget quotes." We all need a little encouragement sometimes, that warm voice in your head that reassures you that it's going to be ok.


And when you lift the flap, a few more words of encouragement and then a little picture just hidden under the flap.

Which says it all really. Through the eyes of a parent, you understand that.  You know they have the ability to fly, to be the person they want to be, to overcome all those obstacles in their way but the hard part can also be believing it too, a process that takes time...


On the inside cover, I made a band out of Kraft card and added some antique lace. I had originally thought of maybe making some postcards and popping them in there but then I thought, what about a survival kit.

Looking on the shelf in my bedroom there is one that my son bought me many many years ago when we were in Jersey. It was something so simple and yet so sweet in an organza bag. I have seen lots of these around and thought that this would finish off my junk journal nicely.


It was fun making this as you can personalise them to suit and I had to remember that all these things needed to fit in the bag too...after I sourced them.


This junk journal was more inspirational wording than junk art-based because it was more personalised with a friend in mind. I do like the random sort of nature of these, where you start with a blank canvas and that creative project just develops.

I have a taste for making these now and it's on my list to make another of a different sort, along with a few more things to make this year, hopefully with all being well and good.
Have a good day, whatever you have planned.
Happy Crafting


Tuesday, 10 November 2020

Marleens Stocking

 I have a festive card to share today which is part of a monthly progressive digi  challenge


The challenge is imaginethatdigistamp.com. To get this cute digi stamp, you need to sign up this month to register and receive Marleen's Stocking free this month.  After you have created and uploaded your project to the challenge before the end of the month you will then be able to do the same the following month with the next free image as long as you continue to enter the challenges on a monthly basis.

I am only using 2 of the 3 papers from my downloads for my card today. I printed the holy backing paper onto a piece of 210gsm A4 white card and used my Tattered Lace precious nested die to make my card base.


With the festive tree backing paper, I decided to make some flowers out of it using my Dreamees flower dies.

Entering a digi challenge isn't normally something I would consider doing as I am not a colourist, but I thought I'd give it a go, especially as this digi image was really cute. I do own a few pens but mostly use my inks to paint. 

I used a mix of promarkers and Dreamees dinky inky sparkle inks for a little shimmer on the hat and stocking. I also added a little highlight to the flowers which doesn't show up in the picture. The clear sparkle in my dinky inkys has replaced the clear sparkle overlay pen that I used to buy from Crafters Companion.

You can just see the texture on the Santa's hat from the stickles glitter glue in frosted lace. One thing I really like about digi images is how easy it is to resize them to suit your project.


Have a good day, whatever you are doing and stay safe.
Happy Crafting


Entered into the following challenges:- 


Saturday, 5 September 2020

Sympathy Card

Sympathy cards are always difficult to make and sometimes it's challenging to find the right words too. I made this card for a dear friend and decided to keep it quite simple. For our blog challenge at Daisy Chains this month our theme is CAS - clean and simple.


I have decided to use this card as my DT project for our blog challenge.

For the card base, I used ivory centura pearl cardstock with my Tattered Lace Precious Nested Book die set from the Loving Memories collection.

Run the larger die twice through your die cut machine to get the front and back part of your book using a tacky pva glue or red liner tape along the inner spine to create your card/book.


The largest die measures 13.2cm  x  18.7 cm which makes a nice neat card.


I love the attention to detail on this die set. It is such a delicate collection. I also used the gilded cross die in the collection on some Hunkydory rainbow mirri card. This cross die does actually come with its own matching charisma paper which you can download for free direct from the Tattered Lace website in their downloads section.


Inside I used white printable vellum for the insert with a personalised verse.


Also using the smaller cross in the die set and a chain die from another Tattered Lace set that I had, I created a little crucifix to embellish inside.


As this card was going in the post, I didn't want it to get crushed so made matching gift box.


My card to let my friend know I was thinking of her at a difficult time.

Have a look at the inspiration from the rest of the design team and what our crafters have been making for our blog challenge this month.


Happy Crafting
Michelle
x


Friday, 26 July 2019

Tattered Lace - Even More Words DT samples

Following the launch of Tattered Lace Even More Words collection, I am sharing my DT samples made from some of the dies for the launch on Create and Craft TV  today.

I used the following dies for my samples: - King of  Everything, Top Hat, Expression of Lace Diamond Frames & Nested Pint Glass dies


For my first card I have used a mix of the King of Everything, Top Hat and the Expression of Lace Diamond Frame dies

I have printed the Diamond Frame onto a velour cardstock for that felt look and then decoupaged it.


I thought the Top Hat and monocle gave the lion a quirky gentry look and as you know I love quirky!


Using the same dies but taking away the Top Hat dies I have gone for a more Serengeti look, using paper from one of Tattered Lace's downloads.


Bringing his mane forward for a little more dimension.


For a very different look, I  die cut the lions face into the black cardstock, then used copier paper scrunched around the lions face. For this, I used a matt medium to stick it down and a thin coating over the top.  Let it dry before adding your choice of gilding wax. I have gone for bronze by Treasure Gold. A little goes a very long way as its really creamy.


I have then mounted it onto a combination of black card and Hunkidory chocolate mirri card.


I have gone for a steampunk look with this easel card using the Expression of Lace Diamond Frame dies which have been decoupaged onto gold mirri card and part of the Top Hat die set.  The patterned papers are from the Tattered Lace Neo Victoriana collection.


I die cut the top hat frome papers from the Neo Victoriana collection and then chopped up parts of another which looked like metal plates to form the steampunk effect for my top hat.

I used a brass button from my stash and the monocle from the Top Hat collection for the watch. I found some papers in my stash with clocks on, small enough to create a fob watch and added a circle of acetate for a more realistic effect.


 The fob watch can actually be moved up and down and has a solid back as a fob watch would have.


It all just seemed to work together, the way I wanted it to fortunately!! and I added a key (from a pack of key embellishments) to complete this project.


I really like this particular die set, the more I used it, the more I found I could make with it. It really does help to have a play first before you dive in and make a project, just to see what works and what doesn't.


I had seen quite a few "Like a Sir" themed items about and thought this die set would lend itself perfectly to  this.  Instead of using the matching charisma papers that you can download with your dies directly from the Tattered Lace Website  I decided to die cut using black centura pearl card and a gold matt mirri card. I paper pieced the cane and hat and again used acetate in the monocle for a more realistic affect.


The backing papers were from a download I had and printed them onto my cream velour paper/card.  I originally purchased this paper from the Dreamees website and use it a lot as it give your projects a lovely suede like feel as well as prints perfectly.  I also used the Tattered Lace Precious Nested Book for my card base.


Again I have added another little fob watch to the spine of the card which is moveable using the monocle from the Top Hat collection.


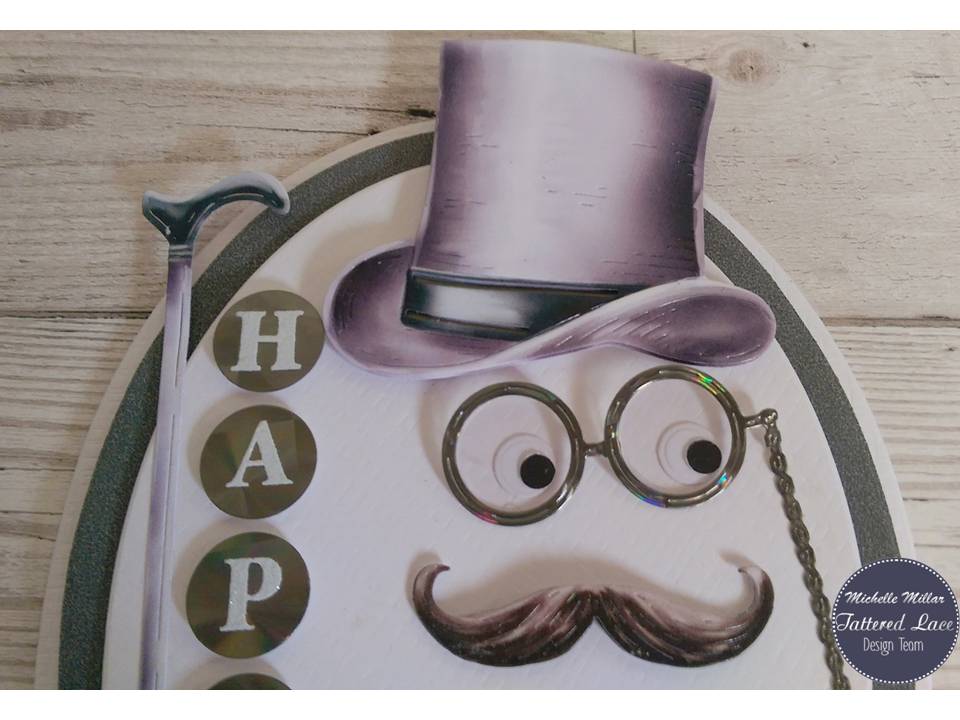
For my oval card I have just used the Top Hat die set but made the monocle into some specticles, adding googly eyes. I added the card stand because I thought my card would sit better on it and then thought it looked like a "Mr Potato Head" with feet!! I have also used the Oval 3 Foundation die set for the card base.


Circus/party themed was my next idea behind this card, incorporating the canes as prop sticks like the ones you get in these photo booths you can hire for parties and weddings.


I have used the match charisma papers for the dies for this project.


I mixed the Top Hat die set with the Nested Pint Glass die set, using one of the larger dies in the set for the face. Making a pair of spectacles again from the monocle, I added some holographic card for some Ringo Starr glasses! ....I just love the ginger moustache and beard on this one.


It just needed something else though and ribbon didn't seem to fit on a male card so decided to tie it into a tie, as I had a piece just the right colour and just big enough to tie!!


Cardstock was a 12 x 12 scrapbook piece from my stash. That's why I have so many random bits of craftstock ......because you never know when you might need an oddment.


Right, on to the Nested Pint Glass die set, Ideal for male cards, a little different and at first I wasn't too sure what to use it for apart from the obvious shape. I used it as part of a face in the previous card and made a shaker card using the largest dies.  I did have to search for the shaker cup, which I knew I had but didn't know where. This shaker cup is one by Stamping Up but there are various other branded ones about, but I knew this would be the right size for my card. 


I filled it with tiny pint glasses using the smallest die in the collection with a remnant of  mirri card that I can only describe as a metallic peach. I also used my Tattered Lace Nested Circle dies to die cut the outer circle. for the shaker cup.


For cardstock, I went with a piece of mustard card, mink centura pearl card onto a kraft card base.


For a slightly different look, I used my Tattered Lace Tall Stepper die for a base with the larger pint glass dies layered up onto mink centura pearl card, mulberry red mirri card by Hunkydory and chocolate centura pearl card for the top layer.


Using some sand coloured core coordination card by Tim Holtz that I had I used one of the small Pint Glass dies to decorate, adding some frosted lace stickles for the foam on my pint.


A few ribbon banners and a sentiment, just to finish it off.


My final card to share is a bit retro, with that familiar diamond pattern I remember my dad having on his socks. I have used the Tattered Lace Diamond Foundation dies on my felt cardstock again to form the pattern.


This time I have paper pieced my Pint of beer and added a layer of acetate for the glass effect, with some frosted lace stickles for the foam.


A piece of worded birthday ribbon finished it off nicely and meant I didn't need to add a sentiment to the front of my card.


Men's cards always seem a challenge to make but I really enjoyed using this collection and I'm sure it will come in very handy in the future.


Happy Crafting


Decorated MDF Gift Boxes

I had a few small MDF gift boxes sitting in my craft box for a long time, waiting to be decorated, so I thought it was time to use them. For...