
Today I am sharing May's flip-flap memory book pages for our Dreamees monthly group swap.

I try to use as many Dreamees products where possible to comply with the swap but more importantly, it's about having fun creating.
With these pages, I picked a sewing theme and carried it all the way through and as always, it's so easy to mix your Dreamees collections, old and new to get the most out of them instead of leaving them redundant in the draw.
I really like this Festive Fretwork flower die set, they are perfect as Christmas flowers and make beautiful all-year-round blooms too with their textured petals on the larger dies.
The Dreamees did a sewing stamp and cd collection some time ago which I have made good use of in my project and still find their cds come in very handy from time to time, especially for themed papers and toppers, like this little fob watch which I printed onto one of their papers.

I wanted to create lots of different textures on these pages. On here I used that cute little mouse stamp from Autumn days looking up at the calendar from the perfect planners stamp set.
I have created the sentiment plaque using Debbi Moore's metal magic, which works on a similar basis as an embossing powder. Once the powder has melted, it can be stamped into and then sets like an embellishment.

The page concertinas out with some mini pieces of inspiration on each side, each made to look as if they have been stitched
I have used the basket from their endless possibilities set with air dry clay for my basket of felt flowers. Being a sewing theme I also made good use of my stitching tool and some embroidery thread. I know my swap partner has dogs so I have added a stamped image of this cute little pup under the recipe sentiment.

For a different texture, I used film and fibers, on my tangled treat butterfly and this accompanied my usual ATC card that I always add with my book pages.

On the flip side of the concertina page, I have stamped some bees buzzing around some honeycomb which I have made using a little air dry clay again from one of their stamps. Air-dry clay is really light so works well for added texture in these projects.
I find Das clay from The Works/Hobbycraft is pretty good for small pieces like this. It's inexpensive and once opened if you keep it in an airtight box with a baby wipe inside it extends the life of your clay.

On the reverse side of the pages, I have gone for a more vintage shabby vibe.
I found a template for the button card and covered it with Dreamees papers. The buttons were made using a die by Tattered Lace and it has proved to be a very handy embellishment for projects but lots of your little stamps can be made into embellishment too, like the pins, needles, and scissors that I have used all over this project, with the help of glossy accent!

I've used a small piece of corrugated cardboard as a base for my stamped mannequin. This has been dry brushed with gesso before adding a small piece of rice paper to one corner. With one of the Dreamees little book of textures, I stenciled some white texture mousse for interest. Once dry, I went over it with a little white pearl drops.
The little flowers were from one of their CDs and I have also added glossy accent to the stamped image of the sewing machine.

For the pockets that I created on the next page, I found these little Toppers on one of the Dreamees CDs which I printed onto some of their patterned paper and then backed onto cardstock ready to embellish.
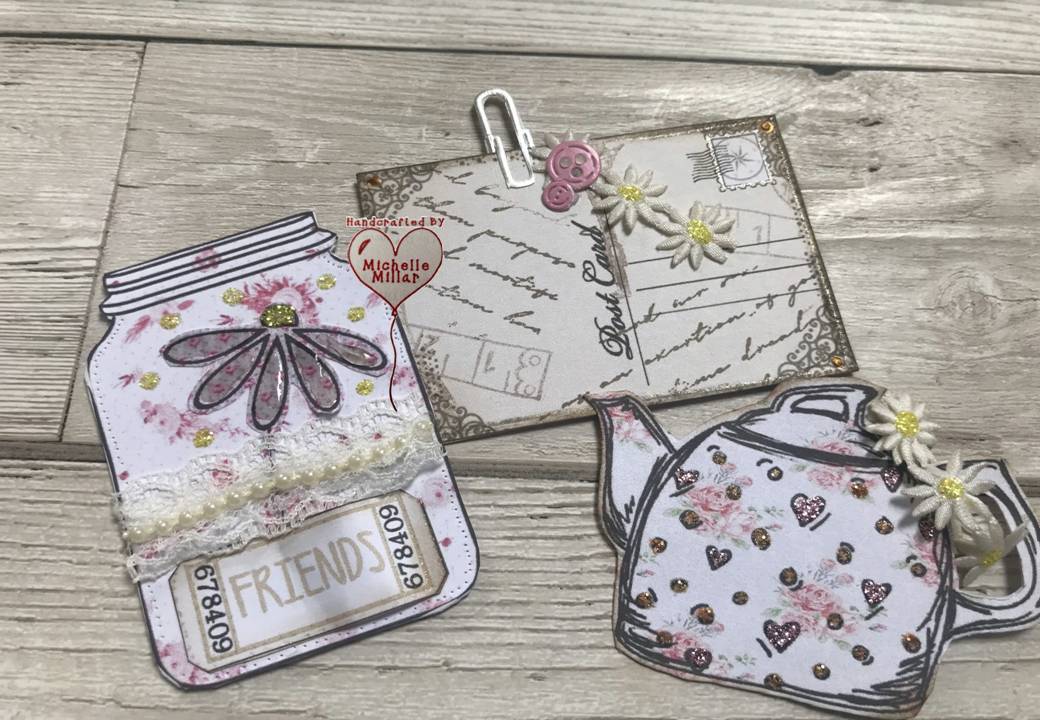
I had forgotten that Hayley Bignall had also created some digi images on some of her CDs and here this little daisy came in very handy on the jar. With a little background stamping on the postcard they just needed a little bling in the shape of stickles glitter glue.

A few inspirational quotes on the back of my tags to finish on. All those little odd pieces of ribbon and lace have been ideal for this project. I am still using my stash of mixed ribbon and lace that I bought from a charity shop pre- covid. I have certainly put my lucky find to good use.
This is a lovely group project swap to be part of especially as I can pick it up and keep adding to it over the course of the month until I am happy that I have done enough with it.
Have a great day, whatever you have planned for yourself
Happy crafting


