The mdf fairy has been shimmered with a spectrum noir sparkle clear overlay pen
This set of Dreamees fairy doors were purchased at one of their workshops I went on and they came as a pack of two. I have made up the larger door. The mdf is available direct from the Dreamees. The very clever Jimmy Murray (MDFit) cuts all their mdf and if there is a specific piece you are looking for, he will make one for you.
This Textures cd by the Dreamees is a really good cd to have in your collection. There is a good selection of papers as well as texture ones and I think this specific wood paper is so realistic.
For the wooden panels on the fairy door, I used a piece of thick cardboard (from a box) and covered it with the wood panel papers along with the mdf pieces. For the base, I used an mdf Dreamees shape from my stash, which was just long enough for the door to stand on. I covered this with the pebble paper, which actually looks like crushed pebbles close up.
One thing I also like to do is edge the mdf pieces with a coordinating ink to soften the edges. I used Tim Holtz distress ink in gathered twigs on all the pieces.
I stuck the pieces together using cosmic shimmer pva glue as its a good strong bonding glue. I left the stand until the door was fully decorated.
The mdf fairy I sourced online (ebay to be exact). They came in a pack of 10 (most of them I used in my garden as hanging mobiles from my eucalyptus tree). I inked the edges of the fairy with some Tim Holtz vintage photo distress ink and then gave it a shimmer with a spectrum noir sparkle clear overlay pen. This pen (comes in a pack of 3, widely available from Crafters Companion) is invaluable and I use it all the time. I would definitely recommend you invest in a set. They also come in a fabulous range of colours.
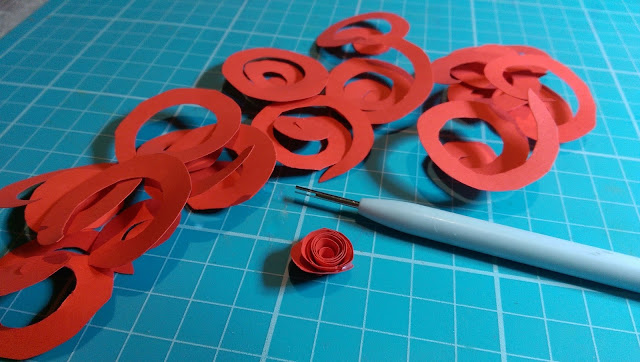
I wanted roses climbing up one side of the door so cut 10 circles out of red card measuring 1 . 5 inches. I could have used one of my dies to do this but it was quicker to draw around the lid of a little pot that was handy and just cut them out. I then cut spirals into the circles. You don't have to own a quilling tool to twist the paper into a coil but it helps if your flowers are small as its less fiddly. I just happened to have one which was a free gift from a craft magazine. I used a little cosmic shimmer pva based glue to stick the base of them (to stop them unravelling too much)
.
You can also see the pebble paper better in this picture.
Using some twine/wired raffia ( I purchased this big role from a floristry wholesaler. It should last a while). I wrapped it around a thin paintbrush to coil it before bending it to stick onto the fairy door. I have used my glue gun to do this in the past but this time I just happened to use my cosmic shimmer pva based glue in tiny blobs. It does dry clear but you just have to hold it in place a little longer to make sure it sticks well before moving onto the next section.
This wired raffia is perfect to make the door knocker also, I then glued my twinkling fairy to the door. Then I added my roses where I wanted them, along with some leaves punched from green cardstock just to all a little foliage.
Now I glued the base to the door and left it overnight just to make sure it formed a good bond.
The next day I added the finishing touches, which were a toadstool, ladybird, some little pieces of bark (I was given), a little acorn (I had picked up and kept) and a handmade by metal charm. I also shimmered the stepping stones and acorn with my pen, for that early morning dew look.
Hope that you have enjoyed my fairy door walk through. Soon this fairy door will be off to its neww home.
Happy Crafting


6 comments:
Fabulous Fairy door love the shimmer and beautiful roses
Carol x
Thank you so much Carol x
Gorgeous fairy door
Thanks very much Katie x
Very significant Information for us, I have think the representation of this Information is actually superb one. This is my first visit to your site. Wooden Hanging Fairy Online UK
Thank you very much Micheal, much appreciated
Post a Comment