blog backbdrop

Showing posts with label Magik Graphics. Show all posts

Monday, 28 October 2024

Halloween Projects

I have a few little Halloween projects to share but haven't got around to writing a blog post on them.
 

I have decorated a little coffin shaped box along with some coasters. I came across a box of pale pink clover leaf coasters in a charity shop for 50p, they looked like they hadn't been out of their box and were just what I needed for a project like this.


I started out by painting my little coffin shaped box from The Works, with a thin coat of white gesso. I also did the same with the coasters. 

On the Inside of the box, I decided to use some Art Alchemy Sparks paint in Night Shadow. This velvety rich paint goes a long way. These paints come in many colours, but I think some shades can be hard to find as new ones come out.


My images are from the Watercolour Witches digital download collection by Magik Graphics. I love this collection! They are not currently trading, but I am sure that they will be back at some point. 

These images have been printed using my Epson Ecotank inkjet printer and I have used the Craft Master rice paper which I would recommend, especially if you are using an inkjet printer. I purchased my rice paper a while ago through an offer on Create & Craft but I know that you can purchase it directly from Highlight Crafts.
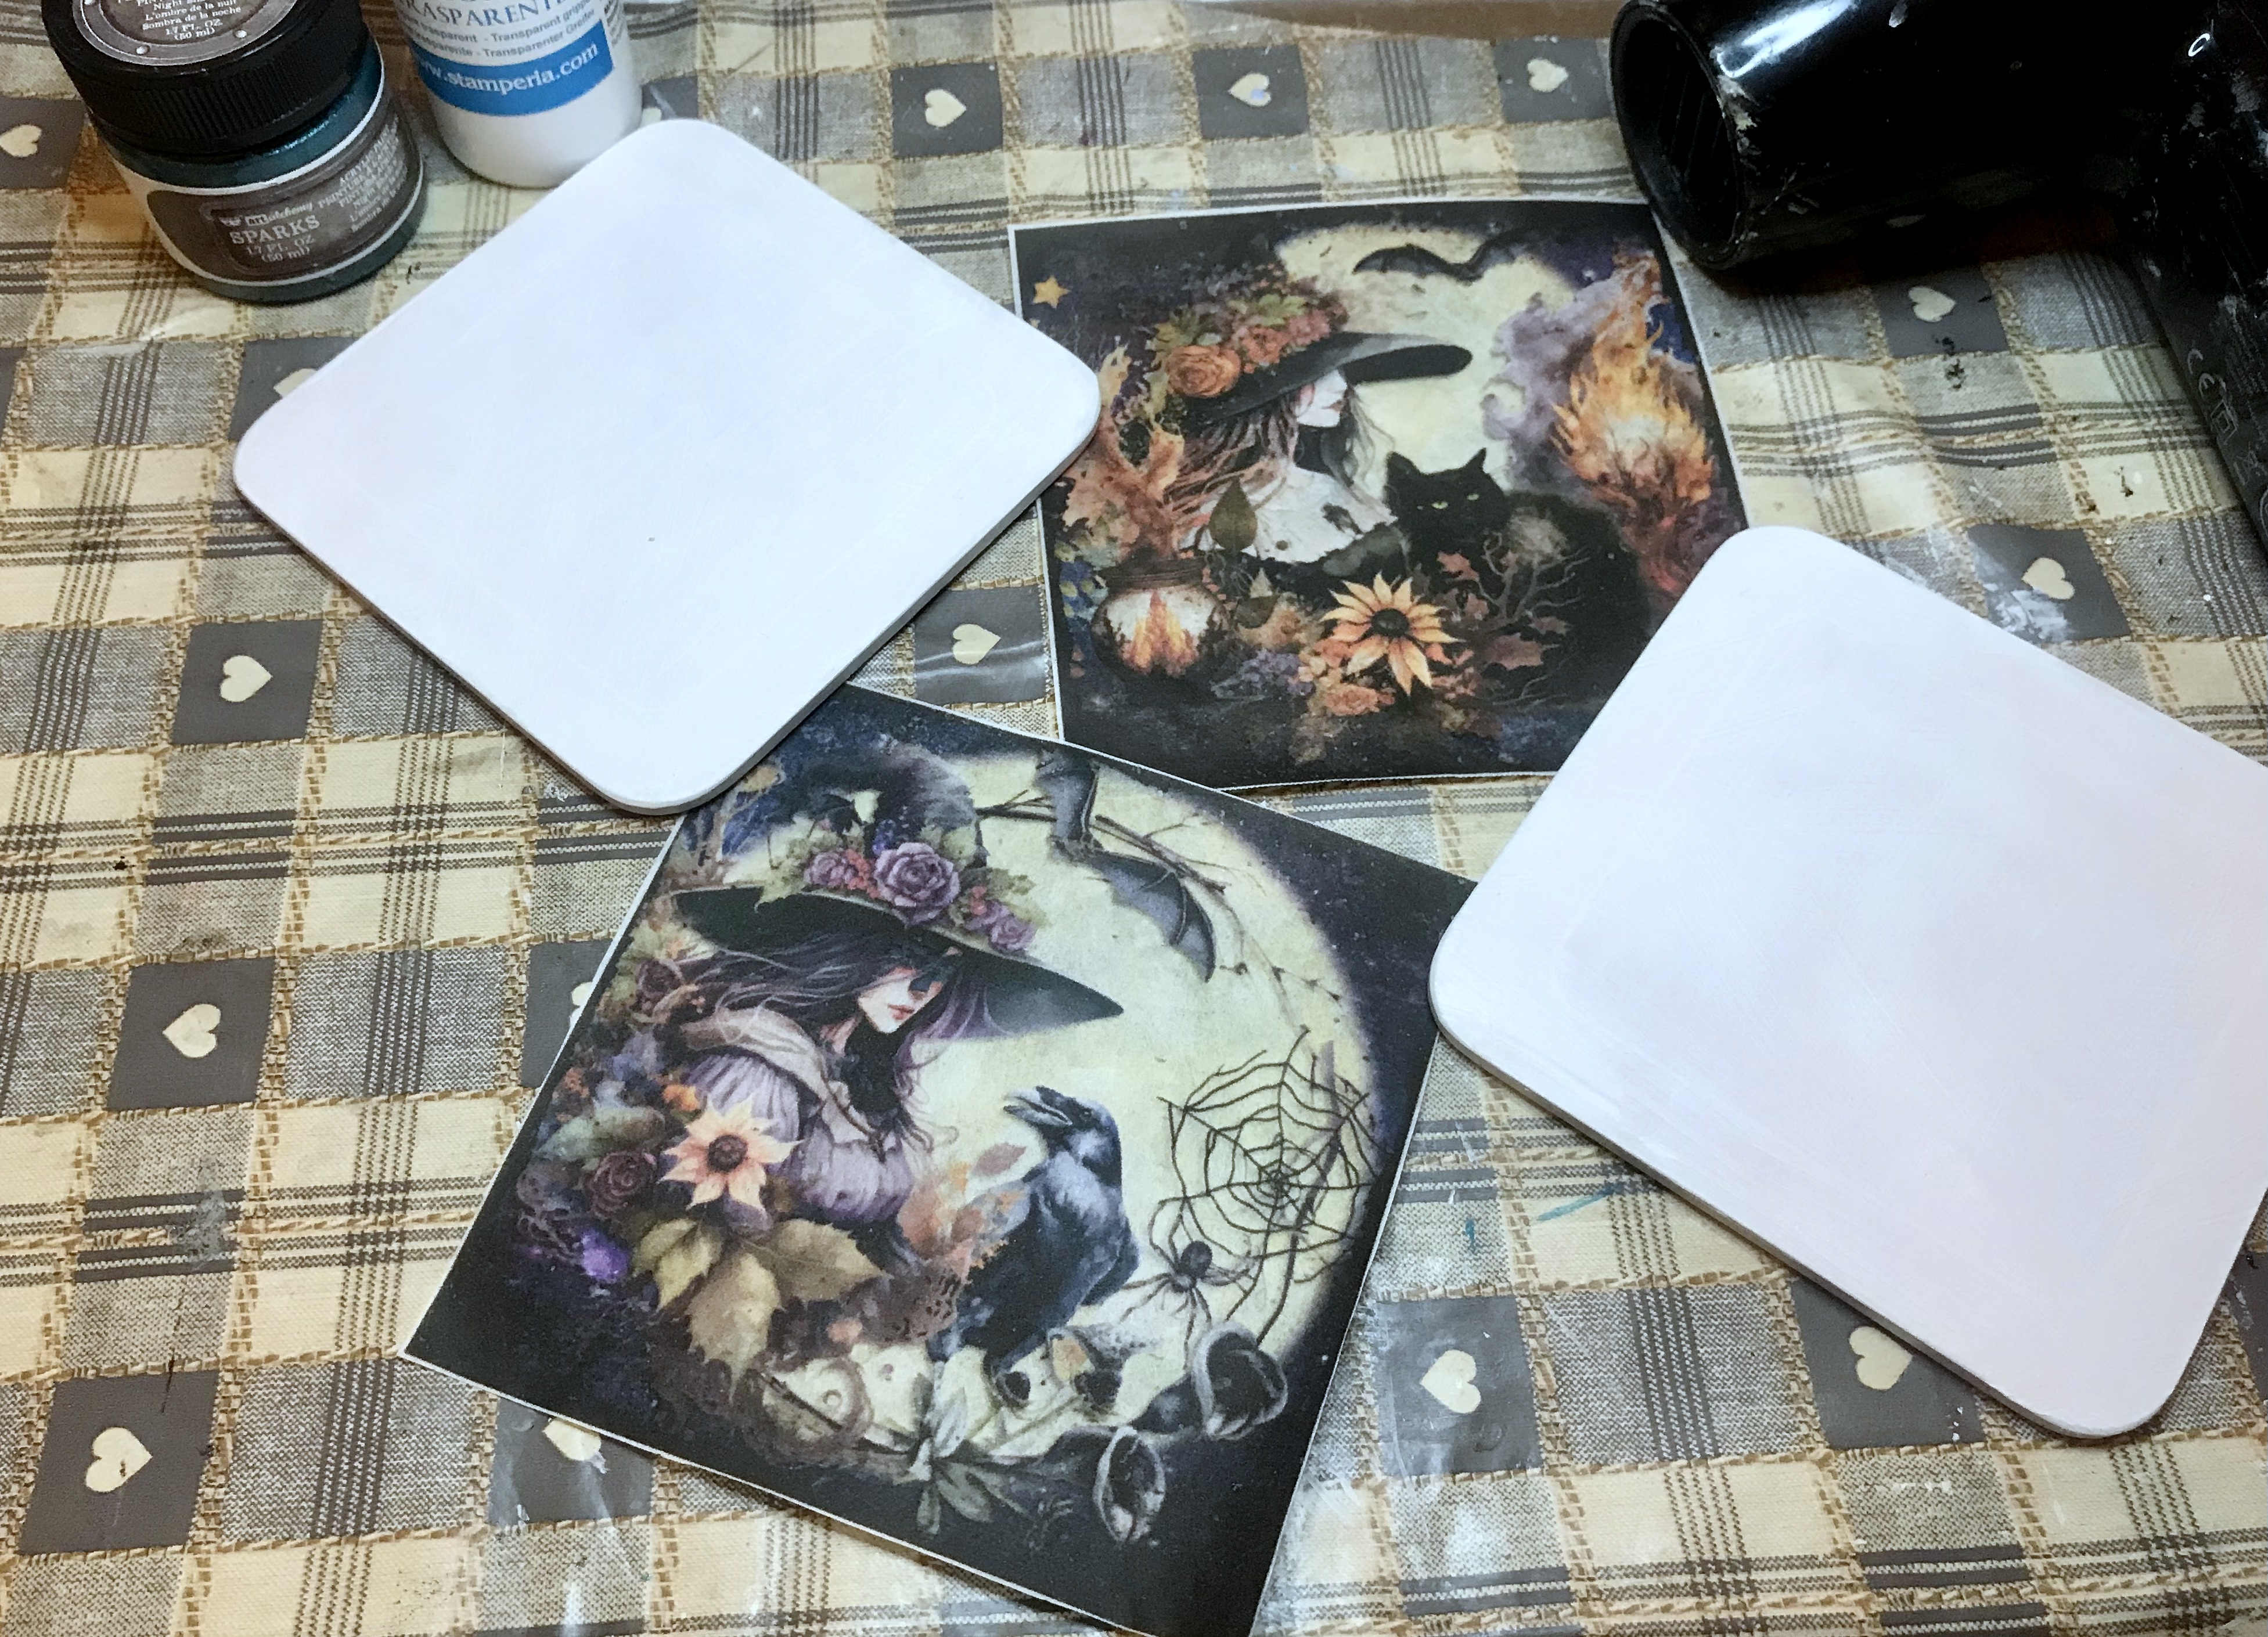

They recommend a stencil spray to adhere the rice paper to a sheet of A4 copier paper so that it will pass through your printer but I had a can of Crafters Companion Stick & Spray in my craft stash which does the job equally well when used lightly.

I used a decoupage transparent mixed media glue/medium, from Stamperia to seal my images to the coasters and the box.  


To add texture along the side of my box, I used a little sand texture paste from Pretty Gets Gritty and then I painted over the top with some black gesso.


Finally, I added some clear lacquer to seal my projects and give them a nice gloss. I also edged the little coffin box with some gold wax. I intend to use this as a little jewellery box for my dressing table.


I have a few more coasters to finish off but I'm really pleased with how they have turned out.

Have a great week, whatever you have planned for yourself.

Happy Crafting


Challenges
A place to start - AG  - Rising Star

Monday, 5 February 2024

Watercolour Witches Gift Box

One of my favourite crafty activities lately has been decorating boxes as you can give them a unique look and they are always very useful to put things into too.

For this project, I used some of the papers from Magik Graphics Watercolour Witches Collection, which is available on a CD or as a digital download, direct from their website.


This is a wonderful collection and Susan has also designed these papers to fit on these boxes, which are just under 10 x 8 inches (4 inches in depth), that a lot of crafters have been using and Susan also uses them in her Facebook live craft group.


I printed these papers on my usual 120gsm colour document Navigator paper, as this works for me and since Wilkos is no longer trading, I can still find it at Tesco which saves me having to order online.

I kept decoration to a minimum as I didn't want to cover up these wonderful papers.  This box isn't for me but I will definitely be making one to keep.


Inside, I opted for this rich amethyst metallic paint from Finnabair Art Alchemy which is amazing to use and leaves a fab velvet rich shimmer.  I also chose a different image for the inside of the lid as I thought that the colours tied in nicely.


I gave the box two very light coats of matt medium to seal it, making sure each layer was completely dry before adding the next, this prevented the paper from wrinkling or any colour bleed from the inks. It also left my box with a nice smooth finish. I then edged the box with gold wax.


I thought one of the mecha moths would look good in the top corner of the box. This one was made from hot glue and I coloured it with some copper wax. At different angles, you can see through parts of it, which adds to the dimension.

I did make a 7x 7 inch card to accompany my box. This collection also has a range of inserts to accompany the various designs for your cards and is certainly one that I really love and can not recommend enough.


All this one needed was a trio of flowers from my box that I had previously made up using some blooms from Opulence by Design Crafts and a little moss.

My decorated box has been on a bit of a tour (collecting various stamps along the way) before eventually reaching its destination safely.

Have a great week,  whatever you have planned for yourself.

Happy Crafting


Challenges:-
Mix it Up - MM    (Top  Pick ) 


Sunday, 15 May 2022

Gothic Book Box


I have finally finished my gothic book box which has been a work in progress project and I'm really pleased with how this one turned out.


All the inspiration for this project was taken from Sue Andrews - Magik Graphics mixed media live Facebook group.

I chose this beautiful image of the Midnight Roses CD by Magik Graphics, which decided the colourways for my box.


I used Pebeo high density modeling paste through one of Stamperia's stencils.  This texture paste is nice and smooth and leaves a great defined texture to your project but I would have preferred it in a jar rather than in a tube. It did dry pretty quickly but as I'm a slow crafter I normally leave things to dry overnight anyway.


The book box was given a coating of black gesso except for the inner edges which I painted in buff acrylic paint to look like pages, adding some texture to mimic the edges of the pages. My new favourite paint is the Finnibair metallics range. It's difficult to capture the true colour and shimmer in a picture but for this project, I picked plum, which was the closest to the colours in the image.  I dry brushed the colour, leaving some of the black to show through.

I think the gilding wax always finishes a project off and really highlights all that texture on your project.  I also used the alchemy tag moulds by Stamperia to create the tag and some of the embellishments for my box using air dried clay.

I knew those broken chains that I kept would come in handy one day. Attached to one of the tags that I had made, it was a perfect hanging embellishment. This was attached with a little leatherette cord, inside the top of the box. This is why as crafters we keep all these random little bits and pieces.

I can get a  bit carried away when I have a pot of gilding wax in my hands. Even the brass butterfly and key had touch of wax to lift them and the rose paper flower just didn't look right with its green stem, so that had to go too.

This now sits in my bedroom.  I don't keep many things that I make as I am so used to making for others and a lot of my own craft projects tend to sit on the back burner with the garden ones being the ones that do eventually get finished as that is where I tend to spend a lot of time.

As I am stepping away from making as many cards now, I'm hoping to focus more on some mixed media projects

Have a great day, whatever you have planned for yourself
Happy crafting


added to:  The River of Creativity Challenge  (Shoutout for May challenge)


Wednesday, 20 January 2021

Dream Catcher

I have got a little collection of birthday makes to share today for one of my friends that I made for her just before Christmas and these are all gothic themed.

This is quite a large mdf dream catcher that I made for my friend from the Dreamees.   I didn't have black gesso so I used black acrylic paint, applied with one of those dome sponges shaped like an egg. Mine happens to be makeup sponges from Primark as they are cheaper than the proper craft ones you can buy, but they are great to apply paint to mdf like this as I find that you don't get brush/streak lines on your mdf when dry.


I found some go-to beads in my stash that have a good mix of black, silver, smokey and clear textured shaped beads for projects like this and threaded some onto some clear twine, using some large studded gems for the front of the feathers.


I decorated the dream catcher with flowers made from Fleurs flower forming foam using the Dreamees Sweet Sunflower dies. I used the crocus patch colourways for the foam and a purple faber castell oil pastel on the edges of the petals to add tone to the flowers before moulding the foam to give them some shape.


I used a mix of black and purple stamens in my flowers and added some foliage from the Fretwork Fronds also by the Dreamees in purple card and adding black feathers that I purchased from Hobbycraft.

I used a silver acrylic paint pen the mdf wording and added some black braiding to hang the dream catcher up.

To go with the dream catcher I also made a frame card using paper and graphics from the Beliza Mortals CD by  Magik Graphics. The flower was made using the Build a Peony flower stamp by the Dreamees, which has been heat embossed onto black vellum using silver Wow embossing powder.


The image on the inside has been decoupaged into the curtained disc on the topper.


To finish with, I added an 8x8 card to match which was printed onto glossy cardstock when I made it, hence the reflection on the card, which always makes taking photos a challenge when you have a light background also. 

Magik Graphics have some amazing gothic, pagan, mystical graphics and more and there is no loss of definition when you print your images and design papers off even on regular printer settings.

I really enjoyed making these and it's to have a change of genre to craft with.

Happy Crafting


Wednesday, 21 October 2020

Gothic 30th Birthday card

And now for something a little different.
I don't get many opportunities to make gothic cards but do enjoy making them. 
The card I am sharing today is a commissioned 30th birthday card and I have used the stunning artwork from Magik Graphics.
As this was a special birthday card, I thought that an 8 x 8 twisted easel would work really well, not only to display the artwork on the card but as a more effective freestanding card that can also fold relatively flat depending on the stopper that you use on the card.

I used 300gsm black colour core card stock for the card base and a layer of silver satin board to separate the base card from the topper.


The topper from the Magik Graphics Beliza Mortals CD Rom was chosen for the striking satin border with its steel grey lace edge. The graphics are so sharp that even when printed off, no definition is lost and you don't have to print on your full ink printer settings either, which means that you still get premium quality without using all your ink.


The striking topper for the base of the card is from the Magic Graphics Midnight Roses CD Rom. I had been given a brief that Lori's favourite colour was purple, keeping that in mind and whilst looking at the roses on the topper I remembered that I had some plum roses in my stash that would make a great stopper and compliment the ones on the card.

As crafters we often make and share between each other and one of my many talented crafty friends also loves to make flowers and some time ago  Sharon Diarrassouba made and sent me some of these gorgeous handmade roses, which I have used on a few projects. These ones were just the right colour for this project and I'm sure she will be happy to know that they have been put to very good use once again. 

On the base of the card, I used the matching insert , when the card is closed it will just appear on the back, which is better when receiving a boxed card. This time I have mounted the insert on some Hunkydory aubergine mirri card as it looked better than the silver satin board for the insert. 


If you have made a keepsake card, it also needs a nice box to go with it. The image chosen for the box wasn't in the colour they ideally wanted, but they loved the image, so  after asking permission from Susan Andrews to change the hue to lavender, I was really happy how it all turned out. I also used the Dreamees poinsettia embossing folder to line the base and lid of the box as I really like the textured effect.


The word and letter dies are by Crafters Companion and the little leaf dies are Dreamees die cut from silver satin board. Speaking of Crafters Companion, I still use my Ultimate Pro every time I make cards, along with my A3 box board. Probably my first major craft purchase and still going strong. Sometimes you just can't beat the old faithfuls can you.

I also used pinflair glue gel to stick the flowers down and it also gave the flower that I used for stopper on the card a good firm base to stick down on. The only other thing I added which is a bit difficult to see in the pictures are some metallic gems on the corners of the card base.
There is another gothic card in the pipeline but unfortunately, I can not share that at present. In the meantime, perhaps i will make a few that I can.

 Happy Crafting


Thursday, 1 February 2018

Magik Graphics - Belleza Mortals CD ATCs

I decided to see if I could use the Magik Graphics Belleza Mortals cd to make a set of ATCs.


First, I started with the Sugar Skull Hattie collection of images and templates within the folder of the cd. I imported the images into Craft Artist and sized them down to just smaller than the ATC size ( 2 . 5   x 3 . 5 inches) and printed onto 210gsm photo paper. The graphics are so sharp that when you manipulate them the resolution and quality are not compromised. I found that they printed out really well using the fast/normal setting on my printer (as my printer is temperamental with cardstock) and using normal/everyday printing (saving on ink).


I decoupage the images and used pinflair glue gel to create some dimension on the cards and layered them onto black cardstock.


Sugar Skull - Hattie


I did exactly the same for six of the collections I chose from the cd, this being Sugar Skull Vivid Candy.


Finishing off with a few embellishments
Sugar Skull - Vivid Candy


Sugar Skull Roxy


Sugar Skull Poppy Blue


Sugar Skull Platinum Flame


Sugar Skull Calypso


These proved to be extremely popular for my swap and I'm so pleased they went down well with the group I swapped them with, as the artwork by Susan Andrews from Magik Graphics is go good and very unique that I wanted to do them justice.


Happy Crafting


Decorated MDF Gift Boxes

I had a few small MDF gift boxes sitting in my craft box for a long time, waiting to be decorated, so I thought it was time to use them. For...