blog backbdrop

Thursday, 7 January 2021

Lockdown growing projects

My other love apart from crafting is gardening. I love the way your garden is constantly changing and evolving and nature has an amazing way of adapting itself to every extreme and at times,  against all odds.

So, my lockdown planting started with me planting on cuttings of succulents last year for the summer for a small garden project, which is obviously rather slow. 


I then remembered a conversation I had with my friend about an orange pip growing into a little plant, and decided that as I had a lot of time on my hands over the first lockdown to plant a few.


So, at the start of lockdown Pip and Pip junior were born from a humble orange from Aldi.  I remember that my mum would pop orange seeds down the side of her plants on the kitchen window sill all the time and they would just sprout up and then she would just replant them... I don't recall any orange trees as a result though.


As we go into the third lockdown, pip junior are doing pretty well, and my friend has his little brother pip who is also fit and healthy.

So, on the second lockdown that got me thinking of something else to grow. 
On my walk to co-op, I take a short cut, down the scenic route and pass this beauty and in the summer, its a stunner and they can grow pretty big.


A Cynara Cardunculus/ cardoon artichoke thistle. By the start of the second lockdown, the heads had gone to seed so I acquired one and thought I'd have a go a growing the seeds.


The thistle heads are really quite majestic, even when they have dried out, albeit still quite spikey.  I did put my gardening gloves on to retrieve the seeds which look like apple pips and these cream spines are really prickly.


I looked up online how to propagate these seeds and it was a bit hit and miss.  I potted them up in some compost and just popped them in my greenhouse where they get plenty of sunlight. I haven't needed to water them at all.
To be honest, I wasn't actually expecting anything to grow so was pretty excited to find that two of the 6 pots had shoots and one had a huge root growing through the pot already. Hopefully, they will be strong enough now to survive the winter.

Well, we've had orange pips, ornamental artichokes and now with the third lockdown its lemons!


So!  After watching a Utube video I decided to have a go at growing a lemon tree!...or two!
Ideally, I would have preferred limes as I love limes but there was not one single pip in my limes (not that I'm complaining) but I have had a few requests for lemon plants funnily enough (must be lockdown fever).

So here they are, poor little devils, seeds stripped of their shells and about to be sprayed with water and then wrapped in a paper towel before being placed in a jar and then placed in a dark place for 2 weeks to germinate.


Hopefully, when I return to these in 2 weeks time there will be signs of life. Hopefully, this will be the last lockdown we have..... but in the event of me needing back up planting projects, suggestions for future planting projects would be welcome.
Enjoy your day, whatever you have planned.


Tuesday, 5 January 2021

Sending Smiles & flowers card

Today I thought I'd share the card that I made in our group Facebook  Dreamees craft swap whilst in the second lockdown. As it is also the first blog challenge of the year for us at Let's Craft and Create I also thought It would be a nice project to start the year off.

Our theme for January is Cheers to you, and as with all our challenges, there is an ATG option.  It's been a challenging year for everyone, with very little to celebrate, so why not send a card to a friend to give them a reason to smile today.

I decided to use the Dreamees Autumn Haze paper pad and make some flowers to pick up the colours in the papers.  I chose an easel card as I thought it would support the half-moon display of flowers.


For my flowers, I stamped and die cut my flowers using the Dreamees Beautiful Babysun stamp and die set using the denim sparkle dinky inky pad on some textured aubergine coordinations Tim Holtz card stock from my stash and patterned design paper from the  Dreamees Autumn Dreams paper pad.


I only had white pollen stamens by the Dreamees, so decided to colour them to tie in with my project using the honey sparkle dinky inky.  The colour really well, especially if you juice the pad a bit with the matching reinker. That way you can have stamens whatever colour your wish. 


I added a little foliage from the same Beautiful Babysun die set using some soft green card and a few green frosted berries, with a little sisal between the layers. I've used the smallest dies from the oval Loops & Lace dies collection for my sending smiles sentiment, which was from the Dreamees Cute bun stamp set.

I used the woodgrain design paper from the Autumn Haze paper pad as a faux wood plaque for the card topper and mirrored it through as a stopper for the card, saving one of the larger flowers for the centre stopper on the card.
I really enjoyed making this card for the lovely Erika and hope she likes it. I also made some ATCs too. Haven't made these in a while.


I heat embossed the dreamcatcher from the Dream Big stamp set with gold embossing powder and the Heartfelt Hedgehogs with my sparkle dinky inkies and then sprinkled clear embossing powder over the top and embossed. I used my sparkle dinky inkies to colour my stamps in too as well as the simple background.
 For Erika's name, I used the some past Dreamees alphabet stamps as the letters were smaller than the current Caligraphy set, although, I did use the capital E from this set.


The little card pocket I made was just to keep the cards together and I may make her more in the future that she could add to it.

These craft swaps are great and a good way of connected other crafters especially during these lockdowns where so many people have felt isolated and struggled with their mental health. 

Our design team have also been busy this month with projects of their own and there is always lots of fabulous inspiration shared by the crafters on our blog too. If you are interested,  there is a prize for the winning entry, following our theme and a badge for your blog for the top 3 runners up. Just click on the link below which will take you to our blog challenge. 

Enjoy your day whatever you are doing.

Happy Crafting


Barrel of birthday blooms card

Today is the start of our blogs challenges and at Daisy Chains, we are starting with a birthday theme so I have a barrel of blooms to share with you today.


My birthday card was made for a very special lady before Christmas, so it had to be all things Dreamees .

I went for an 8x8 tent card design on this one as I thought the front might be a little top heavy so used a 300gms white card base.
For my card I used:-
  • Dreamees A4 sage 300gsm cardstock
  • Dreamees tickled pink paper pad
  • Dreamees woodgrain embossing folder
  • Dreamees Beautiful baby sun stamp/die set
  • Dreamees Wonders Within swirl corner die
  • Dreamees Fretwork Fronds dies
  • Dreamees Endless Possibilities stamp set
  • Dreamees Stylish Shoes stamp set for the sentiment
  • Dreamees MDF window from Craft Magazine mdf set
  • Dreamees Moss
  • Dreamees white sisal
  • Dreamees 4mm coral pearls
  • Dreamees Sparkle Dinky Inkies
  • Dreamees vellum
  • craft card
  • Hobby House flat backed pearl string
  • a strip of 1mm pink organza ribbon
  • white twine
  • 3mm white pearls
  • Small piece of green card & pale green vellum
As I knew that the person I was making this card for loved flowers, there had to be plenty of them, so a cascade of blooms was what I was aiming for. I stamped and heat embossed the Beautiful Babysun flower stamps onto vellum and then used a little watermelon sparkle dinky inky on the petals to highlight the flowers, especially as I had used coral pearls in the centre of the flowers to make them stand out.
For the barrel the flowers sit in, I stamped and decoupaged it onto kraft card, using pinflair glue gel for a little dimension and inking the barrel with some dinky inky in walnut for a more aged effect. The moss was a really good filler around my pot and I then backfilled it with the foliage from the fretwork fronds and babysun die cuts.


I started to add the layers to my card and die cut the Wonders Within Swirl Corner die on the sage panel of card that would sit just off centre of the flower barrel. I added a panel of vellum to the mdf window as I wanted to trap part of the flowers cascading down behind it.

A fine flat backed pearl string along the centre on some pink organza ribbon and the little dragonfly dies die cut from a little piece of silver satin board make them look like a metal embellishment. The sentiment was heat embossed onto vellum from the Dreamees Stylish Shoes stamp set.


As you probably know by now, I don't always put a sentiment on the front of my cards. I did have space to put a happy birthday sentiment but for this lovely lady, this sentiment was more fitting.  

The rest of our design team have also been making some lovely projects this month, along with so many great crafters on our blog every month. It's always lovely to see the inspiration everyone shares. Please use the link below to take you to the blog challenge and thanks for the visit.


Happy Crafting


Thursday, 31 December 2020

Bouquet of Blooms 60th Card

On the last day of the year, I thought that I would share a card that I made a few months ago for a  lovely lady in our craft group for a very special birthday.


She didn't actually know that we were making cards for her and that's the best kind of surprise for a crafter, handmade and craft.......lots of craft in fact.

For my card, I started with an 8 x8 inch 300gsm white card base and chose the Dreamees sapphire dreams paper pad. One of my new pads to use and I know for a fact that I am not the only crafter that loves the smell of their new paper pads.....strange but very true.

The day before I started to make this card, I had a flower making day as flowers take me a little longer to make these days. As I hadn't quite decided on a plan for my card I decided to make a batch of flowers and just see how they turned out.


Using a mix of the sapphire dreams and plain cardstock I used the loops and lace flower dies to create my flowers, As I only had white pollen stamens, I used some of my Dreamees sparkle 2nd gen dinky inky reinker to colour them the shade that I wanted and added Dreamees 4mm pearls to the rest.


I had some french navy colour core card that I used to define the layers in my card and used the circle loops and lace doily die for the centre topper and one of the border dies in the oval set to make a ribbon band for my polka dot ribbon to sit on.


On a printed die cut piece of the backing paper from the paper pad, I stamped the recipe of a birthday sentiment and decided to have my flowers cascading around the topper. For the foliage, I used the dies from the embellishment set in the loops and lace collection and die cut the leave in silver satin board to tie in with the dimensional silver glittered 60 in the corner.

Fortunately, I did have just the right amount of flowers I needed for my card and if you are a few blooms short the rolled roses are always a good space filler and easy to make without a die. On these I added a little ink to the edges which gave them a little shimmer too as the Dreamees 2nd gen dinky inkies do just that, colour and shimmer perfectly.


I added a verse to my card and made a box, hoping it would withstand a trip in the post and by the look of it, it did which is always a relief when you make something.

To be fair the post are pretty good, I make a box and then wrap it in a layer of brown paper before sending and that seems to work pretty well and keeps the weight and price down as well as adding an extra layer for wear and tear.

I know there have been a lot of complaints about Royal Mail with the run up to Christmas but I think they have been doing an amazing job under extremely difficult circumstances, working silly hours which is easy to forget.
Enjoy your day whatever you are doing and best wishes for the New Year.
Happy Crafting


Wednesday, 30 December 2020

Last of the festive cheer

As we are close to ringing out the end of this year I thought I would just share the few cards that I managed to get made which were only a handful by all accounts.

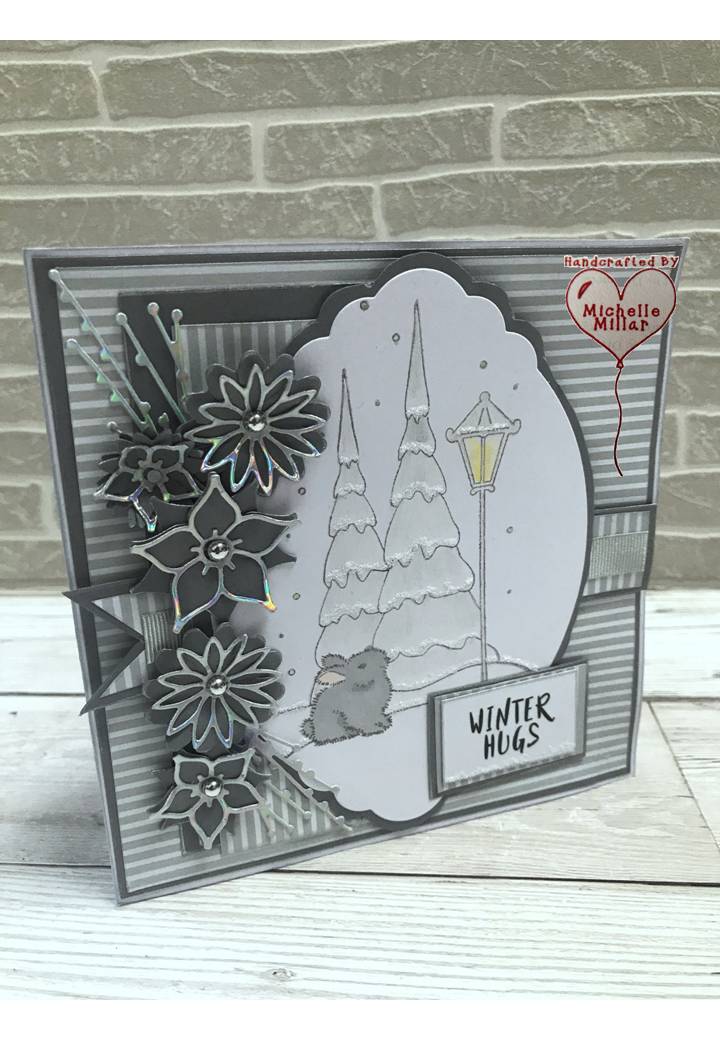
My little collection all made with my festive Dreamees stamps and Loops and Lace die collection by the Dreamees which as you can see a lot of my cards has been my favourite go to die set collection lately. I particularly love this Santa Paws stamp set that Hayley Bignall designed, which really does capture a traditional essence of Christmas.


Each card does vary as I don't like making identical cards. The card above has the addition of the pine cone stamp by Skull & Cross Buns to match the tag Christmas tag I made earlier.


I made all the festive flowers using the Loops & Lace flower dies and used mostly Dreamees festive design papers from their past CDs and paper pads. I painted my stamped images using my second generation dinky inkies.


This adorable stamp is also part of the Santa Paws stamp set and with a bit of imagination, you could adapt this and use all year round. I know I am biased where Dreamees are concerned but when you love what you use its only natural that you want to share it with others too.

I love using my Stickles glitter glue in frosted lace at Christmas for all those snowy icy edges as it adds that perfect amount of glittery texture that doesn't rub off like glitter can do.


These sparkle dinky inkies are brilliant. They just add the right amount of shimmer without going over the top but you can intensify that sparkle with the  re-inkers  should you want to.

Some of the sentiments were Festive Dreamees ones from a past printed Christmas collection with backing papers.

The adorable winter bunny was coloured in with a promarker. I wanted him to stand out and the colour worked well.


And something a little different using a little mdf stocking and the Christmas sentiment tab stamps.

Finally, finishing with another stocking card made for my brother in law and family using the little mdf stockings by the Dreamees and the little fir tree branch die by Tattered Lace. For the background, I also used the poinsettia embossing folder.  I added a few miniature bells to the edge of the card and some stickles glitter glue in frosted lace for a snowy effect.

I had hoped to make a lot more cards this year but unfortunately, it just didn't turn out that way, which is a shame but not the end of the world.
Enjoy your evening
Happy Crafting


Hollywood Glamour Birthday Card

I made these birthday cards a few months ago, ahead of time, as I knew I wouldn't be crafting for a while. For my card base, I used a 7 ...