blog backbdrop

Showing posts with label Dreamees Pretty Pets. Show all posts

Monday, 5 April 2021

Friendship plaque swap

Today I am sharing a decorated mdf plaque that was made for one of my lovely crafting colleagues as part of a craft swap but it just took a little longer to make and send on to her as part of our craft swap.


It is also the start of a new blog challenge for us at Let's Craft & Create and we have a flower theme this month. As with all our themes, there is an ATG option also. My project this month has a lot of flowers, which is one of my favourite things to make.

This project started with a play with some flower stamps that I hadn't' t used for a long time. It's great rediscovering stamps that you haven't used in a while particularly love the raggedy shape of these petals as they are so different and I like different.


I heat embossed the Exquisitely Exotic flower stamps by the Dreamees onto 120gms white Navigator paper with silver Wow embossing powder and then added a little colour with the Dreamees wonders of watercolour pencils. 


To blend the colours I mixed a drop of water with a few drops of the silver mist dinky inkie sparkle reinker in an ink pallet. I prefer to add my water this way than use it in my water brush.


The part that always takes time is, of course, the cutting but it worth it to achieve the look you want. In the middle, I added 4mm grey/silver Dreamee pearls.


After the flowers were made I then made a decision on how I wanted to display them and on which mdf  (funny because it's normally the other way around when you plan a project) I was going to use. I decided on the Pretty Pets set from my Dreamees mdf stash and covered it with one of the new design paper pads, Blushing, from the new Sparkle inks collection.


Instead of adding leaves, I thought the green pollen stamens would make a good alternative. These were originally white pollen stamens that I had inked with a juicy pickle Dreamees 2nd gen sparkle dinky inkie pad.  I didn't have a stamp with the sentiment that I wanted, so I just typed one that I liked onto cardstock.


I did the same with the following hanging plaques and on the bottom one, using her name, I added some definitions for each letter.

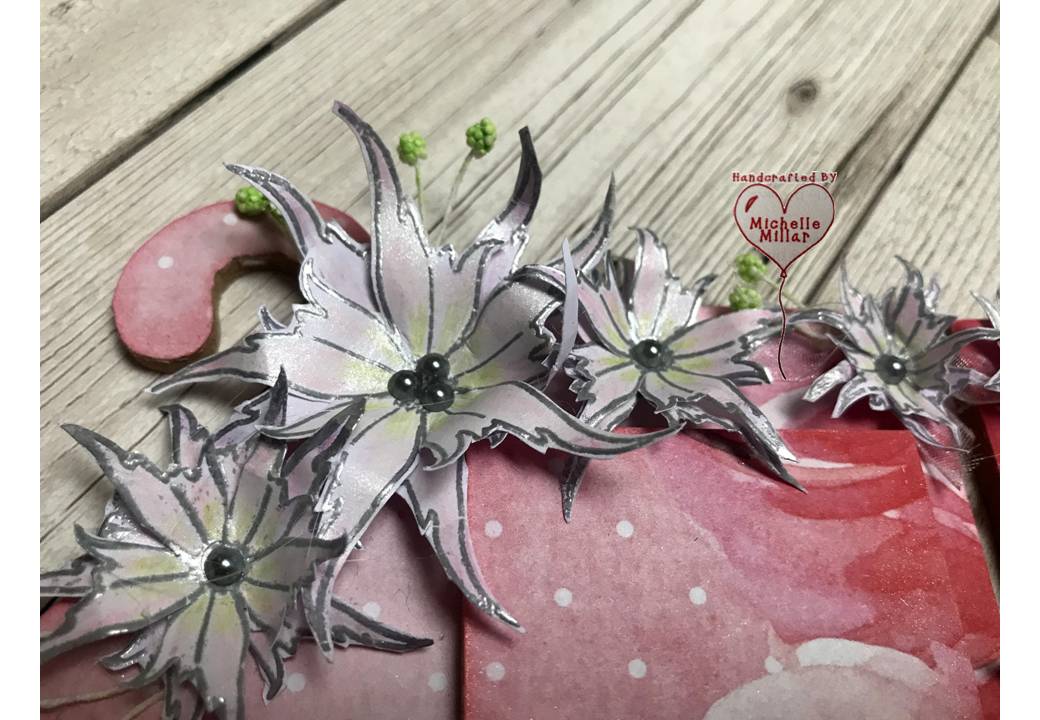


Considering this paper isn't any specific brand, I think the shimmer from these dye-based inks are brilliant (not always easy to capture in a photo).

I left enough gap for the plaque to fold in on itself so that I could post it off to her without squishing the flowers too much.

A decorated piece of Mdf is also a great alternative to sending a birthday or greeting card and hopefully longer lasting too.

Have a go at something new, whether it's something that you have always wanted to do or something that you created that was inspired by someone.

Our design team have also been busy this month with projects of their own and there is always lots of fabulous inspiration shared by the crafters on our blog too. If you are interested,  there is a prize for the winning entry, following our theme and a badge for your blog for the top 3 runners up. Just click on the link below which will take you to our blog challenge. 
 Happy Crafting


Sunday, 5 May 2019

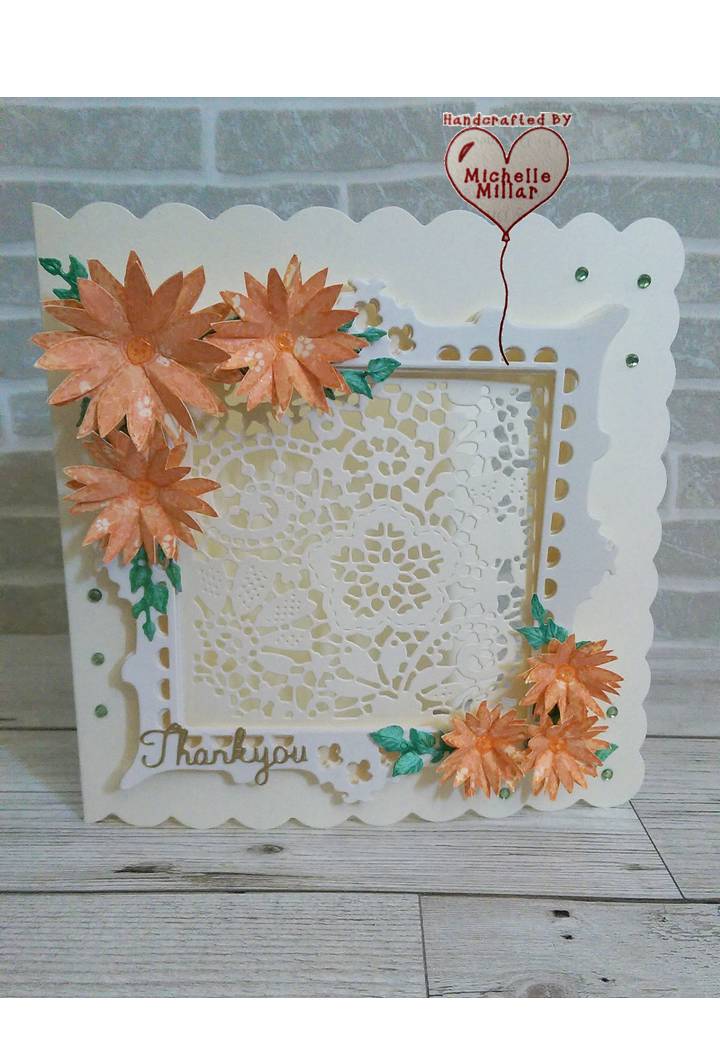
Dreamees Thank You card

Today I am sharing a DT thank you card for the May blog challenge over on Let's Craft and Create with the theme "Motherly Love"
This is another Dreamees make.  As you are probably aware by now I love Dreamees products. I love their stamps, especially their flower stamps which make such pretty flower for your cards.

Onto a cream card blank, I used the inner lacy panel from their divine lacy die which leaves the lace panel in your card. 

Dreamees square lacy divine die set


Then I used the outer frame die for my picture frame front and layered them up to give my card some dimension to the frame.


Next, I stamped the Something Stitchy flowers using rich cocoa memento ink onto the pretty pets backing paper printed off the cd. The rich cocoa gave a softer outline to the stitchy flowers. I love their little button centres which I added a little Ranger glossy accent to the centres.

Dreamees something stitchy stamp set
I also die cut some Tattered Lace leaves/flourishes from their Spring is Coming collection which were printed onto their matching charisma paper (downloadable free from their website)

A Tattered Lace sentiment and a few gems to finish the card.  I also used the Dreamees Square Lacy Divine outer frame die for a panel inside the card to write on.

I do like a little sparkle, so added just a hint of shimmer to the edges of the flowers using my spectrum noir sparkle clear overlay pen (which I used all the time). They come in packs of 3, last ages and are available from the Crafters Companion website.

Have a look at the inspiration over on our blog page from the rest of the design team along with the other project entries for this month on Let's Craft and Create Blog Challenge.  There is also a prize offered every month to the winning entry.

Happy Crafting


Tuesday, 18 September 2018

Birthday Book Card

For this months blog challenge on Let's Craft and Create, I am sharing a Birthday Book card made with Dreamee products and a Tattered Lace die set for our "friend" theme.


First I printed the wood grain backing paper, double sided onto hammered card for a little more texture using The Dreamees Sweet Sunflowers cd


Die cut the larger book dies twice and then join the spined dies together using a strong pva based glue like cosmic shimmer. The smaller of the large die can be used for pages inside your book or for panels as I have used them on the top and bottom.   I've also die cut the label using peach satin board by Create & Craft.


I stamped the sweet sunflowers onto the Dreamees velour paper, which has a lovely suede feel to it, using their dinky inkies to colour them in with one of their water brushes.
This card/paper takes the ink really well, whether you stamp onto it or colour.


I then die cut the flowers and layered them up.


Velour paper


I had a small zip and decided to cover it with some cream cotton lace to give the book front a prettier look to it with the sunflowers bursting through the centre. Pinflair glue gel is a perfect glue for this sort of project.  Using the Dreamees dotty alphabet stamps for the name in the label.

Dotty Alphabet stamp set

I stamped some white tissue paper with the largest stamp in the set, which made perfect coordinating paper to wrap it in.

Using the same velour paper I stamped my puppies using the Dreamees Pretty Pets stamp set.
I included the little mouse from their Autumn Days stamp set and used my Pearlescent dinky inkies to colour them in with the water brush again.


Onto cream card I have printed a leaf and sunflower backing paper (double sided) and made a box base to fit inside the book.

Using a piece of green lacy webbing for the grass and the sunflower leaves as foilage behind and around the puppies which have been adhered with pinflair glue gel, giving great dimension.

I used red liner tape to fix the box in place into the box but a strong pva glue like cosmic shimmer would also work well.

I have also stamped the Dreamees Friendship Dish recipe stamp onto coordinating wood grain card to form the plaque for the inside of the book. The Friendship Dish stamp was one of the first stamps I bought from The Dreamees.

A little Ranger glossy accent on the puppies eyes and nose to finish them off.


I have to say I love this precious nested book die by Tattered Lace, it has so many uses.
Pop over to the Let's Craft and Create blog page and see what the rest of the design team have been making. There is a $10 gift voucher for the winner.

Happy Crafting

Tuesday, 5 June 2018

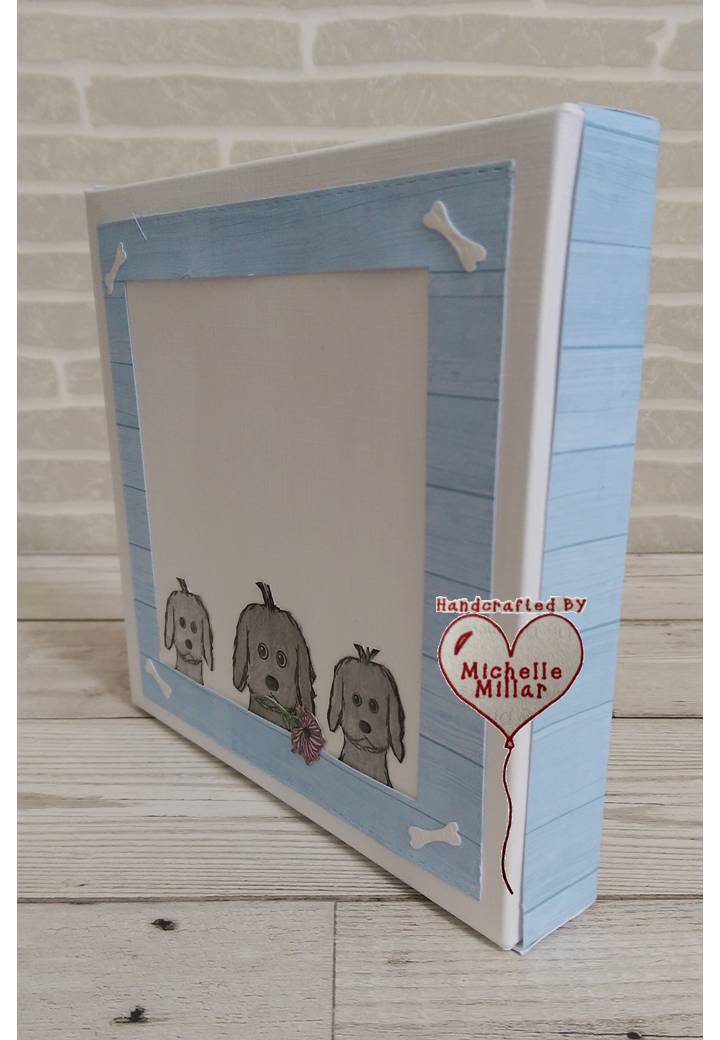
Puppy Shadow Box Card

My DT card for the May blog challenge over on Daisy Chains blog this month is a Puppy shadow box card made for my nephews birthday. The theme for this months challenge is, cards for boys/men.


Another Dreamees project as all the elements just fit into what I wanted to make.
I used the backing papers from their Pretty Pets cd along with their doily die cut from the same hammered base card which I used for the shadow box.


A lot of the Dreamees products along with the hammered card are available from Create & Craft.


I stamped these cute puppies onto some 250gsm stamping cards and coloured them with The Dreamees pearlescent ink pads using a water brush. I used a mix of lightning/masquerade/heavy metal for the grey puppies and russet/ruby for the brown ones.  These inks gave the pups a hint of shimmer without being too sparkly. Patch was the odd one out.


I also used a little bone punch purchased from a charity shop last year.

After layering up the square base card using foam pads to create dimension, I used pinflair glue gel to stick the pups on for a little more shape and added some glossy accent to the pups eyes and noses.

For the shadow box I made a square box to fit the card front that I had made and for that, I used my Ultimate Pro by Crafters Companion.  I have had this for years and score, make envelopes and boxes with it.  The shadow box was an inch deep and due to the way, this scoreboard was designed you don't have to work out any measurements to ensure your box is a perfect fit. I just used the boxboard. 


I cut a window out of the lid and replaced it with a piece of acetate.  Then I glued the card base to the base of the box before sealing the edges of the box lid with a tape pen.


I deliberately didn't put a sentiment on this as I wrote on the back and as it is a shadow box card it will stand nicely on a shelf in a bedroom as a picture frame.

Pop over to  Daisy Chains and have a look at the challenge and the other great DT samples the team have made this month.

Happy Crafting

Rebel Girl Birthday Card

  I'm sharing a birthday card that I made a few months ago using a mix of these fantastic digi images by Polkadoodles. Polkadoodles has...