blog backbdrop

Sunday, 20 June 2021

Create an Eden Journal Page

Following on from the brush art mdf, I have created a journal page also using the mdf brush from the Dreamees embellishment sheet.


Inspired by a lot of paintbrush art I wanted to recreate my own page using one of the Dreamees paper pad, Sweet as Strawberries, as I thought it was perfect for what I wanted to create.

With my love of gardening and my strawberries beginning to ripen with all this sunshine, the idea in my head I wanted to create was a zest of flavour from the harvest of fruit. I think crafting and gardening are very similar, as in the way that they both continue to change and evolve. So, (if you are not already confused) the paintbrush represents the "painting your garden of Eden".

I used the Dreamees 8 x 8 Sweet as Strawberries paper pad to created the layers for my journal page. One of the design papers had lots of small strawberries, which made them ideal for the explosion of fruit.


They did take quite a while to cut out but I did have the precision scissors that I rely on to do the job and with a little shaping with a ball tool and a touch of glossy accent, they came alive. Just before the glossy accent set, I pricked the strawberries with my pokey tool to mimic the strawberry seeds.

I added structure paste to some Dreamees crocodile sparkle dinky inkie reinker to create the paint on the end of the paintbrush and the streak of paint.


For the brush head, I added raffia/jute ribbon and then created a panel for the paintbrush using cardboard. This was then painted silver with my Dreamees silver dinky inkie reinker. I covered the handle of the brush with some textured paper from my stash.

I was really stuck with the wording for my page, to begin with. Having an idea in your head is one thing but adding wording to match that makes sense, doesn't always follow.

So, I used the end part of one of the Dreamees sentiments "grow a happy life" and added the first part using alphabet stamps and cutting them out so that they looked as if they fit together.

I wasn't entirely sure where I was going with this when I started but I am happy with the outcome.

If I had thought about it, I would have added pictures of my strawberries which I have grown in hanging baskets this year. The baskets themselves look a wreck, as our resident nesting blackbird has decided to pull the basket liners apart,  to use to line her own nest.

Well, I did say my garden was wildlife friendly....

Have a great day whatever you have planned
Happy Crafting


Brush Art

I was inspired by a lot of the paintbrush art that is about at the moment and as I had a paintbrush mdf embellishment sheet by the Dreamees, I thought that I would attempt to create my interpretation in a smaller form.


These 2mm mdf paintbrush embellishment sheets are really easy to store away until you need to use them and also prevent smaller elements from getting broken, as well as making it easier to colour whilst in the carrier sheet.  The paintbrushes are about 12.5cm tall.


To recreate the brush head, I used raffia/jute ribbon and added a panel to the brush which I created out of cardboard, then painted with a little Dreamees silver dinky inkies reinker.

For the splash of paint on the end of the brush, I mixed a little strawberry fields sparkle dinky inkie with some structure paste.  I used some mini scrabble letters from my stash to embellish. I saved all the letters from an old travel game.....as, like always, think these things might come in handy in my crafting.


I added a slender paintbrush and glitter bottle using gel medium to stick them down as it gives a clear strong bond, especially on mixed media surfaces.  The 'Inspire' wording was also from one of my Dreamees embellishment sheets and mixed a little structure paste with my dinky inkies to get a textured topping on the letters, not forgetting a little drip on the button that I used for the 'i'. Another really handy mdf embellishment sheet they have are the faux bulldog clips; which I have painted and added to the base of the brush.


I covered the handle of my brush in some remnants of glitter paper that I had and really liked the colourways. The mdf brushes are light enough to add to a card if you just wanted to paint or just add your papers to them too.

I am enjoying making smaller projects, perhaps as my crafting pace has had to slow down to a crawl now at times, as long as I feel inspired to create something, no matter what it is then I will keep going.

Have a great day, whatever you have planned
Happy Crafting


Monday, 17 May 2021

Go fly a kite

Today I am sharing two inspirational cards that I have made using the digi stamps from this month's progressive monthly digi stamp challenge from Imagine that digistamp.


As I took part in last month's challenge  I was sent this month's digi kit; Go fly a Kite, to use in this month's challenge. As I am not a colourist, I tend to choose the pre-coloured option and decoupage areas to add dimension where I choose to.


I think these digi stamps are really cute and like the inspirational sentiments. After just over a year of being in and out of lockdown, sending cards to say hi, how are you? seems to be on the increase again which is a great thing. 

It really doesn't cost a lot to put a smile on someone's face to show that you are thinking of them. It just takes a little more time out of your day to do something thoughtful for someone else, no matter how small, that could make a world of difference to them.


I used some papers from my stash and a little silver thread for my kites.  I remember flying kites when I was little, running what seemed like a half marathon to get the kite off the ground and then hanging on for dear life as it shot off like a catherine wheel in all directions...


Why not check out the Imagine that digistamp blog challenge and the inspiration from the other crafters that have joined in too. 
Have a great start to your week and enjoy your day whatever you have planned.
Happy Crafting.


Wednesday, 5 May 2021

Say it with sunflowers

It's all about the sunflowers at the moment, and the card that I am sharing was the birthday card that I made for my friend's birthday in March, to go with the mdf shutter artboard in one of my previous posts.


It's also the start of a new blog challenge this month at Daisy Chains and our theme is to add some ribbon. As with all our challenges, there is an ATG option.

I have used:-
  • Kraft card 
  • Dreamees - Ray of Sunshine 8x8 paper pad
  • Tattered Lace - Design Team - A wreath for all seasons - sunflower dies
  • Dreamees Sweet Sunflowers stamp set
  • Antique gold satin ribbon
  • Dreamees 4mm olive pearls


I like working on bigger cards but as I make envelopes/boxes for my cards, I have found it easier to work with 7inch cards as that works better with the size of card that I have to make my boxes.........which I don't normally think about until the card is made.

So, on a 7 nch kraft card base, I have used the same design paper from the pad to form the layered panelled design on my card. This particular print of the sunflower would  have looked beautiful just in a frame untouched. 


I did think about using my stamps but, I remembered how beautiful these die cut sunfowers were from Tattered Lace's Design Teams collection - A wreath for all seasons; with their matching charisma papers.

So I inked the edges and layered them up adding with some stamped leaves from the Dreamees sweet sunflowers stamp set and thought they went quite well together. The sentiment is also from the same stamp set.

The rest of our design team have also been making some lovely projects this month, along with so many great crafters on our blog every month. It's always lovely to see the inspiration everyone shares. Please use the link below to take you to the blog challenge and thanks for the visit.

Happy Crafting


Capture the Moment - Birthday Card

I have some men's cards to share today, which were made for my brother and brother-in-law. They are virtually the same, apart from the colour ink that I have used. 


It's also the start of our blog challenge at Let's Craft & Create and as we have a no patterned paper theme, I thought that this would be a good project to share. A with all our challenges, they are also ATG.


The camera was stamped twice onto white stamping card, for each card, so that I could decoupage the camera lens. I then added clear embossing powder to the top layer to give the camera lens the illusion of a clear lens.


For my background and topper for each card, I used Peacock feather & Salty Ocean with Antique Linen & Black Soot distress oxides by Tim Holz. I mimicked a random bokeh effect using one of the circle stamps from the Visible Image - Music on Wold Off stamp set in frayed burlap distress oxide.


I mounted the topper on foam pads to add a little dimension and used the splat stamp from the same stamp set around the edges of the card in black soot with some 2nd generation stamping.


I also went for a more faded look with my negative stamp on the background of my topper. I love this stamp by Inkylicious. I bought this film strip years ago and it's been well used and is a great quality grunge effect stamp.


This is about as close as you will get with me making two cards the same, hence why I would not be the right person to make your wedding invitations.......I suppose they would be unique... as they would all be different ...ha ha.

Anyway, I have backed these onto smokey grey card before mounting them on the white card.I thought it needed a softer colour than black.

Great wording for a card, of course by Visible Image, unique stamps and wording.  On a card like this, I add a personal sentiment inside, so I focus on what I want to create rather than worry about putting a birthday sentiment on the front.

Our design team have also been busy this month with projects of their own and there is always lots of fabulous inspiration shared by the crafters on our blog too. If you are interested,  there is a prize for the winning entry, following our theme and a badge for your blog for the top 3 runners up. Just click on the link below which will take you to our blog challenge. 

Happy Crafting


Wednesday, 21 April 2021

Shutter Artboard

 A little mdf make to share today, which I made for one of my friends for her birthday. I love anything to do with diorama so I am always looking out for little things to use in projects like these.


I had purchased my mdf shutter artboard from The Dreamees before Christmas but hadn't actually got around to making it. As we both have similar tastes in things and a love for gardening and garden centres too, I thought that she might like this too.


To give the shutters a more varnished look, I used some vintage photo distress ink by Tim Holtz on them. I can't remember if these little mdf circles were in the kit or whether I had saved them from previous kits but either way they make great handles. 
I don't throw anything away, sometimes the "waste pieces" come in very useful later on.  The Woodgrain paper that I used for the artboard came from The Works. 


I have decorated the artboard with some nature die cuts from Tattered Lace's Design Teams collection A Wreath for All Seasons. I decoupaged the trowel to give it a bit of dimension and added some glossy accent to some of the berries on the plants.

Inside the shutters, I stamped and heat embossed in gold embossing powder the friendship stamp from one of the Dreamees recipe sentiments, along with part of the Beautiful Babysun sentiment.


I used one of the  Dreamees Nice & Toasty design papers inside the shutters and with what was left, I made the little flowers, using a flower punch from my stash. In the centre of the flowers, I added 3mm pearls.  For 3 little snails on top of the window frame, I inked up some tiny little seashells that I had with some vintage photo distress ink.


I used artificial grass that I knew would come in handy one day, that I bought from that great shop, Flying Tiger. Little toadstools and mdf ladybird was from my stash, mini cactus from The Range and mini terracotta flowerpot was actually from a garden flowerpot man that didn't weather too well so he's been recycled. 

There is only one thing missing from this and that is a traditional garden gnome, If I could have got a dolls house miniature one, I would have added it, not because she loves them but because it's been a bit of a running joke over the years.


Another snail made from a seashell and I thought the hot glue overspill made him look a little more lifelike. I had a leftover ivy leaf, so I used it as a fallen leaf with some glossy accent as some morning dew.


I thought, this project needed to look cute when the shutters were closed and for that feel good factor, on those days, when there is no one to say "good morning gorgeous"....  just open the shutters and smile..... well that is the premise. 

Enjoy your day whatever you have planned for yourself.
Happy Crafting


Tuesday, 20 April 2021

Ray of Sunshine birthday

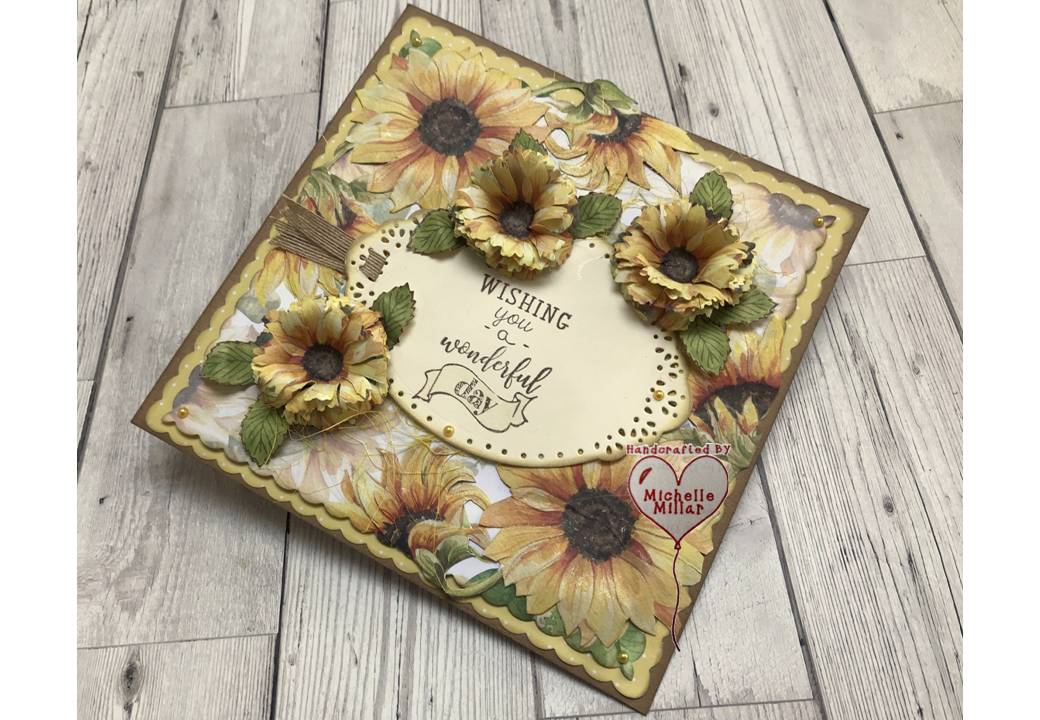
I'm sharing a birthday card that I made for my sister in law today using the Ray of Sunshine paper pad by the Dreamees.


Sunflowers are such a bright happy flower and this paper pad is full of luscious prints to use. On my 8x8 inch 300gsm chocolate card base also from the Dreamees,  I die cut two of the contrasting papers using my square dies from the Fine Filament Portofino collection by Tattered Lace.
Using another sheet of the same sunflower design paper, I backed it onto a piece of thin card and then fussy cut around the larger sunflowers, top and bottom. Then added this to the card as a dimensional panel.


I die cut my topper for my sentiment using the Loops & Lace oval die set and stamped it with the sentiment from the Sweet Sunflower stamp set.

Looking at one of these beautiful design papers and my dies from this stamp and die duo, one of the dies was a really good match for the flowers on one of the papers.


I only needed 3 to really match as the others were going to be layered up as flowers. I cut into some of the petals to give them some shape and inked the tips of the petals with my 2nd gen sparkle honey dinky inkie to tone them. I thought they worked really well.


I had some leaves saved from a previous project that I had stamped on my favourite cream velour card using the stamp set. As these had already been coloured with my dinky inkies, I just needed to add these to my project.

I try to get the most out of my craft products, although saying that we all forget what we have as crafters sometimes but try not to accumulate a lot of the same thing.

You can make some beautiful projects using  The Dreamees paper pads in your crafting and they have been colour matching their sparkle dinky inkies so that they all work together.

Have a good day, whatever your plans are. 
Happy Crafting!


Hollywood Glamour Birthday Card

I made these birthday cards a few months ago, ahead of time, as I knew I wouldn't be crafting for a while. For my card base, I used a 7 ...