blog backbdrop

Saturday, 5 September 2020

Sympathy Card

Sympathy cards are always difficult to make and sometimes it's challenging to find the right words too. I made this card for a dear friend and decided to keep it quite simple. For our blog challenge at Daisy Chains this month our theme is CAS - clean and simple.


I have decided to use this card as my DT project for our blog challenge.

For the card base, I used ivory centura pearl cardstock with my Tattered Lace Precious Nested Book die set from the Loving Memories collection.

Run the larger die twice through your die cut machine to get the front and back part of your book using a tacky pva glue or red liner tape along the inner spine to create your card/book.


The largest die measures 13.2cm  x  18.7 cm which makes a nice neat card.


I love the attention to detail on this die set. It is such a delicate collection. I also used the gilded cross die in the collection on some Hunkydory rainbow mirri card. This cross die does actually come with its own matching charisma paper which you can download for free direct from the Tattered Lace website in their downloads section.


Inside I used white printable vellum for the insert with a personalised verse.


Also using the smaller cross in the die set and a chain die from another Tattered Lace set that I had, I created a little crucifix to embellish inside.


As this card was going in the post, I didn't want it to get crushed so made matching gift box.


My card to let my friend know I was thinking of her at a difficult time.

Have a look at the inspiration from the rest of the design team and what our crafters have been making for our blog challenge this month.


Happy Crafting
Michelle
x


Wednesday, 5 August 2020

Craft Journal

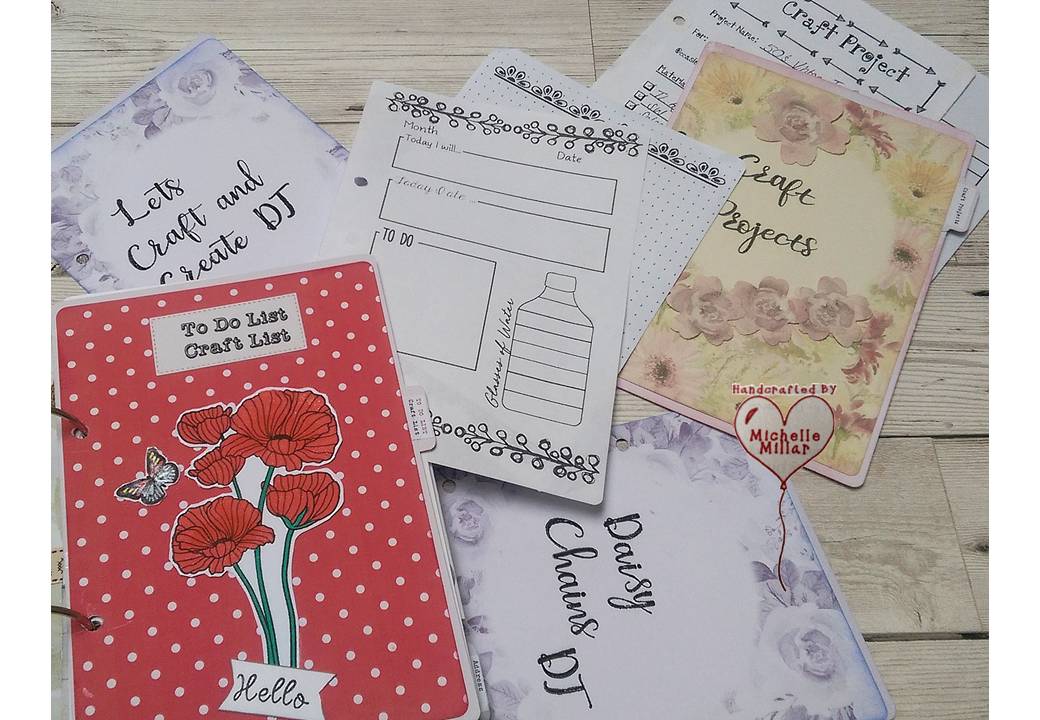
I finally got around to doing one of the things I had been meaning to do for ages and that was to start my Craft Journal. Today I am sharing the front page that has been finished with lots of layers.


I am also going to be using this project for our blog challenge this month on Let's Craft and Create where our theme is to use lots of layers.

My son bought me this journal kit for my birthday by The Dreamees, which comprised of 1 x set of A5 mdf covers, 1 x set A6 mdf covers, jump rings, journal stamp set, journal CD, set of fine writer pens.

Using one of the A5 mdf covers is used the following:-


  • Dreamees Craft Magazine Issue 1 - I used some of the free papers that come with the magazine along with the free mdf shapes that came with the magazine(if you order direct from the Dreamees website).
  • Dreamees Forget Me Not stamp set
  • a strip of Hobby House gold flower pearl string
  • a strip of rich plum satin ribbon
  • small mdf heart
  • Dreamees doily die
  • Dreamees swirl die
  • Backing paper from CD
  • chipboard letters
  • Gold superfine Wow embossing powder
  • Versafine embossing ink
  • Dreamees dinky inkies sparkle 2nd gen in treasure.
  • Dreamees olive green pearls
  • small piece cream webbing
  • Tim Holtz distress ink victorian velvet


I stamped and heat embossed the Forget Me Not flowers onto some of the backing paper from the magazine. the gold embossing really highlighted the veins on the petals and leaves. I also used the flower stamp on the small mdf heart to get the same effect.


I used the mdf hearts from my shape kit that came with the magazine, covering the solid heart with backing paper


I used the treasure dinky inky on my chipboard lettering and to highlight the edges of the mdf heart and Tim Holtz distress ink in victorian velvet around the edges of my mdf journal.

I then went on to finish the other side with backing papers from the journal cd
which also had some lovely sentiments.


I have stamped the Something Stitchy flower stamps onto patterned paper and added a little glossy accent to the little button centres to make them pop, also to the button stamp. It just needed a piece of ribbon to bring the layers all together.


That is only the cover....

Inside I keep all my ink swatches. I made some simple charts to keep my colour swatches from the different ranges as an easy refer back to and printed off a colour chart for the Distress Inks, downloadable online.


A section for my Dreamees Stamps, CD & die collection catalogue, Tattered Lace die list. 

DT Blog Challenge Info, Craft Projects and some of the all essential journal pages that came with the CD Rom; such as a To do list, Address List and Birthday list


I've used the backing papers from the CD with the sentiments on some of my pages and for the larger titles, I have used the Dreamees Calligraphy stamp set. This alphabet stamp set is priceless in my opinion.


Have a look at the inspiration from the rest of the design team and what our crafters have been making for our blog challenge this month. There is a prize for the winning entry and a badge for your blog for the top 3 runners up.

If you don't have a blog, you can enter via Facebook just by adding the link from our actual blog challenge page to your entry on your Facebook page. Follow my link below to the challenge.


Happy Crafting
Michelle
x


Fast Food Birthday Card

This month for our blog challenge at Daisy Chains I am sharing a card made for my nephew's birthday featuring some fast food. As our theme, this month is for boys/men I thought this would be a good card to share for my DT card for the blog.


Boys/men's cards can be a challenge to make as sometimes you find there is not a great deal of choice or you get stuck for ideas of what to make. As a crafter, I find you have to keep coming up with something new every year.


I like to make a card using a theme the recipient can relate to and with these Tempting Treats dies by Tattered Lace they are really quite generic so will appeal to anyone who likes fast food and as my nephew does, I figured that I was on a winner here.


For my card I used:-


  • Tattered Lace Tempting Treats Meal Deal collection 
  • A4 white 300gsm cardstock folded to A5
  • A5 red 160gsm colour core cardstock
  • A5 cream/red striped backing paper from my stash
  • A strip of red satin ribbon
  • 4 metal nailhead craft stickers
  • chipboard alphabet/number stickers (The Range)
  • Glossy accent to decorate
The matching charismas for the Tempting Treats Meal Deal dies can be downloaded for free directly from the Tattered Lace website.


Add a little glossy accent to make the ketchup look more realistic. The hotdog also comes with a mustard option. These dies would also make great party invites too.


I think this is a really fun die set with so many possibilities.


Have a look at the inspiration from the rest of the design team and what our crafters have been making for our blog challenge this month.


Happy Crafting
Michelle
x


Tuesday, 28 July 2020

Mens Birthday Squeeze Card

Good morning, today I have a squeeze card to share. I have made one of these roulette scene cards in the past and think that they are a great design. I made this card for my brother's birthday, earlier in the year.


I downloaded this fabulous artwork from Debbi Moores Website, which is a great alternative to the traditional genre available when you are looking at making men's cards. This project is downloadable in PDF format for £1.50 and available until the files runout. I have added a link below.

https://www.debbimoore.co.uk/prodpage.asp?ProdID=4984 
Cards For Men Scene Card

I like the fact that it has tabs that enable the card to be squeezed pretty flat to go into an envelope (all depend on how much you want to build it up).

There are plenty of elements to add to the card from this download and on the gambling chips, I have used some of Debbi Moore's crystal print magic. I love this stuff. As much as I love glitter, I am not a huge fan of it as I and my family always end up wearing it for days after ...weeks even!!

Print Magic is like an opaque embossing powder than turns your card into glitter card without losing any detail from your image or shedding any glitter and its amazing how far a small jar goes.


To bring out the chrome in the roulette wheel, I highlighted it with some glossy accent, also using this on the eyes of the dice.


I decided that a silver metallic pearl would work perfectly for the ball in my roulette wheel and placed it on the birth date.


I have also used the glossy accent on the faux pearl around the Happy Birthday sentiment which made the sentiment stand out a little more.


I used a cream base card to back my roulette scene card onto. I really like the dimension on these scene cards and Debbi Moore has so much to choose from on her website. 

Every month she offers a free download on her website which enables you to make a beautiful card from what you have downloaded. You can't get better than that to inspire you to keep crafting.

Stay safe


Happy Crafting!
Michelle 
x


Wednesday, 15 July 2020

Cool Retro Camper Birthday card

Today I am sharing a birthday card that I made for my brother using a little stamp called the cool retro camper.


I always find it easier to stamp when it comes to making men's cards. I heat embossed with clear veraFine ink and black embossing powder onto white card and then painted the camper vans with a small paint brush and my chalk dinky inky reinkers in zest, rust and poppy. For the chrome bumper, wing mirrors number plate, I used a little dinky inky reinker sparkle 2nd gen in lustre with a little silver mist on the window screen.


For the luggage and luggage rack I just filled it in with a little rust, sunset and breeze in the chalk dinky inky pads you only need the tiniest amount. 

After cutting them out I backed them onto some stitched black card squares.

For the background on a piece of white stamping card,  I used the sunset, blaze and poppy dinky inky chalk pads and the bubble stamp from the Visible Image Jazz It Up stamp set.


I edged the card with the chalk dinky inky in poppy before adding a black matt layer of card behind it.


I then scored an A4 piece of 300gsm white card to place my retro camper van topper onto and add some glossy accent to the headlights of the van for dimension.

I love this little stamp and think it makes a cool male birthday card but change the colours and it would suit anyone I think.


Happy Crafting!
Michelle
x

Sunday, 5 July 2020

Keep Crafting notecard

For our Blog challenge on Let's Craft and Create this month with are celebrating the theme of red white and blue, so I have made a keep crafting notecard with those colours.


 Using a 5.5inch white card base I mounted royal blue and red cardstock followed by a white topper.

I had some remnant cardstock to make up my lettering - royal blue centura pearl and cherry red from Tattered Lace using the classic letter dies by Crafters Companion.  The lace border die is also by Crafter companion and I used some colour core blue and red cardstock by Create & Craft from my stash.
I twisted some bakers twine - this had a paper texture rather than the usual rope one that you get and added it to the to of the border.


I used a little heart die which I passed through an embossing folder and added a some foam pads to add a little dimension to it.


A simple  CAS notecard using, easy to make, whether you are celebrating the 4th oth July or just dropping a line to say hi .

Have a look at the inspiration from the rest of the design team and what our crafters have been making for our blog challenge this month. There is a prize for the winning entry and a badge for your blog for the top 3 runners up.


Happy Crafting!
Michelle
x

Just Fly note card

This month I am sharing a little note card with a digi image from my favourite Vera Lane Studios. Also, this month on our blog challenge at Daisy Chains we are running a theme of "design paper" and this is the DT card that I will be using for the challenge.


I love making my own backgrounds and backing papers for cards and one really easy technique I use a lot is the marbling one with shaving foam and acrylic ink sprays.


I used a red, blue and green acrylic ink spray with shaving foam and it never fails to amaze me how the colours change when swirled with shaving foam.

For the topper on my notecard, I used my brushos in purple and turquoise.


My digi stamp by Vera Lane Studios is from the Just Fly set she comes in JPG and PNG format and this set comes with the sentiment, a cute little cat with wings(that I haven't used on this card) and the adorable gipsy fairy which I have coloured with some promarkers. I have added a little glossy accent to her eyes as I always do.

One of the places that you can find Vera Lane's digi stamp collections is on Etsy.


There is also a great blog I can recommend you visit:-


Have a look at the inspiration the rest of the design team have been making this month for our challenge, along with what the crafters on the blog challenge have been making too.


Happy Crafting
Michelle
x

Hollywood Glamour Birthday Card

I made these birthday cards a few months ago, ahead of time, as I knew I wouldn't be crafting for a while. For my card base, I used a 7 ...