blog backbdrop

Tuesday 7 May 2024

WOYWW #779 Craft Journal Covers

 It's Wednesday and I'm taking part in another What's on your desk Wednesday - WOYWW #779. Please checkout Julia Dunnit's Stamping Ground's page  if you are interested.


I have been crafting for myself this week and I have been meaning to use these beautiful papers to re-cover my craft journal.


I had previously stripped back my A5 mdf journal covers, ready to start again. I gave them a coating of white gesso and printed the digital images in the size that I needed for my boards on 160gsm smooth white cardstock.

These beautiful images were created by Shasteya Bellarose & June Hill, who run a creative group on Facebook called Gud Karma Creative Studios. They have some fabulous created content that has been made available for free, to print off for personal use only.

I added a few coats of matte medium to seal the images and to also create a base to add my mediums to the covers.


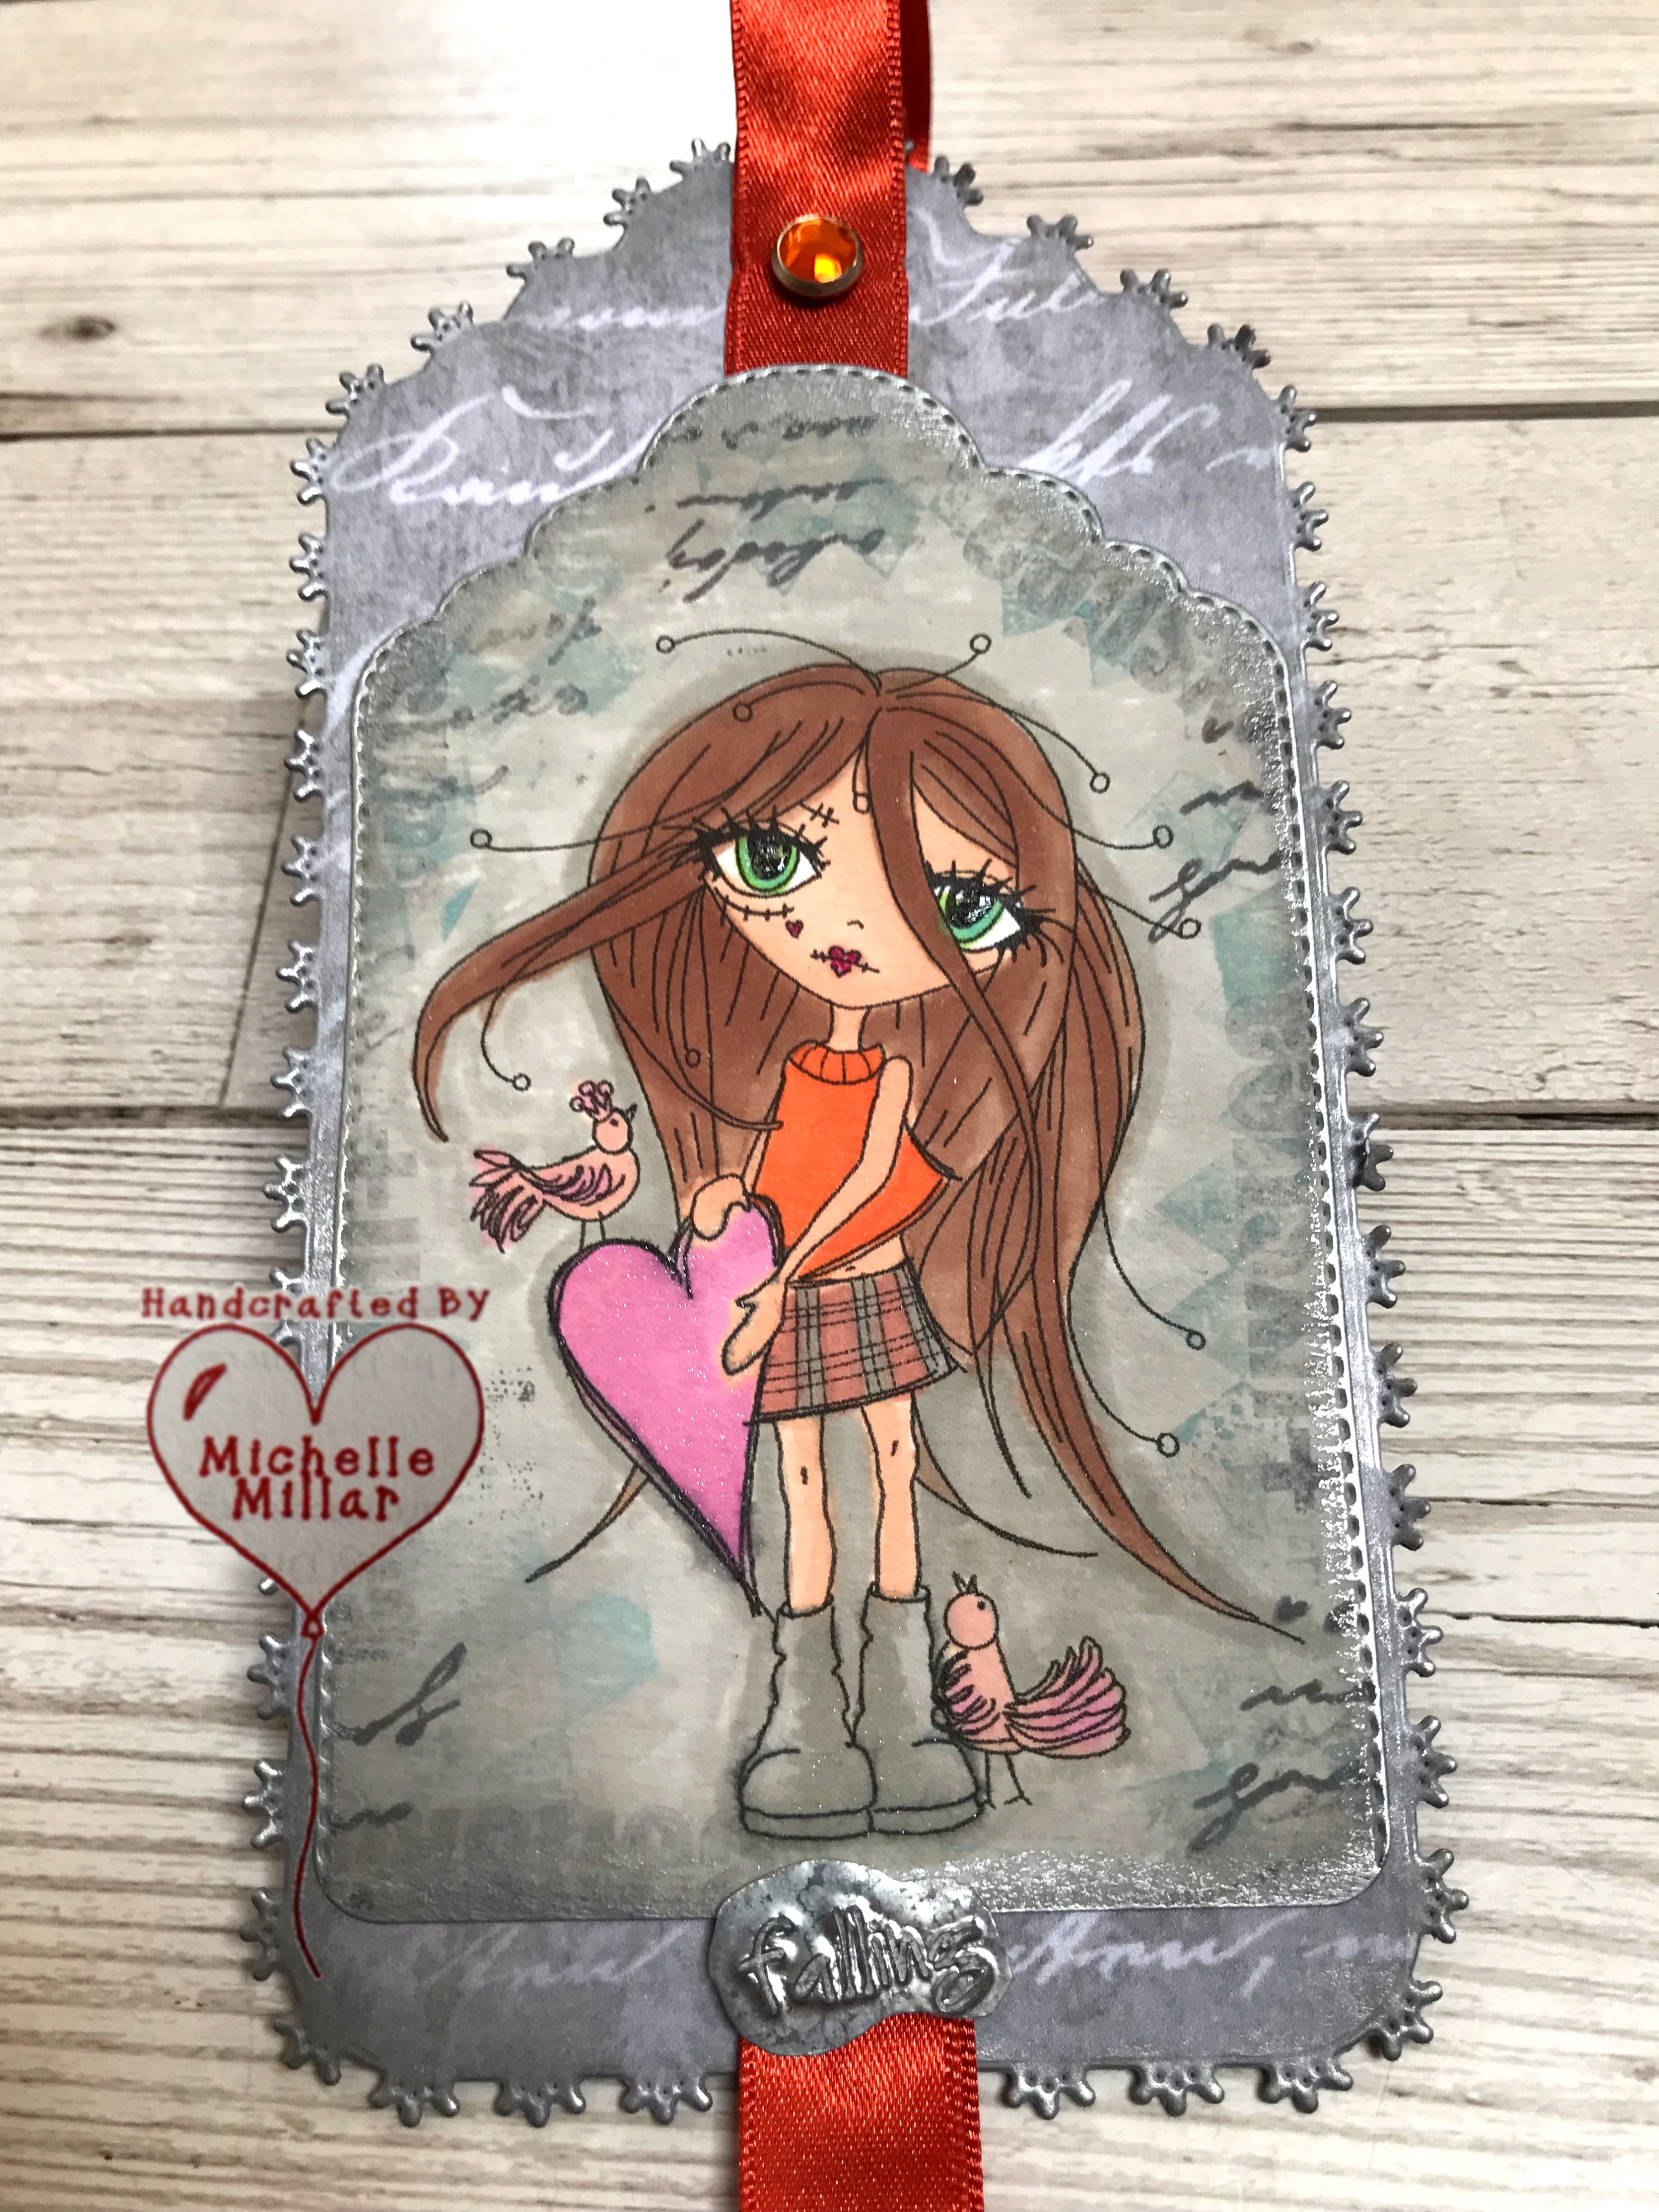
This is my favourite image out of the ones that I decided to use, so it had to be the cover. I love these kind of images and I just added some stencilling through my script stencil and one of my worded stamps from Visible Image.

I've also highlighted areas of the image using my clear glaze and stardust glitter pens, adding a little dimension with some seed beads.

Around the edge of the journal cover, I added some sand texture paste  and then some Pretty Metallic paint in mint chip.

At the top of the folder I added a faux metal embellishment that I had made earlier using gold metal magic and stamped - strength.


On the reverse I chose this great saxophone image. I added a little background stamping and some more highlights with my pens, along with some sand texture paste along the saxophone which has been highlighted with rose gold metallic wax.

I had these little holographic pink flower sequins in my craft stash that I thought would work well and add more texture too.


This oriental image was another favourite of mine, so I put it on the back and I have a choice of two beautiful images on either side of my folder. 

I added some stencilling and another worded stamp from Visible Image, along with my sparkle pens and seed beads for dimension.

I edged the cover with gold metallic wax.


On the back of my second journal cover I used this really pretty music paper and added some second generation background stamping with a grey ink pad and a metallic one.

I also added some ephemera from my crafty stash, left over from some ATC's that I had been making a while ago.


My journal covers have had a facelift and that's another job off my list.


And in the other favourite place I love to spend my time, I am patiently awaiting our robins to fledge over the next few days. The parents have been very busy feeding and we have been so lucky that the box is in regular use.


This is the view out of my back door. I have an old table under the bike port where I do my potting - next to a little greenhouse,  It's really handy when it's wet and windy as I'm sheltered from the elements a little and I often have a little friend who is curious to know what I am doing.


I managed to quickly get a sneaky picture (it was pot luck really) whilst the parents were out getting food,  You can just about see one of the baby robins. Fingers crossed for them.

What have you got planned for the day? Whatever it is, I hope it is a good one for you.


Wednesday 1 May 2024

Bookmark/Tags WOYWW #778

I've  been finishing off some tag/bookmarks this week and I do like a bookmark.
I also wanted to use these cool digi images from Polkadoodles and thought that they would look great on some bookmarks.


It's also What's on your Workdesk Wednesday - which I linked up with last week, 
a day when you link up to Julia Dunnits Stamping Ground and see what others have been up to. There are details on her blog, should you wish to link up too.


So this was how my table started off for WOYWW.  I'd printed off and coloured my digi images with my Promarker alcohol pens.  Normally my colouring only stretches to the size of an ATC card, but I am gradually stepping further out of my comfort zone.

For my bookmark bases I used some leftover backgrounds that I had previously made using distress oxide inks. One of them was quite pale so I added some background stamping too.


I added some Pretty Gets Gritty explosion powder to the second layer of one of my tags for a purple and gold shimmer and they were both edged with a little metallique wax.


This one will go in the birthday card for my friend's daughter. I really liked these images from Polkadoodles when I saw them. They are both from their Ickyink Art Collection.


I haven't decided on a home for this one yet, she may be used in my craft journal.

I managed to get a picture of this feathered beauty in my garden too. The Jay doesn't normally hang about, but had noticed that I'd left some peanuts out for the squirrels on the log. Well it ate those and then decided to have a good look around whilst there.


So far it's been coming back every day... not sure the squirrel's too chuffed about that...

What have you got planned for the day? Whatever it is, I hope it is a good one for you.


Challenges:


Thursday 25 April 2024

Gothic Fairy Arch

I've finished my Gothic fairy arch and have a few pictures to share with you and I'm also going to add it to one of the monthly challenges at Gecko Galz.


To begin with I die cut my arch from card to make a substrate and then  gave it a coat of gesso. 

I used the Pretty Gothic Window A5 die from Pretty Gets Gritty. They do some really cool dies that are great for making your substrates for projects.


With a small pallet knife, I scrapped  some sand texture paste across my arch. Then  I mixed a little acrylic paint and kept dabbing until my arch started looking a bit aged and rusty, drying in between the layers.

I then dry brushed with some grey acrylic paint - well gesso mixed with some black acrylic to dull it down a little. 

Next it got a spritz of frozen  toffee pretty pearl spray and then I edged the arch with rose gold wax. I was quite happy with how it turned out and told myself that i could leave it alone now!


I went on a search for some rice paper as I wanted the background of the arch to be transparent and found a leftover piece from one of my cardmaking projects that I had printed off.

I had also made a batch of cogs up a while ago. They were die cut from soup carton packaging and then I'd added some sand mixed into my acrylic paint. They were finally edged in copper wax.


The pearl spray has highlighted the texture in the arch a lot more and I then started to add some texture to the edges of my fairy image too, using a little coloured sand texture paste and seed beads.


I chose an image from the Gecko Galz Pixie Dream land Kit for the focal point of my gothic arch. These are really lovely images and I was spoilt for choice.  I also added a few butterflies from their Butterfly Wings Digital Collage Set too.

My paper flowers have also been edged with a little metallic gold paint and the tiny translucent flowers have  micro beads in their centres. I also thought that the wording was very apt for my project.

This was a fun little project to make.
What have you got planned for the day? Whatever it is, I hope it is a good one for you.


Challenges
Creative Artiste - AMM        (Top 3  04/2024)


Wednesday 24 April 2024

WOYWW #777

Happy 'What's on Your desk Wednesday!'  WOYWW
This is my first contribution to the blog, that I came across the other day, so I thought I'd give it a go.


I craft at my kitchen table - its a good space with plenty of natural light and I just bring down what I need to craft with, which is normally in a draw or box that I can just stick on the table or floor. My mess is kept at the end of the table which is big enough....sometimes ha ha.

So, I decided to make a gothic arch for an ethereal Spring challenge on Gecko Galz this month. I die cut my arch from card to make a substrate and then  gave it a coat of gesso.


With a small pallet knife, I scrapped  some sand texture paste across my arch. Then  I mixed a little acrylic paint and kept dabbing until my arch started looking a bit aged and rusty, drying in between the layers.

I then dry brushed with some grey acrylic paint - well gesso mixed with some black acrylic to dull it down a little. 

Next it got a spritz of frozen  toffee pretty pearl spray and then I edged the arch with rose gold wax. I was quite happy with how it turned out and told myself that i could leave it alone now!

I want a transparent background on my arch, so I think I will find some rice paper in my draw to stick on the back of my arch.

I had made a batch of my cogs up a while ago. They were die cut from soup carton packaging and then I'd added some sand mixed into my acrylic paint. They were finally edged in copper wax.


I have a fairy image which will be my focal piece for my project and I'll then start adding all my embellishments.

I'm quite a slow crafter and some projects can take me a while to finish but hopefully I will crack on to finish this little one off.


Where I sit is also perfect for me to look into my garden, the other place I prefer to spend my time. It's small and wildlife friendly and a lot easier for me to tend to these days - a haven for me.


We've got some robins nesting in our bird box again this year so hopefully we'll see them fledge in May, which is a lovely sight.

Have a great day,  whatever you have planned for yourself 


Friday 19 April 2024

Birthday Card #brave

A quick share today: two cards I made towards the end of last year but not shared.
I used the same fabulous stamp by Visible Image and just used different colourways.


I used the Visible Image No Filter & Background Vision stamps with my distress oxide inks for this 7 x 7 inch card. I stamped and heat embossed the image with black VersaFine Clair ink and added some stencilling in the background.


My second card was a little bit bigger finished, as an 8x 8 inch card, using warmer colour tones and adding some background stamping and a little stencilling too.

Visible Image's style has always been unique and they are very good quality stamps that I always come back to, as they are so easy to work with, especially for me, as I'm not a colourist.

Have a great day,  whatever you have planned for yourself.

Happy Crafting


Challenges:-
613 Avenue Create - splash of colour      (Top Rocker  04/2024)


Tuesday 26 March 2024

Easter Cards


This is a huge kit, comprising of 25 x A4 pages from topper, tags, panels, card front designs, flower forming sheets, leaves to sentiments, bows, floral inserts and backing papers.
Have a peek at the sample of just what is in this kit as I have only used a fraction of it.

My first Easter card is a diamond flip shaped card and I used a 8 x 8 inch white card base that had unfortunately been squashed in my draw but as it was going to be chopped up it came in very handy.


I used one of the toppers from the kit and some square dies from my stash to die cut the layers for the diamond flip topper. I layered it up with the purple block paper from the kit and then a piece of gold satin mirror board.


Inside the card I've added a posy of flowers to accompany the insert and added a few leaves too. I have also added this to the front of the card too.


I've used one of the sentiments and added shimmer to my card and blooms using
my Sakura stardust gel pens. This card measures 8 x 6 inches.


My second Easter card is a hexagonal stair stepper and when I saw the hexagonal topper sheet, it inspired me to make a stepper card.  My card measures 11 x 6 inches.


I used the purple block paper on the panel of my card, as I thought it would really make the toppers pop. I then die cut my toppers using hexagonal dies to create the layers and then mounted them on foam tape to add a little dimension.

I also decoupaged the flowers on the toppers and added two of the bows to the largest topper. Using my sparkle gel pens, I've highlighted around the flowers.


My card folds flat but I have made an envelobox  for it as I did add a little dimension on the toppers.


I've left a space on the back for the message.


My third Easter card is a double staggered Z fold card  and this one measures 9 x 6 inches.
I cut one of the insert sheets into strips and then layered them onto the yellow card strips
that were to form the front of my card.
I've added a few tulips in the corner and two of the purple bows for a little dimension.


I used one of the beautiful floral sheets for the centre panel of my card.


This card will also go flat into an envelope and I have added an insert on the back for me to write a sentiment. 
This is a bumper kit that will cover so many occasions to take you through the year.


It's really easy to add sparkle and shimmer your cards and projects made from these kits. I have a growing collection of Stickles glitter glue but I also love using Sakura stardust gel pens. They are really effective for outlining the edges of your projects as well as highlighting detail too.

There is much inspiration for card styles and folds on Mix It Up Craft by Sam Calcott and lots of these you don't need even need to use dies for. 

If you would like to check out Amanda's YouTube Channel for cardmaking, flower making and inspirational craft videos  you can find her gallery here or even follow on Instagram:  
Flower making has always been one of my favourite things.


Have a great day,  whatever you have planned for yourself.

Happy Crafting


Challenges:-

Little Red Wagon - Florals   (Featured Project)
Creative fingers -AG
Crafty Calendar - more than 1 fold 

WOYWW #779 Craft Journal Covers

  It's Wednesday and I'm taking part in another What's on your desk Wednesday - WOYWW #779 . Please checkout Julia Dunnit's ...