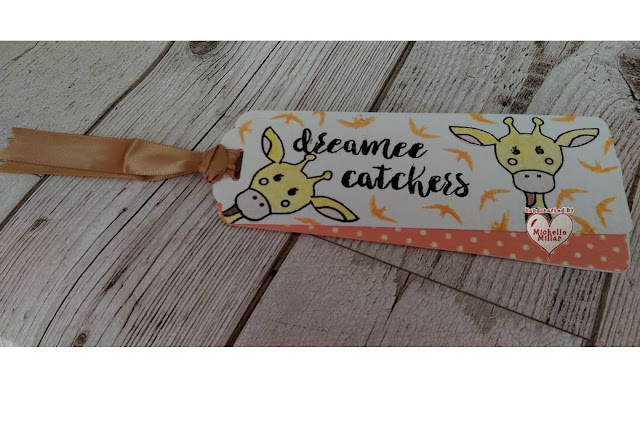
Using Stamping Ups bookmark punch (which I have to say is a lovely heavy weight punch producing bookmarks 2 inches wide ) I cut out a coordinating piece of card to offset behind the bookmark
I used the flower stamp from The Dreamees Elegant Dress stamp set and coloured them in with the Dreamees Summer Dinky Inkies collection.
On this bookmark I used the flowers stamps from The Dreamees Sensational Flowers stamp. I coordinated the colours with the card using the Summer Dinky Inkies collection and used the same backing papers on the bookmark.
On this bookmark I used the rose stamp from The Dreamees Friendship stamp collection and teamed it with coordinating Deamees backing papers.
I used the Gorgeous Giraffe stamps and backing paper from the Gorgeous Giraffe cd. I also used the Autumn/Winter Dinky Inkies.

For this bookmark I used The Dreamees Cute Cats cat and paw print stamp from the set. Again I have used The Dreamees Autumn/Winter Dinky Inkies. I also used a fishbone punch to embellish it.
Decorated bookmarks are also really handy for children's books, library book and school reading books. For these I used The Dreamees Binky & Bo and Woodland Wonders stamp sets to decorate.
I used some Stickles frosted lace on the bunny and glossy accent on the owl,/acorns, along with some pearl drops and gems to finish them off.
Dinky Inkies Spring Summer
Dinky Inkies Autumn Winter
Dinky Inkies are water based dye inks which have been formulated to work really well with their blending solution, You can take the ink straight from ink pad to paper, allowing you to get a good depth of colour.
The blending solution comes with a set of 3 blending brushes.and you only need a few drops in the pen chamber which unscrews for you to drip the solution you need into it for your project.
Squeeze the centre of the chamber gently to release a solution through to the nib and test on a spare piece of card or paper with your chosen ink to ensure you are getting the correction dilution of ink for your project.
http://www.dreamees.org.uk/
Happy Crafting


No comments:
Post a Comment